Titan Missile Museum Review | (Tucson, AZ)

If you’re ever in the Tucson area and looking for something completely unique, fascinating, and eye-opening to do then look no further than the Titan Missile Museum in Green Valley, AZ, just outside of Tucson.

It’s a historic site that provides visitors with a pretty chilling encounter of just how close the world came to World War III.

In this review, I’ll tell you everything you need to know before visiting the museum so that you’ll be able to make the most out of your visit!

What is the Titan Missile Museum?

The Titan Missile Museum is a National Historic Landmark that houses the only remaining Titan II site open to the public.

Titan II missiles were the largest land-based missile ever deployed by the US and they served a crucial purpose during the Cold War.

The Titan II launch complexes, which housed the W-53 nuclear warheads, were “on alert” from 1963 to 1987 in an effort to show the Soviet Union that mutually assured destruction would be imminent upon a launch of one of their own nuclear missiles.

Today, you can take a guided tour of the site that allows you to get up close and personal with a Titan II and also learn about how these powerful missiles could have been used during the Cold War.

Tip: Use the free app WalletFlo to help you travel the world for free by finding the best travel credit cards and promotions!

Where is the Titan Missile Museum?

The Titan Missile Museum is located at: 1580 W Duval Mine Rd, Green Valley, AZ 85614.

Green Valley is a smaller city just south of Tucson which, depending on what side of Tucson you’re coming from, should only take you about 20 to 30 minutes to get to.

Other Tucson sites:

Titan Missile Museum Access (prices & hours)

Titan Missile Museum hours are typically 9:45am to 5:00pm.

In terms of ticket prices for guided tours, here is what you can expect:

  • Adult (Ages 13-64): $15.50 
  • Pima County Resident Adult: $14.50 
  • Seniors (65+): $14.50 (Proof of age required at check-in)
  • Child (Ages 0-4): $1.00
  • Junior (Ages 5-12): $12.50

As soon as you arrive, you will need to check in with the front desk at the gift shop.

Unfortunately, this means that you may need to wait in the line of gift shop customers before you can check in (which is the one thing I would change about this experience).

If you arrive early, there are some museum exhibits to check out connected to the gift shop which tell some of the story of the Cold War and give you some insight into the power of these nuclear weapons.

I’d wait until the end of the tour to check out the exhibits just because you will appreciate them more.

The guided tours are 45 minutes but there is an optional self-guided portion at the end. In total, we spent about one hour and 20 minutes touring the museum which I feel is a perfect amount of time.

Titan Missile Museum gift shop

Titan Missile Museum history

After World War II, the US and the Soviet Union faced off for over four decades in what would be known as the Cold War.

During this time, tension between the nations grew and the reality of all-out nuclear warfare became a real possibility.

As a deterrence strategy, the US knew that it had to show the Soviet Union that it had the means to cause at least as much destruction as the Soviet Union could, so in 1960 they began constructing 54 Titan II silos.

These missiles — known to be the largest land-based missile ever deployed by the US — were extraordinarily powerful.

In fact, compared to the atomic bombs dropped during World War II they were about 600 times more powerful.

If that doesn’t sound impressive enough consider that they were also more powerful than all of the bombs combined used by combatants in World War II.

Each individual bomb could easily wipe out an entire major city.

So we’re not only talking World War III stuff here — we’re talking end of civilization as we know it.

titan II missile launching
Image via Titan Missile Museum.

These silos were built underground so that they could withstand a potential nuclear attack.

They would not be able to survive a direct attack (warhead landing right on top of the complex) but Soviet missiles were not known to be very accurate so they would stand a good chance to survive in the event of a missile missing its target.

Moreover, the Titan II missiles were designed differently from the Titan I to ensure that they could be launched much quicker.

We’re talking a launch time of under a minute.

Not only could they be launched quicker but after launch, it would only take 30 minutes to hit their target.

This was very important to the deterrence effect because the Soviet Union had to believe that the US was capable of retaliating instantly in the event of an attack.

Therefore, the silos were ready to go 24 hours a day and always “on alert” during the Cold War between 1963 and 1987.

Many processes were developed to ensure that the silos could always receive launch orders.

Even if Washington was destroyed they were able to receive commands for nuclear launches via the “Looking Glass.”

That was an aircraft that acted as a command center in the sky that was constantly flying for 29 years straight around the US to have a way to orchestrate a response to nuclear threats even if bases on land were wiped out.

While there were 54 Titan II silos built, these were not located randomly throughout the US.

Instead, there were three groups of 18 missiles and they were found near three bases: 

  • Davis–Monthan Air Force Base near Tucson, Arizona
  • Little Rock Air Force Base in Arkansas
  • McConnell Air Force Base in Wichita, Kansas

So the silo at the Titan Missile Museum was only one of many in the Tucson area, although it is the only one still available to visit.

Check out the map below to see where all of the other ones were.

Titan II Missile Sites Tucson Arizona

The particular launch complex at the museum (Launch Complex 571-7) came off alert on November 11, 1982.

Immediate efforts took place to preserve this place as a museum which was a tall order because parties like the Air Force had to be convinced.

But thanks to a lot of hard work and special agreements with other nations, the Titan Missile Museum opened up to the public on May 21, 1986.

The Titan Missile Museum experience

Intro

Your first stop will be a small room where you’ll get a very brief overview of what was going on with the Cold War and the purpose these missiles served.

The big theme here is MAD: mutual assured destruction.

Because there were so many of these silos and they were so powerful with the ability to be quickly launched, any opposing force would be assured that the US would respond with an equal if not heavier use of force against them following a nuclear attack.

It’s a theory that many people have debated the merits of but throughout the Cold War I think it proved to be effective. After all, we were able to avoid World War III.

As some will refer to it, it was “peace by deterrence.

Mutually Assured Destruction Theory | by Patrick Hollis | Medium
Photo via Medium.

Our tour guide was a former employee that actually worked at the silo and I believe that at least some of the other guides are as well.

In my opinion, this seriously upgrades the value of the tour as you get to not only experience the silo yourself but also hear from someone who lived and breathed in that space for years.

It’s truly living history.

Descend to the Blast Lock Area

After the short film, you will head outside to the Access Portal Entrance of the Titan II Intercontinental Ballistic Missile (ICBM) complex.

It’s here where you will enter the complex en route to the Blast Lock Area.

The entire complex you’ll be visiting is has a pretty simple layout.

There are basically three buildings that make up the entire complex: 1) Missile Silo, 2) Blast Lock Area, and 3) Control Center.

You’ll be visiting level two of the Missile Silo, the Blast Lock Area, and level two of the Control Center.

To find out more about each section, you can click here.

Titan Missile Museum complex diagram
Image via Titan Missile Museum.

Beyond the Access Portal Entrance, stairs await you.

While the missile is 103 feet tall and the entire silo about 150 feet, you will only head down 35 feet below the surface via 55 metal grate stair steps which is not that bad.

Note: They do have an elevator it is not available for visitors.

Once you get down to the Blast Lock Area, you’ll encounter the massive 3-ton steel blast doors which were designed to protect the crew from a potential nuclear blast.

If you’re over 6′ 2″ tall, watch out for the ceiling because it is a pretty tight fit. I’m 6’1″ and I could feel my head just getting by without grazing the ceiling in the cableways.

Launch Control Center

Your third stop will be in the Launch Control Center.

This is where you can check out all of the actual controls used to launch one of these missiles.

Because decisions and actions were so “consequential” in this room, at least two crew members had to be present there at all times and one of them had to be an officer.

Titan Missile Museum command center

You’ll be briefed on the entire process used to launch these nuclear warheads and witness what it would have looked and sounded like in the command center.

To me, this was the coolest part of the tour.

You discover that the launch process is a sequence full of redundancy and decoding with a little bit of escape-room trickery.

It’s a bit chilling to hear the sirens and nuclear codes ringing through the speakers knowing that this type of alarm would have signaled a likely apocalypse upon the earth.

If you want to take your experience to another level, my advice would be to get to the front of the line before entering Launch Control Center so that you can take one of the seats.

This isn’t to rest your feet but to ensure that you can personally act out what would’ve been one of the most radical moments in the history of the planet.

The seat in the middle is reserved for the Missile Combat Crew Commander (MCCC) and the seat closer to the side of the wall is designated for the Deputy Missile Combat Crew Commander (DMCCC).

If you snag one of the seats you get the lucky opportunity of turning one of the keys to initiate the launch and walk away with your own personal proof you did it!

Titan Missile Museum command center

The missile silo

After the launch session, you’ll journey down the cableway to level 2 of the missile silo.

You are still only seeing about a third of the rocket whenever you look up but it’s extremely interesting to see the rocket so up close.

Titan Missile Museum missile

One of the best story lines to these Titan II rockets is that they were used for scientific purposes.

Specifically, NASA used them for Project Gemini — NASA’s second human spaceflight program. These rockets played a major role in the space race and helped with our mission to be be the first country to land someone on the moon.

Historic - Titan II Rocket
Image via Nasa.

Apparently, these rockets made an interesting noise when they were launched. See if you can pick up the noise in the video below.

Back to the surface

After a close encounter with a Titan II, you’ll head back out of the bunker and you have the opportunity to wander around and inspect all of the objects on the surface. Watch out for rattlesnakes.

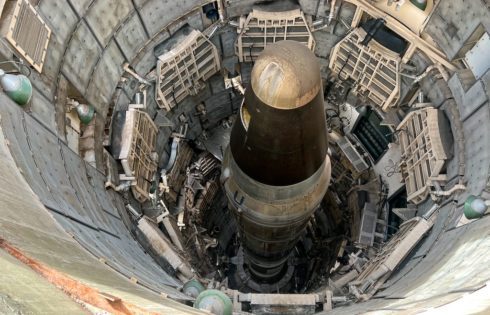
From the top you’ll see you can look down and get a great view from atop the Titan missile.

At over 100 feet, it’s a pretty long way down.

You’ll notice that the cover is permanently locked in a half-open position and that the tip of the missile (re-entry vehicle) is also missing a section, allowing you to see right in.

As you’ll learn, these were all conditions required by the mutual agreement between the US and the Soviet Union as they disarmed their silos.

The Soviets needed to trust that this rocket was not going to suddenly be launched one day and wanted to be able to use scout it out themselves using their own satellites.

Titan Missile Museum missile

While you’re up there, you’ll also learn about all of the different antennas set up to ensure that communications could still take place even after a nuclear blast.

You can also check out some of the engines, radar systems, and other vehicles that were utilized at the facility.

Gift shop plus exhibits

After you check out everything outside, head back in and take a look at some of the exhibits in the visitor center.

They have some interesting things to check out and one of the artifacts that stood out was an edition of Life magazine that contained a letter from JFK telling the American people what to do in the event of a fall out. I just really cannot imagine reading something like that.

Final word

Overall, this was well worth the visit. It’s unbelievable to think about the power that these missiles could unload and the responsibility that the personnel had inside these silos.

A visit to this museum will force you to ponder how close we came to the destruction of mankind during the Cold War.

But it will also make you re-think what it means to retain world peace.

McGinn’s PistachioLand – World’s Largest Pistachio (New Mexico) Review

Most visitors to Alamogordo, New Mexico are coming to explore the beautiful rolling dunes at White Sands National Park.

But only about 30 minutes away there is another unique attraction which is the world’s largest pistachio found at McGinn’s PistachioLand (aka the New Mexico pistachio farm).

Below, I’ll tell you everything you need to know about visiting McGinn’s PistachioLand including where to find it and what to expect whenever you arrive.

What is McGinn’s PistachioLand?

PistachioLand is a famous pitstop near Alamogordo, New Mexico.

It’s home to the worlds largest pistachio and also a country store where you can buy various souvenirs, snacks, and of course pistachios. You can enjoy a refreshing treat at the ice cream parlor, partake in wine tasting, and if you have more time even go on a tour of the farm.

It’s a worthwhile pitstop if you are in the area on a long road trip although for some people it’s now a primary destination. Keep reading below to find out more about this unique attraction!

Tip: Use the free app WalletFlo to help you travel the world for free by finding the best travel credit cards and promotions!

Where is McGinn’s PistachioLand?

McGinn’s PistachioLand is located at: 7320 US-54 #70, Alamogordo, NM 88310.

It’s about 10 minutes from Alamogordo, New Mexico and about 30 minutes from White Sands National Park. The open hours are 10 AM to 5 PM.

They also have a satellite location at #37 Highway 82 Alamogordo, NM 88310.

Tip: If you’re looking for hotels near PistachioLand, your best bet will probably be to stay in Alamogordo.

McGinn’s PistachioLand Experience

There’s a few different ways you can enjoy your time at McGinn’s PistachioLand.

Depending on what you choose to do, you may want to spend anywhere from five minutes to 45 minutes.

The world’s largest pistachio

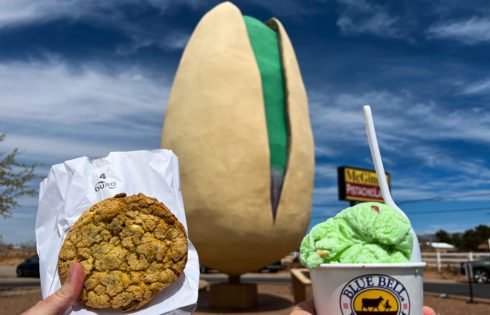
One of the most popular attractions here is the world’s largest pistachio, which stands 30-feet tall.

Just in case you were wondering, this towering nut is NOT a real pistachio.

Instead, it’s a large monument dedicated to the memory of Thomas Michael McGinn who passed away in 2007.

He was the founder of the Pistachio Tree Ranch which is where he created his legacy in New Mexico.

The idea of the pistachio monument was thought of by his son in 2008 and built by Bar-M Construction. It was dedicated in May 2009.

the Worlds largest pistachio

The world’s largest pistachio has been featured in TV shows and movies like This Must Be The Place so this is a legit famous attraction.

It’s close proximity to the road and easy and free access, make it a worthwhile site to check out in my opinion.

Plus, it’s an irresistible photo op.

the Worlds largest pistachio at McGinn's PistachioLand

Right next to the giant pistachio there are a few picnic tables that are perfect for taking a break on. Go ahead and stretch your legs after hours on the open road.

You could bring your own picnic here to relax in a little bit of shade or you could partake in some ice cream or other snack from the ice cream parlor to cool down.

The parking can be somewhat limited during busy times such as on weekends so sometimes you might have to wait for a spot to open. But people tend to be in and out at this place so it should not be difficult for you to find a spot eventually.

The ice cream

One of the most popular things to do when visiting is to try out some pistachio ice cream. All of the ice cream served here is Blue Bell so you know it’s gonna hit the spot.

If you’re kind of suspect about how pistachio ice cream will taste I encourage you to take a leap of faith and try it out because you will likely be pleasantly surprised. It has a strong almond taste which rounds out the faint pistachio flavor very well.

If you’re not in the mood to experiment with a new flavor they have lots of other popular flavors you might feel more comfortable with.

Once you settle on a flavor, can choose to have your ice cream served in a cup or in a waffle cone or waffle bowl.

We decided to go with a cup of pistachio ice cream. However, I kind of regret not trying the cones because I think they are also pistachio flavored?

McGinn's PistachioLand blue bell pistachio ice cream

We also decided to try out one of the XL pistachio cookies. They were not warm and soft cookies to my disappointment but still pretty tasty and definitely on the huge side.

McGinn’s Country Store

McGinn’s PistachioLand is like a cross between a Buc-ees and the Dole Plantation in Hawaii with the McGinn’s Country Store resembling the former.

McGinn's Country Store entrance

Inside, you’ll find a lot of souvenirs including all of the usual suspects like magnets, mugs, keychains, shot glasses, etc. And given the proximity to Roswell, it’s no surprise that you find in abundance of alien-themed objects.

McGinn's Country Store souvenirs

You’ll also find a lot of different types of t-shirts and apparel. To my surprise, some of the shirts actually looked like something you would care to wear out in public. Beyond shirts you’ll also find hats, bags, and more.

McGinn's Country Store souvenirs

There’s also a lot of treats that will tempt you including some interesting Candy Club treats. Peanut butter malt balls tempted us and it looked like they had a seasonal collection of candies like happy Easter eggs and mint bunny bark.

One of the most popular sweet items is the pistachio brittle which we did not get the chance to try but a lot of people apparently rave about it.

McGinn's Country Store candy

If you’re more into savory foods they also have beef jerky and a large variety of things like salsa, pickled foods, and coffee.

Of course, one of the main items you may be looking to purchase is a bag of pistachios.

Here you can find pistachios of a lot of different flavors including habanero, ranch, garlic, and even lemon and lime.

Pistachios are a tremendous snack because not only are they tasty but they are also extremely healthy. They are loaded with healthy fats, fiber, and can help you stay full for longer. Basically, pistachios are the perfect road trip snack.

If you don’t want to mess around with peeling off the shell, you can find shelled pistachios. But keep in mind that the shells help slow you down so that you don’t burn through your stash too quickly!

McGinn's Country Store pistachios

I decided to go ahead and try out the lemon lime pistachios which have a nice tang to them. The mixture of the saltiness and lemon flavor sort of remind me of lemon pepper chicken.

I’m currently working through a serving of these per day and it’s not proving easy to stop!

By the way, if you want your pistachios to remain fresh you can freeze them until you are ready to eat them.

McGinn's Country Store pistachios

I think one of the coolest things that they have is a station where you can get free samples of the different pistachio flavors.

This way, you can find your perfect flavor and then purchase it in bulk without worrying about it not delivering with the taste. It’s actually an extremely valuable feature of the store and something you don’t see every day.

Before you exit the gift shop make sure you check out the classic 1940 Ford Tudor.

If you are a wine drinker or you’re just feeling fancy you can test out four wine samples for free in the wine tasting room.

Their 6,500 grapevines include grape varieties like Chardonnay, Cabernet Sauvignon, Gewurztraminer, Zinfandel and Merlot.

They even have their own signature wine: the Pistachio Delight.

Koi Fish Pond

Outside, there is a Koi Fish Pond although I’m not sure there’s anything particularly special about this attraction….

Farm tour

If you want to get a look at the pistachio farm and the vineyards then look into doing a farm tour. You’ll be taken along on a small tram like vehicle and get a close look at the 90 acres of pistachio orchards and 14 acres of vineyard.

The tours run about 20 to 30 minutes and begin around the top of the hour. Tickets are only $3 for the tour.

Final word

McGinn’s PistachioLand is definitely an odd attraction but honestly it is worth your time if you’re looking for something unique and to perhaps enjoy some type of treat you may have never come across before.

Yes, it has the hallmark of a tourist trap but don’t let that stop you from checking it out because you might be missing out on some high-quality pistachio treats.

Also, I noticed that the workers were very friendly and personable, which is always a great sign that a business is being run the right way.

Pearl Harbor Aviation Museum Review [2022]

When Pearl Harbor was attacked almost all of the damage came from the air and perhaps the best place to get a sense of what those enemy attackers looked like is the Pearl Harbor Aviation Museum.

It’s one of the attractions located on historic Ford Island and it’s definitely worth adding to your itinerary if you can find the time.

Below, I’ll explain more about the museum and give you an idea of what you can expect when you visit including highlighting some of the most interesting things to check out.

What is the Pearl Harbor Aviation Museum?

The Pearl Harbor Aviation Museum is home to several aircraft and original artifacts involved in the Pearl Harbor attacks.

You’ll explore two airport hangars, an outdoor aircraft lot, and a control tower, which all allow you to experience the unique history of this place in a different way.

This museum is special in that it is located at ground zero for the Pearl Harbor attacks.

I’ve been to some aviation museums before and always enjoyed my time but this one just feels different. The history is palpable.

Tip: If you want to buy tickets to multiple Pearl Harbor attractions (USS Bowfin, Pacific Aviation Museum, and Battleship Missouri) check out this option online.

How to visit the Pearl Harbor Aviation Museum

The Pearl Harbor Aviation Museum is located on historic Ford Island, Hawaii, which is an active military base that can only be accessed by a shuttle bus (unless you have some other type of special permission).

The shuttle bus station is located on the north side of the Pearl Harbor Historic Sites Visitor Center. It’s basically on the opposite side of the station for the shuttle boat to the USS Arizona Memorial.

If you plan on visiting the USS Missouri and USS Oklahoma Memorial, you should first get dropped off by the bus at that stop and then when you finish up there you can hop back on the shuttle bus and make your way to the Pearl Harbor Aviation Museum.

That will make things a lot easier because the shuttle bus only runs one way.

Shuttles depart every 15 minutes from 8am to 5pm daily but the Pearl Harbor Aviation Museum is only open from 9am to 5pm.

For security purposes, no bags are allowed on the shuttle bus to Ford Island.

A bag storage facility at the USS Bowfin Submarine Museum & Park shuttle bus stop can store your belongings for a fee of $5.00 per bag. Credit cards are accepted.

You can buy tickets for the Pearl Harbor Aviation Museum online or in-person at the following rates:

  • Adults: $25.99
  • Children: $14.99 (ages 4-12)

Experiencing the Pearl Harbor Aviation Museum

Hangar 37

Your first stop will be Hangar 37, where the shuttle bus will drop you off.

When the attack happened, this hangar housed nine Grumman J2F “Ducks” and nine Sikorsky JRS-1s.

Soldiers on the ground used the mounted machine guns on the grounded J2Fs to defend the island. Meanwhile, five JRS-1s departed Hangar 37 to find the Japanese fleet (but were unsuccessful).

The hangar also provided shelter to the survivors of the battleship USS California.

So thousands of lives were permanently altered on the grounds you’re stepping on and countless acts of bravery took place on these premises.

Getting started

After showing your tickets to the front desk you will begin your journey to the museum.

You should see the gift shop and the Laniākea Cafe restaurant located right by the entrance and also nearby is a 200-person theater that you can pop into to catch a short film about Pearl Harbor.

That will give you some history and then you’ll be ready to head into the main part of the museum.

Mitsubishi A6M Zero

One of the main attractions at the museum is the Mitsubishi A6M Zero or simply “Zero,” which is the name used for these Japanese planes made by Mitsubishi.

They get their name from the last digit of the year that they were launched which was the year 2600 according to the Japanese Imperial calendar.

These were state of the art planes and the most equipped carrier planes when they were launched in 1940. Japan also produced more of these (10,000+) than any other model of combat aircraft.

Their lightweight design made them extremely fast and maneuverable and gave them a lot of range but also made them vulnerable to gunfire. Nine Zeros were shot down during the attack on Pearl Harbor.

Eventually, weaknesses in the Zero were discovered and the US would capitalize on them by altering their strategies of engagement.

As the Allies became more advanced with their aircraft tactics, the Zero became increasingly outdated and eventually was adapted for kamikaze attacks.

Mitsubishi A6M Zero
This specific aircraft was used in combat in the Solomon Islands in 1943.

Zero Nishikaichi (the Niihau incident)

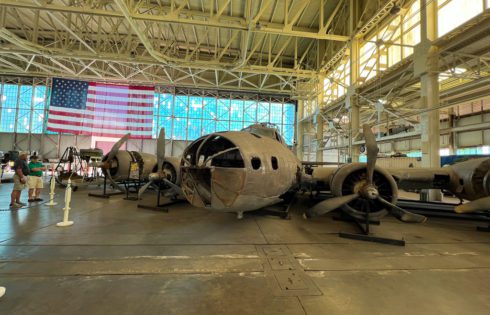
At first glance, the remains of the The Zero Nishikaichi look like in an uninteresting pile of scrap. But these rusted remnants are actually part of a fascinating story related to the Pearl Harbor attacks.

Pilot Shigenori Nishikaichi flew this Zero during the second wave of attacks and was forced to make a crash landing on the island of Niihau, which is just off the coast of Kauai, Hawaii.

A local Hawaiian, Kaleohano, then discovered him and took his papers and pistol.

Kaleohano did not know about the attack on Pearl Harbor yet but he realized this was a Japanese pilot and knew that relationships were strained between the US and Japan.

The locals provided a hospitable welcome for the pilot but struggled to communicate with him so they brought in two Hawaiians of Japanese descent, the Haradas.

Nishikaichi shared the news of the Pearl Harbor attack in Japanese with the couple but they kept that news a secret.

This married couple had sympathy for the pilot and would end up trying to help Nishikaichi escape the island while also attempting to retrieve his confidential papers and pistol.

But as locals on the island discovered what happened at Pearl Harbor via radio broadcast, they quickly turned on Nishikaichi.

Ultimately, a situation played out overnight where Nishikaichi and Harada, armed with a shotgun and pistol, stormed Kaleohano’s house only for him to get away.

Nishikaichi and Harada then initiated a manhunt for Kaleohano, while putting the island intro a frenzy.

Ben Kanahele, who had been captured along with his wife by the duo, ended up getting into a fight with them. During the scuffle, Kanahele killed Nishikaichi with a hunting knife despite being shot three times by the pilot.

Meanwhile, Harada took his own life with a shotgun.

It was a very crazy situation and unfortunately it was likely a contributing factor to the government setting up Japanese internment camps based on an official Navy report dated January 26, 1942.

Nishikaichi burned his Zero which is partly why the exhibit looks the way it does. Image via creative commons.

Nakajima B5N “Kate”

There’s also a Nakajima B5N or just “Kate,” which was the first all metal monoplane aircraft in the Imperial Japanese arsenal.

Japan’s premier carrier-based torpedo bomber, these were integral to the Pearl Harbor attack and 144 of these planes took part in the attack, arriving in both waves.

They also played a role in battles at the Coral Sea, Midway, and Santa Cruz Islands.

The Kate you’ll see at the museum is an extremely rare find.

In fact, it’s one of only two Kates in existence, even though over 1,000 were produced.

Nakajima B5N “Kate”

Boeing N2S-3 Stearman (Trainer)

The “big yellow plane” hanging in the museum is the Boeing N2S-3 Stearman.

This one is especially noteworthy because it was used by former President George H. W. Bush on December 15, 1942, while participating in flight training at Naval Air Station, Minneapolis, MN.

Another interesting aircraft to check out is the Grumman F4F-3 Wildcat, which was used by the US to combat the Zeros and quite a successful US Naval fighter. It was famously used a lot when pilots engaged in the “Thach Weave” (video)

There are some other interesting exhibits to check out in the hangar.

One of the more helpful exhibits was a large diagram that illustrates the first and second waves of the Pearl Harbor attacks.

It does a really good job of giving you an idea of the direction that the attacks came from and also showing you some of the other targets that were hit on Oahu.

Fighter Ace 360 Flight Simulators

If you’re looking for a bit of a thrill ride then consider giving the Fighter Ace 360 Flight Simulators a try.

My biggest regret on visiting the museum is that we did not try this out because in retrospect it looks freaking awesome.

It’s only about $22 for two people and this thing can take you fully inverted for the ultimate flight experience.

You can experience a dog fight with Thunder in the Pacific or get futuristic and partake in some space travel with Quantum Star Fighter.

Outdoor collection

Once you get finished with Hangar 37 you will head outside and make your way to Hangar 79 but on the way you’ll probably want to make a pitstop at the outdoor collection.

Between the two hangers there is an outdoor area where different helicopters and planes are on display.

You’ve probably heard of the Blackhawk but have you heard of the Seahawk?

One helicopter that stuck out to me was the Sikorsky SH-60B Seahawk which was sort of the Navy’s version of the Blackhawk.

Equipped with one torpedo on each side, a 30mm gun, and Hellfire missiles, it specialized in anti-submarine warfare, mine clearing, anti-ship warfare, and insertion of Navy SEALS.

If you look on the left side of the helicopter you’ll see 25 tube openings which look a bit peculiar. These are made to send out sonobuoys that allow a crew to detect submarines.

Sikorsky SH-60B Seahawk

There’s quite a few aircraft outside so you’ll want to allocate some time to wander around and check these out.

Raytheon Pavilion

The Raytheon pavilion is located between the two hangers and it houses an “ever-changing roster of experiences with traveling exhibits.”

When we visited, there was an exhibition on Bob Hope who was a comedian, actor and entertainer who helped keep the spirits high for service men and women on the front lines of World War II.

Hangar 79

The other major structure that makes up the Pearl Harbor Aviation Museum is Hangar 79.

Hangar 79 was undergoing a lot of construction when we were there and the vast majority of the hangar was blocked off.

Hangar 79 Pearl harbor

Once inside, we got a glimpse of one of the Blue Angels and the B-17 “Swamp Ghost.”

This B-17 aircraft, which originally arrived in Honolulu 10 days after the Pearl Harbor attack, has a pretty fascinating story as the pilot had to perform an emergency landing in Agaiambo Swamp in Australia.

The aircraft remained there for decades and only recently was restored and brought back to the US in 2014.

We also saw the Shealy Restoration Shop in action, which is a “genuine aircraft restoration shop that maintains and restores authentic aircraft from World War II and beyond.”

If you want to go behind the scenes of the restoration shop, book the guided Legends of Pearl Harbor Tour.

While I enjoyed exploring the hangar, I don’t believe we were able to get the full experience that Hangar 79 typically has to offer since so many things were blocked off.

Still, one thing that we did see were all of the bullet holes in the windows which are from the Pearl Harbor attack.

To me, that is the most moving aspect of the entire museum.

Hangar 79 Pearl harbor windows
Hangar 79 Pearl harbor windows bullet holes

Control Tower

It was at this control tower where the first radio broadcast of the attack on Pearl Harbor was made at 8:05 a.m. on Dec. 7, 1941.

“AIR RAID ON PEARL HARBOR X THIS IS NOT DRILL.”

At the time of the radio announcement, the structure was being bombed and windows on the lower levels were shattering.

The Control Tower at Pearl Harbor has undergone a lot of recent renovations but unfortunately those were not fully complete when we visited.

But soon the tower will be complete and you’ll be able to take an elevator all the way to the top where you will have 360° views of Ford Island and the surrounding harbor.

Update: the tower is now open and you can visit it by scheduling a tour for around $20.

Final word

It felt like our experience here was a little bit limited because of some of the ongoing renovations but it was still worth checking out.

You’ll no doubt feel the history as you wander the premises and check out everything from the bullet holes left in the windows to some of the rare aircraft on display.

During my time on the shuttle bus, I overheard people talking about skipping the aviation museum but I would highly recommend you to give it a shot because there’s a lot to take in here.

USS Missouri “Mighty Mo” Review (Pearl Harbor) [2022]

Pearl Harbor in Hawaii is full of interesting and historical sites to see and one of those sites is the USS Missouri aka the Mighty Mo.

It’s one of the most iconic and symbolic attractions at Pearl Harbor and it’s arguably the most famous battleship in the world.

But what exactly is there to see at this ship and what can you expect when you visit?

In this article, I’ll give you a breakdown of the major highlights of the USS Missouri and also give you an idea of what to expect when you walk its historic decks.

What is the USS Missouri?

Launched on January 29, 1944, the USS Missouri was the last battleship commissioned by the United States and it’s well known for its “surrender deck” which was the site where the Empire of Japan surrendered, officially ending World War II.

Today, you can explore many rooms and quarters of the ship on a self-guided tour as part of one of the many enriching experiences at Pearl Harbor.

How to visit the USS Missouri

The USS Missouri is located on historic Ford Island, Hawaii, which is an active military base that can only be accessed by a shuttle bus (unless you have some other type of special permission).

The shuttle bus station is located on the north side of the Pearl Harbor Historic Sites Visitor Center. It’s basically on the opposite side of the USS Arizona Memorial shuttle boat station.

You’ll load into the shuttle bus and be taken over the bridge to Ford Island and during your ride your bus driver might give you some history into Pearl Harbor.

Once you make your way to the military base, you are forbidden to take photos from the bus until you get out so keep that in mind.

USS Missouri shuttle bus

Your first shuttle bus stop will be the USS Missouri and the Pearl Harbor Aviation Museum will be your second stop.

If you plan on visiting both the USS Missouri and the Pearl Harbor Aviation Museum then you should first get off at the USS Missouri because the shuttle bus only runs one way.

Shuttles depart every 15 minutes from 8am to 5pm daily and the USS Missouri is open from 8am to 4pm (you must present your ticket before 3pm).

For security purposes, no bags are allowed on the shuttle bus to Ford Island.

A bag storage facility at the USS Bowfin Submarine Museum & Park shuttle bus stop can store your belongings for a fee of $5.00 per bag. Credit cards are accepted.

You can buy general admission tickets for the USS Missouri online or in-person at the following rates:

  • Adults: $34.99
  • Children: $17.49 (ages 4-12)

Tip: If you want to buy tickets to multiple Pearl Harbor attractions (USS Bowfin, Pacific Aviation Museum, and Battleship Missouri) check out this option online.

USS Missouri entrance

USS Missouri (brief) history

The USS Missouri was launched on January 29, 1944, as part of the Iowa class battleships ordered in 1939 and 1940 and designed in part to ensure the US could compete against the faster Japanese fleets.

Although plans were made for the next generation class of battleships which would’ve been even bigger, the Iowa class ended up being the last class of battleships and the USS Missouri was the final US battleship created.

The Missouri arrived at the latter end of World War II but just in time to provide support for other vessels and inflict damage at the battles of Iwo Jima and Okinawa.

During the war she provided anti-aircraft support for aircraft carriers and helped to bombard the shores of places like Okinawa. In August of 1945 it was decided that the official surrender of Japan would take place on the USS Missouri.

After World War II, she would then go on to fight in the Korean War from 1950 to 1953, where during two deployments she inflicted considerable damage to many locations along the Korean coast.

In 1955, she was decommissioned and after about three decades she was reactivated after being modernized in 1984.

She’d go on to provide support in the Persian Gulf during Operation Desert Storm in 1991, where she fired newly installed Tomahawk missiles and also fired her 16-inch guns in anger for the last time.

After being decommissioned on March 31,1992, and after much bidding from other states, it was decided that the perfect docking place for the Missouri’s final chapter would be Pearl Harbor.

In 1998 she was towed across the Pacific to Ford Island and then in 1999 she opened as a ship museum.

USS Missouri with World War II camouflage.

Experiencing the “Mighty Mo”

There’s a ton to see at the Mighty Mo but when it comes to the things you have to see, make sure you check these out:

  • Main Battery Turret
  • Surrender Deck and plaque
  • Bridge
  • Kamikaze Deck (make sure you see the “dent”)
  • Second Level

When touring the ship, you should be able to wander anywhere that is not restricted, so just be on the lookout for those signs. It’s possible that during the pandemic more things are blocked off.

Getting on the ship

As soon as you get off the shuttle bus, you can proceed to the Missouri but don’t forget that you can also walk across the street and check out the USS Oklahoma Memorial.

It’s a well-done memorial to all of those who lost their life in the USS Oklahoma and it’s also much less crowded than other spots so it’s worth a visit.

Once you head to the entrance area you’ll walk towards the ship where you should see a line or at least someone attending a station and they will scan your tickets.

You’ll then make your way up to the main deck of the ship and begin your tour.

Note: if you think you need to use the bathroom I would recommend going to the bathrooms located just near the shuttle stop.

Your driver should tell you about these bathrooms but they are located in a building just in front of the main entrance (across from the USS Oklahoma Memorial).

There is a bathroom on the ship but there’s only one and it’s easy for you to get stuck in the middle of a maze inside the ship so it is best for you to just go before you head inside the ship.

Main Battery Turret

One of the most impressive things you’ll see on the Missouri is the Main Battery Turret and this should be your first stop on the tour.

This battleship came armed with nine 16-inch guns, 20 five-inch guns, 80 40mm anti-aircraft guns, and 49 20mm anti-aircraft guns.

But it’s the nine 16-inch/50-caliber Mark 7 guns that really stick out.

The size of these 66 foot long guns is hard to fathom until you are standing beneath them. You can only imagine how loud these suckers were when they fired upon the enemy at about two rounds per minute.

USS Missouri Main Battery Turret 16"

To get a sense of what this looked like and probably felt like, take a look at the image below which shows the sound waves blasting through the surface of the ocean.

And just imagine how much force was output when all of the guns were firing broadside. It was truly a spectacle.

USS Missouri firing during the Korean War.

You can see the size of one of the shells just below the barrels of the gun. These guns could fire projectiles weighing up to 2,700-pounds, which is just incredible.

What’s even crazier is that the Japanese built a battleship with even bigger guns which could handle 18 inch shells.

That was known as the Yamato and it was sunk during the battle of Okinawa after being hit with multiple bombs and torpedoes.

USS Missouri Main Battery Turret 16"
Each turret required a crew ranging from 85 to 110 men.

These guns were great for bombarding shorelines prior to amphibious invasions and destroying structures like bunkers.

They could fire up to 24 miles away with good accuracy and were used in the battle of Iwo Jima, Okinawa and also in the Korean and Gulf War.

While these guns were extremely powerful, the Navy realized during World War II that carriers could be utilized better and that is largely why battleships were phased out.

After checking out the turret, you’ll head towards Surrender Deck which will require you to go up a steep ladder.

I believe they have an elevator that can also take you up so if you have mobility issues you can still see Surrender Deck. Read more about the accessibility here.

Surrender Deck

The main attraction of the USS Missouri has to be Surrender Deck, since you really can’t get any more historic than this location.

This is the site where Japanese commanders signed the official instrument of surrender, thus ending World War II in a 23-minute ceremony.

A whole lineup of generals from the US and from other countries were present at the signing and you can stand in the same exact spot where these famed military officials once stood.

USS Missouri surrender deck historical photo
USS Missouri surrender deck

Initially, the surrender ceremony was scheduled to take place on August, 31, 1945.

Sailors were ordered to get the ship ready for the ceremony and performed cleaning and even paint jobs on the ship. However, bad weather delayed the ceremony until September 2, 1945.

On that day, at 9:02am, General MacArthur opened the surrender ceremony with these words:

“It is my earnest hope—indeed the hope of all mankind—that from this solemn occasion a better world shall emerge out of the blood and carnage of the past, a world founded upon faith and understanding, a world dedicated to the dignity of man and the fulfillment of his most cherished wish for freedom, tolerance, and justice.”

This moment is memorialized with a plaque that is set into Surender Deck of the USS Missouri.

USS Missouri surrender deck plaque

When you arrive at Surender Deck, there should be a guide there who will tell you some of the story around the surrender.

This is also a great opportunity to ask any questions you might have so it would help if you did a little bit of research before your visit and come with a couple of questions because chances are this guide will know the answers.

In addition to the plaque, there is also an exhibit with duplicates of the surrender papers which were signed at 9:25am to close out the ceremony.

Something that’s a little funny is that U.S. General Richard Sutherland had to fix some signatures because several Allied officers mistakenly signed in the wrong place. Talk about an awkward experience.

This article from Life has a lot of photos from the ceremony that gives you a good idea of what the scene looked like.

USS Missouri surrender deck signature papers

In one of those images you may notice an old (backwards) American flag in the background and you’ll see a duplicate of this flag at surrender deck.

It’s a flag used by Commodore Matthew C. Perry when he arrived at Tokyo Bay in July 1853 to deliver a letter from President Millard Fillmore to the Emperor of Japan with the hopes of opening diplomatic and trade relations with Japan, which had isolated itself for two centuries.

The flag was one of the demands by Gen. MacArthur and during the surrender ceremony he brought it up in his speech.

“We stand in Tokyo today, reminiscent of our countryman, Commodore Perry, 92 years ago. His purpose was to bring to Japan an era of enlightenment and progress by lifting the veil of isolation to the friendship, trade, and commerce of the world. But alas, the knowledge thereby gained of Western science was forged into an instrument of oppression and human enslavement.”

The final stamp on the surrender ceremony had to be the flyover which included 465 B-29s.

This was nothing short of a force demonstration that would rid Japan of any doubts about changing their minds on the surrender.

It would also send a message to other participants in the audience including those from Russia.

These B-29s would take a special route so that they could loop back around and make it appear as if the US was equipped with 2 to 3 times more of these aircraft than we actually had.

Not every B-29 pilot was thrilled with this request, though.

The Smithsonian notes that “the average B-29 crewman was much more likely to die in an accident or a mechanical failure than from enemy action.”

These pilots were taking on a 15-hour trip over 3,000 miles of ocean in subpar weather.

They’d be forced to fly much lower than originally planned and to do so in an already crowded air space with hundreds of aircraft.

This was not your typical football game fly over.

With many of the B-29 pilots having been through plenty of close calls and emergency landings, I’m sure there was a lot of reservations about the risk versus reward.

Still, other pilots embraced the experience and even went on “sightseeing tours” over Tokyo to view the decimated city in the daytime for the first time since their bombings usually took place at night.

The B-29s ended up arriving shortly after the final signatures were made and they put on an impressive showing.

U.S. Navy carrier aircraft fly over Tokyo Bay

Captain’s cabin & Bridge

After experiencing all of that history, you can then make your way to a few more interesting spots up on the deck including the Captain’s Cabin.

As you make your way up to and around the bridge, you come across a special view of the USS Arizona Memorial.

You’ll notice that the Missouri’s guns point right over the remains of the USS Arizona.

It’s meant to be a symbolic gesture that the Missouri is watching over the Arizona and all of those sailors and marines who were entombed within it.

As you look out to the memorial you realize it’s quite fitting that the Missouri is located at Pearl Harbor since this place marked the beginning of World War II and the Missouri is where it ended.

I thought this view from inside the bridge was one of the most impressive views in Pearl Harbor.

One could only imagine the type of scenes that were viewed from these same windows throughout the decades.

Next, you’ll be able to get a glimpse of the conning tower. Take note of how thick the walls are.

I also thought it was interesting that they still had the naval signal lamp which was used to send communications to other ships, usually with Morse code.

They would be able to output no more than 14 words per minute, so sailors either had to be very concise or patient with their messaging.

You can still pull the levers today, so feel free to give it a try.

Kamikaze Deck

As you come back down onto the main deck you have a chance to check out Kamikaze Deck which is another major point of interest on the Missouri.

This marks where, on 11 April 1945, a 19-year-old kamikaze attacker, Setuso Ishino, crashed a Zero into the ship’s hull during the battle of Okinawa.

Thankfully, there were no casualties from this attack and only superficial damage to the ship.

However, kamikaze attackers did do a lot of damage especially during the battle of Okinawa when they essentially went all out.

As of late June of 1945, it’s reported that around 10,000 US sailors and marines had been killed or injured by kamikaze attacks and 30 ships had been sunk with an additional 400 or so damaged.

Kamikaze attackers were so difficult to stop that they forced US forces to bulk up on anti-aircraft fire power including more ships and more personnel.

There’s a few interesting things to note about this kamikaze attack at Okinawa.

You can still see the dent from this attack if you look over the side of the ship between frames 159 and 165.

Photo by Wally Gobetz.

There’s a photograph of the Zero (or Zeke) just before it slams into the ship. It’s such a rare moment that I can’t imagine there being many (if any) other photographs like it.

Equally impressive is that it was taken by Len Schmidt, the cook assigned to the USS Missouri.

Zero kamikaze slamming into USS Missouri.

After the plane hit the Missouri, a machine gun from the plane broke off and impaled one of the turret guns.

There is a picture of that scene and it’s pretty remarkable how that happened.

Finally, the crew recovered the body of the kamikaze attacker and gave him a proper sea burial.

This was ordered by the captain of the ship, William Callaghan and it came at the protest of many sailors, especially when he called for the burial to take place with a Japanese war flag.

Callaghan’s reasoning for the ceremony was that he wanted:

“A tribute to a fellow warrior who had displayed courage and devotion, and who had paid the ultimate sacrifice with his life, fighting for his country.”

It’s kind of unfathomable to me that a crew would be able to show this kind of humanity during such a brutal war but there’s probably something to be said about the perspective it helped to maintain for some sailors.

The second deck tour

Right after you get done exploring everything above, you have the decision on whether or not you want to go down to the second deck.

The entire second deck will probably take you 30 to 40 minutes to explore.

I did not have a map and was able to get through it all without any major issues because the doorways and walls are marked with arrows so you pretty much always know where you need to go.

Personally, I would highly recommend that you head down there to check everything out because it will give you a sense of what life was like on a battleship like this.

It’s also a nice way to get a break from the heat if you are visiting on a warm day.

It’s kind of easy to miss the ladder down to the second deck but it is in the little outhouse looking building located underneath the middle gun in the photo below.

You can check out the second deck photos below.

For the most part, it’s pretty obvious what you’re looking at and a lot of times you’ll see signs describing to you what you see.

Once you finish up your tour you can head back down to the pier and there are quite a few different places to grab food, snacks, and souvenirs.

You’ll probably be spending around $10-$15 depending on if you want a burger or something a little bit more substantial like shrimp, fish and chips, etc. But you can also find refreshments to get you by like Dole Whips.

Related: Dole Plantation Review (Worth it or Tourist Trap?)

Before you leave make sure you check out the iconic statue of a sailor kissing his partner.

USS Missouri kissing statue

As you exit the Missouri area, you’ll head back to a covered pavilion with a lot of benches where you can wait for the shuttle bus.

After the tourists exit the bus they will signal for you to board and you can head to the next stop which is the Aviation Museum.

If you don’t want to visit that museum then just stay on the bus and you will be taken back to the visitor center.

Final word

I think the USS Missouri is a must when you come to Pearl Harbor. The ship itself and all of its armory is a spectacle but it’s hard to beat the history on the ship with Surrender Deck.

Even if you don’t have the time or the energy to tour the entire lower deck it would still be worth it to just come and check out the main deck and perhaps grab a bite to eat.

USS Bowfin Submarine Review (Pearl Harbor, Hawaii) [2022]

One of the must-see attractions when visiting Pearl Harbor in Hawaii is the USS Bowfin submarine.

It’s one of the only places where you can actually go inside the tight quarters of a submarine from World War II and it’s a really cool experience, especially if you’ve never even seen a submarine before.

Below, I’ll give you some tips and guidance so that you will be prepared for your USS Bowfin Submarine visit.

Pacific Fleet Submarine Museum campus overview

The Pacific Fleet Submarine Museum campus is one part of the Pearl Harbor experience and it’s home to the:

In my personal opinion, the USS Bowfin submarine is the primary attraction here but the museum is also pretty cool, too. This article will just focus on the USS Bowfin Submarine experience.

Tip: If you want to buy tickets to multiple Pearl Harbor attractions (USS Bowfin, Pacific Aviation Museum, and Battleship Missouri) check out this option online.

USS Bowfin

How to visit the USS Bowfin Submarine

The USS Bowfin Submarine is located on the north side of the Pearl Harbor National Memorial area. After you go through the main entrance, you will head to the right to make your way to the submarine.

You should see signs pointing you the right way but basically it’s on the opposite side of where you line up for the USS Arizona shuttle boat.

It’s pretty close to where you hop on the shuttle bus to take you over to Ford Island where you can visit the USS Missouri, USS Oklahoma Memorial, and Pearl Harbor Aviation Museum.

Related: Pearl Harbor Ultimate Guide

You will need to buy tickets in order to visit the USS Bowfin and here are the prices for the tickets:

• Adult General: $21.99
• Children General (4-12 years): $12.99

Military members and Kama’aina can get discounts:

• Adult (Military and Kama’aina): $16.99
• Child (Military and Kama’aina): $8.99

You can buy these online or you can buy them whenever you get there but I would advise you to just secure them online.

You’ll have to select the date of your visit but you do not have to lock in a specific time slot.

You can choose to do an audio tour if you’d like (they have a kid’s version and an adult’s version). If you don’t do the audio tour, you should be able to get through the submarine in about 30 to 45 minutes.

Once you have your tickets, you can bring them in printed form or digital form on your mobile device and someone at the entrance of the museum area will scan them and let you in.

The good thing about these tickets is that you can leave and come back.

So let’s say that you had a tour of the USS Arizona coming up and you need to head over there to catch your shuttle, you could always just come back later on and see the rest of the USS Bowfin submarine area that you missed.

USS Bowfin submarine history

The USS Bowfin launched on December 7, 1942, exactly one year after the attack on Pearl Harbor, which is why she is known as the “Pearl Harbor avenger.”

In World War II, the USS Bowfin conducted nine war patrols between 1943 and 1945 and most of her patrols were in the South China Sea, Celebes Sea, off the East coast of Japan, and into the Sea of Japan.

Each patrol was a couple of months long and you never quite knew what to expect.

Some patrols were almost entirely uneventful with no confirmed hits on vessels while others were insanely busy with many close calls from depth charges.

I’d recommend you check out this history that chronicles all of the different patrols.

You get a sense of the cat and mouse game that the submarines played with other vessels and also an idea of how many torpedoes simply missed or malfunctioned in some type of way.

USS Bowfin – 75 Years, 9 Million Visitors Later - Pearl Harbor
The USS Bowfin. Image via Pear Harbor.

Looking at all of the combined patrols, the USS Bowfin did a lot of damage

The Bowfin’s four commanding officers believed she sank 179,646 tons (including 34 large vessels) but the Joint Army-Navy Assessment Committee (JANAC) credited Bowfin with 67,882 tons sunk (16 vessels of that tonnage plus 22 smaller craft). 

Regardless of the exact figure, the fact that she had so many successful patrols and made it back so many times is significant.

Submarines were one of the most dangerous places you could be during World War II and they had one of the highest fatality rates (1 in 5).

In many ways, because World War II was the most fatal war for submariners in US history, the USS Bowfin is a memorial to all of the submariners who lost their life in “silent service” during World War II.

And that’s fitting considering the USS Bowfin is considered to be the best preserved and most visited submarine that served during World War II.

USS Bowfin Submarine
The USS Bowfin crew. Image via Pear Harbor.

The USS Bowfin Submarine experience

Once you verify your tickets you have the opportunity to choose which submarine attraction you want to visit first and I would personally recommend going to the USS Bowfin submarine first.

You’ll take the walkway to the deck of the submarine and then you’ll see an entry hatch to take a steep stairway ladder down.

Watch your head as you enter and as you make your way through all of the different compartments.

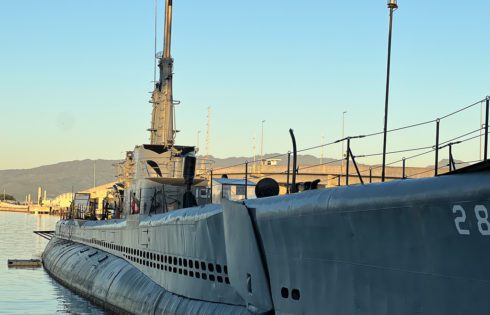
USS Bowfin
USS Bowfin at sunrise.
USS Bowfin entrance

Immediately, we dropped into the forward torpedo room, where bunks were literally on top of torpedoes which was just wild.

USS Bowfin forward torpedo room

Apparently, these bunks became prime real estate because they are so far removed from their busy corridors in the middle of the submarine.

Not only would they be quieter but also cooler since they were farther away from the engine room. To help the sailors sleep, only a red light would remain on in this dark compartment.

I never realized that submarines had both front and aft (back) side torpedoes so they could launch them in either direction.

In total, the sub would carry 24 torpedoes, which doesn’t really sound like a lot when you consider that they would be underway for two months but it just goes to show how selective they had to be with their targets.

At the end of the forward torpedo room, you’ll see the officer’s head (bathroom area) and from there, you’ll head into the forward battery compartment.

USS Bowfin hatch

You’ll see the ward room which is where the officers ate their meals and across from that you’ll also see where they slept (berthing area).

Although the officers had their own eating area, everyone on the submarine apparently ate the same food.

USS Bowfin ward room
USS Bowfin officers beds

Next, you’ll come across the stateroom which is where the captain slept. The lucky captain was the only sailor to have his own personal bedroom.

Considering the magnitude of the decisions he had to make on a daily basis, it’s probably a good thing he got some good rest in a private room.

USS Bowfin stateroom

Next is the “ship’s office” which is basically a closet where someone worked on a typewriter and helped keep track of all of the admin tasks. It’s pretty tight working quarters but what would you expect on a submarine?

USS Bowfin office

After that, it’s time to head through another portal to the control room.

This is where they controlled the steering of the ship and also initiated the dives when it was time for the submarine to submerge.

The goal was for them to submerge in less than one minute. Every second counted.

After reading some of the patrol reports, I realized just how up-and-down the submarines would be during battles at sea.

I can’t imagine the adrenaline and focus flowing through this room during those times as they rode out depth charge explosions for hours.

Prepare to be overwhelmed by the sheer number of controls and valves located all around you.

Keep in mind that all of the different stations were manned by different sailors and when it came to things like surfacing or submerging, there needed to be perfect synchrony to avoid any catastrophic outcomes.

It’s no surprise then that submariners were some of the best sailors as it wasn’t easy to become one.

If you were one of the lucky volunteers who were accepted to serve in submarines, you did receive a nice pay raise, though.

USS Bowfin control room

There’s a ladder in this room that heads up to the conning tower, which housed all of the equipment needed for an attack such as the radar, periscope, torpedo data computer, etc.

It was from this room that all of the damage was done to the enemy.

Unfortunately, this was not open to us on our visit.

I don’t know if access is limited because of coronavirus or because only special guided VIP tours offer access to that but it would’ve been really cool to go up in there and check that room out.

Note: They have a conning tower from the USS Parche in the outdoor part of the museum you can check out.

USS Parche conning tower.

So without going up, we proceeded through another water tight doorway and into the galley which is where most of the crew had their food cooked.

It’s reported that the food was actually quite good which is in line with what I once heard from someone who served on a submarine.

I think it’s partly because they don’t have to mass produce the food like they would on a big battleship or carrier but also largely because they needed to keep the crew in good spirits considering that they could go weeks without surfacing sometimes.

While the submarine was underway, this area remained manned at all times and served up four meals a day.

USS Bowfin galley

Here’s where the crew would eat or just socialize between meals.

USS Bowfin mess

Right past the mess area is where the main bunks were for the crew (berthing area).

USS Bowfin bunks

You then get a look at the crew’s heads (or bathrooms).

On some ships, it wasn’t uncommon for sailors to only shower once every two weeks or so. With an 80 man crew, you can imagine how things probably smelled throughout the ship weeks into a patrol.

USS Bowfin head

Next, you’re headed to the forward engine room, where two of the main diesel engines are located, which I’m assuming was both hot and loud.

USS Bowfin engine room

Right through there is the next compartment which is the aft engine room where the other two diesel engines are located.

Diesel engines only ran whenever the submarine was at surface and when submerged it was all electric. That battery power was finite so submarines had to be careful to not get stuck underwater without power.

And then finally we entered the aft torpedo room.

It’s in that room where you’ll find the exit ladder to make your way back to the deck of the submarine.

Up top on the main deck, you can check out the 5″ deck gun which was used whenever torpedoes were not worth the effort, such as when firing on smaller merchant ships.

This was especially true later on in the war when the Japanese ran out of steel ships and were shipping resources on old wooden ships.

You can also see the radar mast and radar antennas, which were things that gave the US a major advantage during World War II.

USS Bowfin main deck gun

You can also climb up on the bridge where there is another gun and see the exact type of view the sailors would’ve had.

Interestingly, a lot of the fleet submarines had different variations of guns because commanders could choose how they wanted them to be equipped and the types of guns they wanted to use.

Most of the time torpedoes were fired when the submarine was submerged but they would sometimes fire torpedoes when surfaced, especially at night.

When on the surface, there would’ve been two people on lookout on top of the bridge who were tasked with the duty of watching out for all of the crew. There was no room for error and slacking off on your watch could mean the difference between life and death.

USS Bowfin deck bridge

Final word

Overall, the USS Bowfin was a really cool experience.

It probably would have helped to have the audio guide but I still enjoyed being able to explore on our own especially because we had the submarine to ourselves at 7am.

If you don’t choose to do the audio tour, this article should give you enough detail to appreciate what you’re seeing and hopefully you’ll enjoy checking out this submarine as much as I did.

Goldbelly Lobster Rolls (McLoons) Review (Worth Every Penny)

After traveling to Maine for the first time last fall and experiencing the sweet goodness of a real Maine lobster roll I was immediately obsessed with this local delicacy.

My natural instinct was to book another flight back up to the Northeast but that’s a little bit easier said than done.

But then we discovered that you can order lobster rolls from Maine via Goldbelly and excitement (and confusion) ensued.

Could these lobster rolls really be that good considering that I would be shipping seafood from the Northeast all the way to the desert of Arizona?

Before I could pull the trigger, my spouse ended up surprising me on my birthday with an order of Goldbelly lobster rolls from McLoons and I’d have to say it was probably the best surprise birthday present ever.

In this article, I’ll give you a review of the McLoons Maine lobster roll experience with Goldbelly.

Ordering from Goldbelly

On the Goldbelly app or website, you’ll be able to choose from a lot of different types of lobster meals.

There’s a bunch of different tasty options that you can add on like clam chowder, sea salt brownies, etc. You can also just buy meat by itself.

Or heck, you can also just put a whole lobster in your cart!

Here are some of my top recommendations:

  • Maine Lobster Roll Kit
  • Lobster Roll Kit And Wild Maine Blueberry Bread Pudding
  • Lobster Roll Kit And Clam Chowder
  • Lobster Roll Kit And Lobster Stew

You can choose an option for two but my recommendation would be to order for at least four to make it worth it.

You can get these food items sent to you ASAP. If you’re willing to pay for upgraded shipping, you can get them in about two days.

Depending on where you live and the type of shipping you select, you might be paying anywhere from $40-$60 plus.

The shipping cost is why I usually recommend you to order a larger quantity because you’ll get more bang for buck usually.

Our order came right on time and here’s a look at the contents.

Find lobster rolls from Goldbelly right here!

Goldbelly Lobster Rolls McLoons order

Maine Lobster Stew

The first dish I tried was the Maine Lobster Stew.

The rich and creamy stew was absolutely delicious. The stock, consisting of carrots, celery, onions, tarragon, and other ingredients like butter and cream, was not quite as thick as I thought it would be but still pretty much irresistible.

What set it off was a large, meaty lobster claw. Each quart comes with a 1/2 lb. of lobster.

I threw in some of the Westminster Baker’s oyster crackers just to add a little bit of crunch to the stew but don’t go too crazy because you don’t want to drown out the flavor since it’s not that potent.

While you can also go for the clam chowder, I thought that lobster stew was the perfect compliment for the true lobster lover.

After that amazing lobster stew, it was time for the main attraction: the lobster rolls.

Goldbelly Lobster stew McLoons order

GoldBelly lobster rolls

The package contained everything that we needed to create the perfect lobster roll.

Your shipment should come with a little book to help you prepare the food items and I would say it’s very easy to follow.

It will walk you through instructions like buttering and toasting the bread so that your lobster roll comes out to perfection.

The lobster meat was just as good as I remembered it being when I ordered it in Maine. Super fresh.

The lobster bread rolls were also to die for. Brad toasted the bread just enough so that it was lightly toasted which is exactly how you want it.

Goldbelly Lobster roll McLoons order

You can choose to fix your lobster rolls however you like.

Brad served these up with a little bit of mayo and served up the meat cold, which is true Maine lobster roll style.

Some people like them Connecticut style which comes with warm lobster meat and ditches the mayonnaise in favor of warm butter.

Initially, I was a little bit nervous because when we were in Maine we only had the warm butter lobster rolls and I really loved those.

As someone who is not a huge mayonnaise fan, I wasn’t sure if I’d appreciate the lobster served up this new way.

We paired the lobster roll with some potato chips and a pickle spear and that was all we needed for the perfect touch. I soon bit into the roll and was instantly transported back to Maine. Delicious.

The best part is that we had four lobster rolls so this ended up being an all-day lobster eating extravaganza.

Goldbelly Lobster roll McLoons order

Final word

This lobster roll experience completely changed my perspective on enjoying delicacies.

No longer do you have to limit yourself to those “once in a lifetime” eating experiences in order to chow down on something amazing.

And you also don’t have to worry about trying to ship something from a destination while you are traveling or stress about fitting something in your carry-on bag that may or may not be fresh when you arrive back home.

Yes, you do have to pay for the convenience but for the occasional splurge, Goldbelly is absolutely worth it in my opinion.

Find lobster rolls from Goldbelly right here!

Tucson Puff And Paint at Arte Bella Review

Cannabis tourism is still just in its infancy but it’s really interesting to see the type of attractions that are popping up all around the country in states that have fully legalized recreational marijuana.

One attraction that will likely be popping up in your state after legalization occurs is a “puff and paint.”

It’s a slight alteration on the paint and sip a lot of people are already familiar with except this one is BYOC (bring your own cannabis).

In this article, I’ll give you a full review of the puff and paint experience at Arte Bella in Tucson, Arizona.

What is the Puff And Paint at Arte Bella?

Puff And Paint at Arte Bella is a new attraction in Tucson, Arizona, that allows you to consume cannabis on site and enjoy an instructor-led painting class where you get to paint your own masterpiece on a fresh canvas.

Tip: Use the free app WalletFlo to help you travel the world for free by finding the best travel credit cards and promotions!

Where is the Puff And Paint at Arte Bella?

Arte Bella on 4th Ave is located at: 340 N 4th Ave, Tucson, AZ 85705.

This is an area where you can find a lot of other interesting places and restaurants to check out so pairing the puff and paint experience with a visit to a restaurant either before or after your session could make for a nice evening out.

Tip: Don’t get this location confused with the other Arte Bella location at 5870 E Broadway Blvd, Tucson, AZ 85711 which is more of a family friendly environment. That venue is also located in a shopping mall.

Related: TSA Marijuana Rules Explained (Flying with Weed)

Tucson Puff And Paint Arte Bella

The Puff And Paint Arte Bella experience

Your experience really begins whenever you book your session.

You can view the different classes offered online and you’ll see a preview of the type of painting you can attempt. The types of paintings come in all different forms ranging from landscapes to paintings of characters from The Office.

On weekdays it looks like they usually run one class at both 6 PM and 8 PM but on weekends they run classes throughout the day. Prices depend on the size of your canvas and type of paint but we paid about $30 per person.

Arriving

When you arrive you’ll head through a long hallway decked out with all sorts of different creations.

At the end of the hallway, you’ll see iLava kiosks that allows you to order both recreational and medical marijuana.

You place your order at the kiosk and then pick up your order at Downtown Dispensary which is 6 minutes away by foot. There is also a smoke shop nearby if you need to visit them.

The bar

As soon as you enter the main area, head to the bar where you will show your ID to prove that you are of age. Once you do that you’ll be issued a wristband.

We decided to try out one of their drinks called starry night and also went with some sparkling water/soda water. The vibes from the bartender and everyone else inside were all on point from the start.

Tucson Puff And Paint Arte Bella bar

This is one of the only establishments in Arizona you’ll find that caters to both cannabis and alcohol in the same venue. You can order drinks before you start or even during the session or you can just stick to your cannabis if you’d like.

As far as consuming cannabis, they allow you to vape or dab inside at any time. If you want to smoke they have an outdoor patio that you can slip into where you can use joints, pipes, bongs, etc.

I really appreciated that they kept the indoor part of the venue smoke-free although I think that may have been required by law?

When you arrive, your art instructor will probably be setting everything up and encourage you to visit the bar or get your cannabis intake going.

We just hung out in our chairs next to our canvas and waited for the session to begin.

Related: Can You Smoke Weed in a Hotel Room?

Tucson Puff And Paint Arte Bella

At each station, you’ll receive your plate of colors, paint brushes, and a water cup for cleaning your brush. They will also bring you a plate for mixing your colors.

Tucson Puff And Paint Arte Bella paints

If you happen to have a drink, be sure to keep your water cup far away from your drink so that you don’t ever confuse them because apparently that happens!

Once it’s ready to start, you’ll put on an apron and if you have any type of a long sleeve jacket or coat you might want to take that off just to be on the safe side.

Your instructor will then give you a briefing on the painting and explain to you some of the basics you’ll need to create your own masterpiece.

It’s a nice environment inside and they play some good music which is nice.

Tucson Puff And Paint Arte Bella stage

At first the music coming from these huge speakers was just too loud and I could not hear anything the instructor was saying so I had to bring it up but she quickly turned down the music to a level that allowed me to understand what she was saying.

If the music is too loud for you be sure to speak up early because you don’t want to miss out on the instructions that will help you do things like blend your colors together, choose the right paint brush size, etc.

Tucson Puff And Paint Arte Bella

Throughout your session, you basically receive instructions in different stages as you work on the painting.

It’s sometimes pretty simple stuff like “paint the top part blue” but sometimes you get more detailed instructions like mix these three colors together and dab your small paintbrush here and there.

In some cases you might be applying a lot of paint to one layer and need to stand up and quick dry your painting but your instructor should show you how this is done.

Tip: Be mindful of any belongings like your phone that might be in the splash zone of your brush strokes.

Tucson Puff And Paint Arte Bella class

This was my first ever painting session like this and I don’t think I had even painted anything in well over a decade.

Despite my lack of experience and skill level, this was actually a lot of fun.

There’s something about accessing the creative part of your brain when inspired by cannabis that is such a unique and cool feeling.

I know the science is limited and studies debate whether or not marijuana really makes you more creative but in my personal experience I absolutely believe it does.

Or, at the very least, it allows you to appreciate and enjoy activities that require creativity a lot more.

Even if you don’t necessarily know what you’re doing with the paintbrush it still feels good finding a new way to express yourself.

Tucson Puff And Paint Arte Bella class

Try not to be over critical of yourself and avoid trying to create the perfect replica of your designated painting. It’s much funner to put your own personal touch on your work and just use the painting as a very loose guide post.

Feel free to completely remove elements (e.g., trees) from the painting if you’re not feeling them.

With that said, it does help to have the image of the painting readily available on your phone for reference.

You can save the image or you can probably get it airdropped to you by your instructor.

I’d recommend changing the settings on your phone so that your screensaver does not ever come on. That way, you can quickly glance at the image anytime you need.

(The instructor usually has a real life painting for you to look at but in our case they did not have that on site.)

What’s also cool about this experience is that venues like this are still very new.

Openly consuming cannabis indoors inside in a venue that is actively encouraging you to do so is very much a novel experience.

And because of that, it feels like a very open and accepting place were you can come and be free.

Our session only had the two of us which was really cool because it felt like a private session but I know some of the other sessions can be a lot bigger, especially on the weekend.

Tucson Puff And Paint Arte Bella class canvas painting

The entire session lasts about an hour and a half to an hour and 45 minutes.

Once you make the finishing touches to your canvas, you’ll let your canvas dry for a little bit and then you are free to head out and take your canvas with you. Tips are always appreciated, of course.

Tucson Puff And Paint Arte Bella class canvas painting

Final word

Doing anything cannabis related out in public still makes me slightly uneasy.

I think the years of all things weed related being illegal still sometimes make it difficult for me to fully relax when partaking in public places.

But attending venues like this, where it is 100% legal and acceptable to partake, is a nice way to begin to overcome that and re-frame what cannabis consumption can look like in a modern world.

It’s also just a good time being creative and testing out your art skills.

Kualoa Ranch Fishpond Ocean Voyage Review

It’s always nice when you can combine stunning scenic views with enriching experiences where you learn about the history and culture of a location. The Kualoa Ranch Fishpond Ocean Voyage is a perfect opportunity to do just that.

In this article, I’ll tell you everything you need to know about the Kualoa Ranch Fishpond Ocean Voyage trip so that you’ll be fully prepared for your visit and be able to make the most of it.

What is the Kualoa Ranch Fishpond Ocean Voyage?

The Fishpond Ocean Voyage consists of two parts: a boat tour of the historic Molii Fishpond and a catamaran ride that takes you out into the ocean where you can take in awesome views and perhaps get greeted by sea turtles. The total experience is approximately 90 minutes long.

Tip: Use the free app WalletFlo to help you travel the world for free by finding the best travel credit cards and promotions!

Kualoa Ranch overview

The Molii Fishpond is part of Kualoa Ranch, which is a location that offers many popular tours and experiences.

Earlier in the day we got to enjoy the Jurassic Adventure Tour which was awesome and a must do for Jurassic Park and Jurassic World fans.

After the tour, we had a little bit of time to grab a quick bite and then we were ready to begin the Fishpond Ocean Voyage.

Fishpond history

Fishponds are integral to the history of Hawaii and were not constructed anywhere else in ancient Polynesia.

The unique geography of Hawaii with abundant streams, shallow reefs, and the right tides made it a perfect place to create these ponds which provided fresh fish for survival, trade, and ceremonies.

Sources differ but it seems hundreds of these ponds were made across the different islands of Hawaii.

There are different types of fishponds but one of the most popular was the loko kuapa, which consisted of stone walls (kuapa) that enclosed a shallow bay or inlet or in other cases, extended out into the ocean.

These walls would be built above the height of the highest tides to properly take advantage of changing tides and currents. They also were designed with consideration to the impact of crashing waves so that they were built to last.

The loko kuapa ponds would also have one or several sluice gates (makaha) made of vertical slats, which served the purpose of allowing small fish to enter while retaining the bigger fish.

They also helped with circulation to reduce stagnation.

Once the pond was functioning, there would be one or more people who would be responsible for maintaining it and preventing poachers from stealing their fish. In exchange for the service, they would be offered fresh fish from the pond.

In these ponds, the water is brackish as the seawater mixes with fresh water from springs or streams. It’s said that the content of the water can dictate the flavor of the fish in a distinct way.

The Molii Fishpond is one of the largest in Hawaii covering 125 acres and ranging from 4 to 30 feet in depth. It’s estimated to be between 600 and 960 years old.

According to local legend, the pond was built by Hawaiian Menehune. These were mischievous, cliff-diving dwarves standing only two feet tall and capable of major engineering feats (like building a 4,000 foot fishpond wall overnight).

This fishpond is special because it is one of the few royal fishponds that still function today, raising Moi (threadfish), ‘ama’ama (mullet), and awa (milkfish). You’ll also spot a lot of jellyfish as you take a look at the pond.

Placed on the the National Register of Historic Places, the fishpond and surrounding scenery has also been featured in a lot of movies including Jurassic World, 50 First Dates, Mike & Dave, and many more.

Experiencing Kualoa Ranch Fishpond Ocean Voyage

You’ll arrive at the Kualoa Ranch and proceed directly to the check-in desk where you can verify your tickets. You can head over to the waiting station that will be marked for the ocean voyage.

Boarding the bus

From there, you will be ushered to one of the Kualoa Ranch tour buses.

Kualoa Ranch tour bus

It’s your classic school bus which may conjure up good or bad memories depending on your childhood. It’s a short drive to where you need to go so either way you won’t be in here very long.

Boarding the boat

Once you arrive at the fish pond you will head over towards a dock but on your way you’ll see a location that was used in the show Lost.

I’m currently watching that series for the first time so I did not look into that scene very deeply but I believe it involves a submarine.

You’ll then head over to the dock where your boat is and it is in this little area where you can spot a lot of jellyfish.

You’ll then board a very interesting looking boat. It’s fully exposed to the sun so make sure that you have a hat, sunglasses, and sunscreen if you need it.

This boat is only used to take you across the fishpond so don’t worry, you will have shade on the catamaran.

Kualoa Ranch fish pond boat

The Fish Pond

As the boat takes you around, you’ll learn some of the basic information about the fishpond. Personally, I thought it was cool to ride around in an area with so much history dating back hundreds of years.

Kualoa Ranch Fishpond

You’ll also start to catch some of the amazing views looking back at the Island. The views only get better.

Kualoa Ranch Fishpond

Secret Island

Soon you’ll arrive at Secret Island. This is a beach that you have to pay to visit and it also is where they host special occasions.

As you stroll through the shaded path, keep your ear out for lots of birds singing in the trees. It’s a cool little place.

Kualoa Ranch Secret island

You’ll only be walking across Secret Island for a very short walk until you arrive at the beach where you will find your catamaran.

Kualoa Ranch Secret island

The catamaran

The catamaran is a pretty good sized boat and is a double-decker. There’s plenty of room for everybody.

Kualoa Ranch Fishpond Ocean Voyage catamaran

Most of the passengers decided to head to the top where you can have unrestricted panoramic views.

The bottom will give you all the shade you need and you’ll still have large windows to take in the view. Your belongings should be able to remain dry in the cabin pretty easily.

The front of the boat is known as the “wet zone.”

Kualoa Ranch Fishpond Ocean Voyage catamaran

As you start to pull away from the island, the views of the Koolau Mountains get even more impressive.

Kualoa Ranch Fishpond Ocean Voyage catamaran views

Usually, when we do a catamaran tour it is to get to something like a snorkeling destination so the experience is a bit more adventurous.

But this type of boat ride is just for people who want to get out and admire some beautiful scenery and enjoy some time on the water.

Kualoa Ranch Fishpond Ocean Voyage catamaran views

You’ll no doubt be able to get some great photos.

You also get a good view of the island Mokoli’i also known as the “Chinaman’s Hat.” Apparently, during low tide you can walk all the way out to the little island.

Hawaii "Chinaman's Hat
Hawaii "Chinaman's Hat Oahu

At some point, you’ll probably stop at this little reef area that is known for sea turtles. We ended up spotting one juvenile sea turtle which was pretty cool.

But it was only so exciting because the day before we had an awesome encounter with large sea turtles while scuba diving.

And that’s something I would point out about the tour. It’s not really catered toward people looking for more adventurous things to do and I feel like it’s better for those looking for low-key experiences or for families.

Still, if you have not had a lot of close experiences with the turtles in Hawaii then they can be fun to spot from the second level.

If you happen to be on a honeymoon then it’s said that the number of turtles you spot will determine the number of kids you have. So be careful looking too hard for those turtles!

Even though the turtles were not coming out in full abundance, the views from this area are pretty amazing.

Back at the Fish Pond

After you arrive back at Secret Island, you’ll head back to your boat and then you will have your official tour of the Fishpond.

You’ll be taken around the shore and learn more about some of the movie scenes and the vegetation including the invasive mangroves. Nothing really blew my mind but it was still interesting to learn a few things about the pond and how it worked.

And once again, those views just never get old.

The one clearing area with the palm trees is a spot used in a lot of movies. It’s the spot where Owen set up his bungalow in Jurassic World.

The one major drawback I had about the tour is that I called ahead of time to see how to get access to this area used in Jurassic World.

I was told that this tour would give me access and I booked this tour solely because of that since our main goal heading to Hawaii was to capture all of the Jurassic Park filming sites.

We did not get access though and instead just got a view of it while passing by.

Kualoa Ranch initially pushed back on my complaint but after going back and listening to my phone call (which I didn’t know was recorded) they admitted that they messed up by telling me this tour would give me access to that area.

It wasn’t a huge deal but it did throw off my plans for getting lined up movie shots which was my main goal for this tour.

It also ate up a couple of hours of our day that I could’ve used to get other more useful shots.

This would probably be less of an issue for your average tourist but for a travel blogger meticulously planning out visits for content, it becomes a pretty big nuisance when things like this happen.

I was glad they eventually came around to understanding where I was coming from but I felt like they did very little initially which kind of put a bad taste in my mouth, especially because I really do love this place.

After the fishpond we arrived back on the dock and then took the bus back to the ranch.

Final word

Overall, I enjoyed the tour because I thought it was cool to actually ride around in a historic fishpond and learn about the role that these ponds played in ancient Hawaii. The scenery is also pretty stunning so you have the opportunity to get some fantastic photos.

I was bummed that I wasn’t able to get the photos I was primarily focused on getting for our Jurassic World piece and that the customer service seemed to not be very customer friendly. But they did later get with me and make things right so it does seem like they wanted to make customers happy in the end.

Luau Kalamaku Review (Kilohana Plantation, Kauai) [2022]

If you’re visiting the Hawaiian island of Kauai and looking for one of the best luaus then make sure you consider Luau Kalamaku.

Attending this luau was one of the major highlights of our ten night trip to Hawaii and in this article I’ll give you a complete breakdown of what to expect and how to make the most of your visit.

What is the Luau Kalamaku?

The Luau Kalamaku is one of the most popular luaus in Kauai. It’s a theatrical luau that tells the story of the remarkable voyages between the Tahiti and Hawaii Islands through song and dance.

In addition to the show, you can enjoy a Hawaiian feast, take a historic train ride around the plantation, browse local artisan stations, and enjoy some other traditional activities.

Looking for tickets to the Luau Kalamaku? Book your tickets here.

Luau Kalamaku schedule

Here is the Luau Kalamaku schedule:

5:00pm to 6:00pm: Artisan market

Things start to open up at 5pm and you can stroll through different stations on the back lawn. If you booked a ticket on the Kilohana Plantation Train, the train will leave the depot at 5:30pm.

6:15pm: Hawaiian Imu Ceremony

At 6:15pm you can listen for the sound of the conch shell, which will begin the traditional Hawaiian Imu Ceremony. We missed this sound so you might want to just head over to the ceremony area at around that time.

6:30pm to 7:30pm: Dinner

At 6:30pm, dinner will begin followed by dessert and coffee if you wish. Things will already be started on the stage with traditional hula dancers.

7:30pm to 8:15pm: The show begins!

At 7:30, Luau Kalamaku begins and it lasts approximately 45 minutes.

8:15pm: Photo sessions

Right after the show, you can get special photos with the cast.

Luau Kalamaku

Where is the Luau Kalamaku?

The Luau Kalamaku takes place on the Kilohana Plantation and is located at: Depot, 3-2087 Kaumualii Hwy, Lihue, HI 96766. It’s just outside of the city of Lihue on the southeast side of the island.

Kilohana Plantation history

The Kilohana Estate history goes back to 1896, when plantation manager Albert Spencer Wilcox, one of the original missionary families, first developed it as a working cattle ranch.

Later on in 1936, his nephew Gaylord Parke Wilcox took it over and built the first mansion on the island. It was an immaculate and modern building designed by a famous British architect, Mark Potter.

The house has been restored and it is free to visit today.

So in addition to the luau experience you might want to just give all of the Kilohana Plantation a visit to check out the 16,000-square-foot mansion and all of the shops within and around it.

If you think that you’ll be working up an appetite then give the highly rated Gaylord’s restaurant a try.

Of course, if you book the VIP package then you’ll get a four course meal and the VIP luau seating which is highly recommended.

You can also check out the Mahiko Lounge bar for happy hour and the rum shop.

Experiencing Luau Kalamaku

Parking

The plantation has a huge (free) parking area so finding parking should never be an issue. In our case, the staff ushered us through a dirt path where we were able to find a parking spot in the grass.

Luau Kalamaku parking

Arriving

Your first move will be to the check-in desk where they will verify the type of ticket that you have and show you where you need to go.

From what I could tell, you either get pointed towards the main entrance to the luau or if you booked a train ride, you will get pointed towards the train station.

Kilohana Plantation Train

Easily my biggest regret is not riding the Kilohana Plantation Train.

Just a few days prior, we rode the Pineapple Express at the Dole Plantation and it wasn’t exactly the most riveting experience, so I kind of wasn’t in the mood for another meh… train ride.

But when we arrived at the plantation I realized that this was actually a full-sized train that looked like it would be a fun ride.

Plus, it’s one of two heritage railways in Kauai, complete with flatcars that were originally built in 1941 at Pearl Harbor by the U.S. Navy. History always seems to come together in Hawaii.

Kilohana Plantation Train

I also found out that the train depot was used in one of Disney’s biggest new movies, Jungle Cruise. Take a look at the photo I took from the movie and pay special attention to the lattice at the bottom of the building.

It totally lines up with the train depot which is just amazing.

We were just wrapping up checking out all of the Jurassic Park filming sites in Kauai so it was cool to stumble upon another big time movie location.

If for some reason the train is full when you arrive or you forgot to book you a ride, they offer train rides throughout the day so you can always come back and check it out.

Anyway, the train is a 40 minute conductor narrated train ride through a 2.5 to 3 mile rail line with mahogany train cars.

It will take you through the plantation where you’ll see mango, banana, papaya, pineapple, (and other fruits) and it will offer you the opportunity to feed the pigs, goats, sheep, and their friendly donkey, Stiney.

So this is definitely a kid friendly/family type of attraction.

Kilohana Plantation Train map

Getting leid

If you’ve never been leid before get excited because you will have your opportunity when you arrive at the luau! They choose to give women a floral lei and men a shell lei.

The shell leis for men are pretty thin and don’t really stand out that much.

So if you are a man looking for a shell lei that stands out a little bit more consider bringing your own. Personally, I really liked the look of the black nut leis.

Also, women might think about wearing something that contrasts really nice with the purple lei. If you’re not sure what to wear to the luau, check out my article on luau outfit ideas for men and women.

While you can pretty much wear whatever you want to, it’s fun to come “properly” dressed for a lua.

Woodworks

If you’re looking for a memorable Hawaiian souvenir, this luau might just be the place to get it.

Right near the entrance you’ll see a woodworker who is creating brilliant wood pieces right before your eyes.

As you can imagine these are going to be a pretty penny for the larger ones but I would highly advise you to check them out because you might find something that you really love.

Get there early though because the best pieces may already be gone later on.

Luau Kalamaku woodwork

Picture time

After you enter you have the opportunity to get your photo snapped by a professional photographer.

Open Bar

Something that will certainly excite a lot of people about this luau is the open bar.

I actually don’t drink so I was not able to personally experience the drinks but Brad said they were good but very sugary in their sugar-to-alcohol ratio.

The bartender did serve me up some sort of virgin tropical drinks which were extremely refreshing.

The bar is in the rear of the pavilion. Initially when we arrived there was a pretty long line but it got short very quickly and then I never noticed it getting backed up again.

Here’s a look at one of the drinks they were serving up — it’s a very tempting blue. They also serve mai tais.

Luau Kalamaku drinks

And here is that delightful tropical drink that they made for me, complete with a fresh pineapple slice.

Luau Kalamaku drinks

Restrooms are located just outside the back exit near the bar.

Artisan Market

Before the show starts you’ll want to check out the artisan market.

It’s a mini-market with around six or seven different stations where you can find local crafts. They had some pretty cool items like tiki pet collars, Hawaiian wooden cell phone cases, and lots of bags and jewelry.

I also saw some people getting henna tattoos.

Personally, I was most interested in the woodworking near the entrance but they had some cool stuff over here too.

Dinner

When doing research for different luaus, I saw very mixed reviews for the dining experiences.

Some luaus really seemed to deliver while others served up pretty mediocre dishes. So I went into this a little bit nervous about the quality of dinner.

Fortunately, the dinner ended up surpassing expectations.

First, they came around and served the table a bowl of salad and allowed us to fix our own plates.

Luau Kalamaku salad

Then they came by with some warm rolls which were great with butter.

Luau Kalamaku dinner rolls

And then it was time for the buffet.

I was kind of dreading the buffet because there were so many people and it just seemed like it was going to be madness.

But then I picked up on their system which is to call on certain tables to proceed to one of the buffet lines (I think they had four?). It actually was a pretty orderly process.

Because of the pandemic they did ask us to put on gloves before heading to the buffet. It was kind of a nuisance trying to put on those thin gloves but I’m sure it kept things more sterile so I did not mind.

The buffet had a lot of pretty solid options.

I thought that the teriyaki chicken and pork was terrific. Some of the other items like the rice were also pretty good.

Luau Kalamaku dinner plate

During your meal don’t focus on your food too much because you might miss some traditional hula dancing on the stage!

Luau Kalamaku hula dancer

After people have had their main dish then there is the call for dessert.

I wasn’t totally crazy about the dessert options because they just really were not my style of dessert which is basically just anything chocolate. Still, they weren’t bad. You can’t go wrong with pineapple upside down cake.

Luau Kalamaku dessert

After dinner there will be a short break and then the show will soon begin!

The performance

I thoroughly enjoyed the performance but there are a couple of things you should do to help you to truly appreciate the performance.

The first thing you want to do is secure yourself a good view of the stage. After everyone is finished eating, they will encourage everyone to point their seat toward the stage.

Yes, your seats are assigned but you still might be able to slide your seat one way or the other to optimize your view.

The great thing about the stage is that seats surround the stage so it’s really easy to get a good view. Once again, if you want to secure a great view look into the VIP package.

Luau Kalamaku stage

If you are in one of the aisles don’t protrude out too much because they will ask you to move in due to the performers running through with fire and what not.

This is why I highly recommend you looking into one of the VIP packages because you can have one of the best views in the house without having to risk your hair catching on fire.

Just be ready to potentially put on your dance moves if you are sitting close to the stage. At a couple of instances, the performers came out to the crowd looking for volunteers to join in.

Some people declined but there was one kid who volunteered and learned a few moves on the spot. If he had not accepted I think they would’ve asked us next!

The other thing you want to do is to refer to your program for context of the show.

It will have a breakdown of every scene and what is going on and you can use that to provide yourself with some context as to what is going on with the performers.

I found myself referring to it several times throughout the evening and it helped me to appreciate what was going on on stage.

It will be a huge help because it’s not always clear what is going on.

But the gist of the show is that it’s telling the story of ancient Polynesia and the voyages they took between the Tahiti and Hawaii Islands by focusing on one family’s courage and vision.

Luau Kalamaku

I was really impressed once the drumming began and the energy levels instantly rose. Apparently, the drummers make their own drums by hand which I thought was really impressive.

It can be a pretty adrenaline inducing experience to watch these passionate performances, especially if it is your first time witnessing something like this.

Luau Kalamaku
Luau Kalamaku dancers

The costumes and accessories are pretty extravagant, and with the sound system and all of the lighting you quickly realize just how theatrical this luau is.

Luau Kalamaku dancers

The cast wears a lot of different outfits throughout the performance and it’s always interesting to see the different variations they come out with at the start of each scene.

Luau Kalamaku dancers

And then towards the latter part of the show, out comes the fire!

I’d have to say that no luau would seem complete without a good fire show and they definitely put on a good one here.

Fire poi-balls swing and traditional fire knife dancing steal the show, which is no surprise considering that “Kalamaku” in Hawaiian, means “flaming torch.”

You know it’s about to get intense whenever they raise the cage.

Luau Kalamaku fire dancers
Luau Kalamaku dancers

And then before you know it the luau is done and you can get pictures with the crew if you’d like.

Luau Kalamaku cast

Final word

This was a very enjoyable evening and I would definitely recommend it to other people. Judging on the quality of the production, I would guess that this is probably one of the top luaus in Kauai.

Looking for tickets to the Luau Kalamaku? Book your tickets here.

Manoa Falls Trail Review and Guide (Oahu, Hawaii) [2022]

Manoa Falls Trail is one of the most popular and beautiful trails in Oahu, Hawaii.

But is the trail worth it and what can you expect?

Below, I’ll give you a thorough guide so that you know exactly what you are getting yourself into when you head out to the Manoa Falls Trail.

What is the Manoa Falls Trail?

Manoa Falls is a short and relatively easy hike in Na Ala Hele, Honolulu, that takes you through stunning jungle terrain on your way to a beautiful 150 foot waterfall.

In total, we hiked 1.94 miles with 600 feet of elevation gain and completed the hike in 56 minutes.

Tip: Use the free app WalletFlo to help you travel the world for free by finding the best travel credit cards and promotions!

Where is the Manoa Falls Trail?

I struggled to find an exact address to the trailhead for Manoa Falls Trail.

However, if you put the following location in Google Maps it will take you very close to where the parking is: Mānoa Falls Trail, Na Ala Hele, Honolulu, HI 96822.

You basically just need to get to Manoa Road and then follow it until you get to the parking station.

It’s about a 15 to 20 minute drive from Waikiki and because you don’t have to do any off-roading to get to the trailhead, it’s extremely accessible even in a rental car.

That’s both good and bad because it means that everyone else can get there easily and you might have issues with crowds if you don’t start early enough.

As you travel along Manoa Road, you’ll see someone at a little cart in the middle of the road who is collecting payment for parking and that is when you will know that you are close.

The parking lot sign says that the hours are 8 AM to 6 PM. However, we arrived at about 7:30 AM and there was an attendant already there.

The Manoa Falls parking fee was $7.28 and I’m sure that it steadily increases every couple of years.

I heard that you can park in the residential areas to avoid the parking fee but I’m always nervous to park in residential areas when I’m unfamiliar with the towing policies and local customs. Plus, I think that adds on close to half a mile.

I figured the money would go to support the park anyway so it was not a big deal.

Related: Jurassic Adventure Tour Review (Kualoa Ranch) 

Manoa Falls parking lot sign
Manoa Falls parking attendant

They will give you a little ticket which you need to display on your dashboard so that you avoid getting fined.

Manoa Falls parking receipt

We arrived just after sunrise and did not have an issue finding an open parking spot. This trail does seem to get very busy so at times this parking lot might be full.

Manoa Falls parking lot

From that parking lot, you’ll see a little staircase poking out the vegetation and you’ll start there. The actual beginning of the trailhead is just a little bit ahead of you.

Read: Uber vs Turo in Honolulu, Hawaii (Which is Cheaper?)

Manoa Falls parking trail entrance

On the way in, we spotted a couple of wild chickens and roosters. The roosters on Oahu are not nearly as numerous as the ones in Kauai but I always enjoy seeing them.

Manoa Falls rooster

From that staircase, you’ll be walking along a paved road which I believe you might be able to drive on but it’s a short walk anyway so it didn’t really matter.

It’s possible that this road leads to more parking options but those might be for the Lyon Arboretum.

After a really short walk, you’ll see the trailhead sign which is pretty much impossible to miss with its bright yellow letters.

Related: Dole Plantation Review (Worth it or Tourist Trap?)

Manoa Falls trailhead

Manoa Falls Trail Experience

You can view my hiking map above to get a sense of the trail but below I’ll go into detail with a lot of photos and descriptions.

What’s great about this trail is that the stunning scenery doesn’t take long to arrive.

Once we stepped foot on the trail, I was immediately impressed by the canopy of trees above us.

Manoa Falls canopy

At about .2 miles into the hike you’ll head through a shipping container which will open up to a stunning area with vine covered trees that looks like something out of Avatar. We’re talking lush.

Manoa Falls shipping container
Manoa Falls trees vines

This was my first true encounter with Hawaiian vegetation and it seriously blew my mind. If you are new to Hawaii, this really is a perfect introduction to the beautiful jungle landscape.

Manoa Falls trees vines

The Waihi Stream runs through this area which adds a lot of beauty to the scene and probably explains the super dense vegetation.

Once you pass that area up the scenery gets tighter and you’ll be on your way to the falls.

Manoa Falls trail

The trail throughout the hike is pretty easy to navigate — I couldn’t imagine getting lost.

If you are doing the trail after a rain then I could see things getting pretty slippery at a few spots, though. That’s probably the biggest challenge this trail has to offer. Otherwise, I’d rate this trail as easy.

Also, you need to watch your head on a couple of occasions because you may have some branches hanging pretty low.

Don’t be like me and forget you have a trekking pole sticking out of your backpack.

Manoa Falls trail

On a couple of occasions, you’ll head over a few peaceful stream crossings. You won’t need to cross the stream yourself but the creek will be running by your side. Be looking to your side so you don’t miss a few nice photo ops.

Manoa Falls trail creek

At about .6 miles into the hike you come across a beautiful bamboo forest.

Manoa Falls trail bamboo forest

After that, you’ll encounter this little area that has a few interpretive panels to give you some background information on the area’s wildlife. I didn’t realize how many species have gone extinct in Hawaii.

Other than birds, we did not encounter any wildlife on our hike but you could hear those birds making all sorts of noises throughout the jungle.

This spot also has this gnarly looking archway to check out under the trees.

After this point, you’ll begin the steepest part of the hike. You’ll be gaining about 250 feet in about a quarter mile. That’s a decently steep grade but because it is only about a quarter mile, it’s not bad.

Because of the steeper terrain, this is where you need to be careful if you’re dealing with wet or muddy conditions. I found the trail to be just a little bit slick but we also visited during a pretty dry time.

I could see this stretch of the hike being a little bit treacherous if you’re coming during a wet time, especially on the way down.

So just take your time and you should be good. If you have a trekking pole or two it might be a good idea to bring it out for this stretch of the trail but it’s really not that bad.

Just when you start to feel a little bit of a burn in your legs, you’ll probably see the falls in the distance. At this point, you’re very close to the end and so hopefully the sights and sounds of the falls will keep you going.

Manoa Falls trail

Notice how there are two tiers to the waterfall.

Manoa Falls trail

As you get close to the falls, there’s another interpretive panel that will provide some history on this area.

You’ll also see a trail junction for the Aihualama Trail. I heard that the trail was not that impressive but I can’t personally vouch for that.

It also looks like there is another trail located off the Aihualama Trail that will take you to Upper Manoa Falls.

I believe that trail requires route finding, scrambling up slippery tree roots, and is considerably steeper than the trail to the lower Manoa Falls.

I wouldn’t attempt that trail unless you are very confident in your climbing abilities. The views from up there look pretty amazing, though.

However, we did not venture on any of the side trails because we had a few scuba dives coming up and were trying to conserve energy.

Anyway, once you pass the Junction for the trail, you are basically at Manoa Falls!

There had been little rain when we visited so the falls were not exactly raging but it was still a pretty cool site.

Manoa Falls

We started early in the morning and were lucky that we were able to enjoy the falls to ourselves.

But as we were making our way back to the trailhead things start to pick up so just be aware that this trail looks like it can be extremely busy.

Manoa Falls base

Once you get to the falls, you’ll notice a few signs that prohibit you from going forward.

There’s a few things to say about the signs.

First, it’s confusing because they say something along the lines of “do not proceed further.”

Yet, they are positioned in different areas so it makes you wonder why are they telling you “do not proceed beyond this point” when each point is located at a further spot.

One thing I realized in Hawaii is that these type of “DANGER: YOU WILL DIE” signs are located in many spots and often times it almost seems like more of a suggestion….

For example, we were headed to a beach area that had a sign that said do not proceed yet we continued on with a lot of other people and it was not a problem despite police hanging out right by the entrance.

It seems like these signs almost function more like warning signs about dangers like fallen rocks or steep and slippery terrain.

Perhaps given the high volume of tourists who tend to be inexperienced adventurers they feel the need to place the signs at the spots?

I’m not saying to ignore all of the signs or that you won’t get in trouble for disregarding them but they just don’t seem as “official” as you might think.

(I would definitely respect trespassing signs for private property, though.)

As far as getting into the water at the base of the falls, it’s said that the water contains some type of bacteria that can cause Leptospirosis, which is common in tropical climates.

Reportedly, it can cause mild to moderate flu-like symptoms that can last for up to 1 to 2 weeks

People still get in the water for those amazing photographs but if you’re not one to risk your health, you probably don’t want to take the chance.

The way back is pretty quick and easy but again going down is usually more difficult on slippery terrain so be careful.

The sun was just coming up above the tree line on our way out which made for some really beautiful lighting so I highly recommend a morning hike here.

Paradise Park

The entrance to Paradise Park is located right before you arrive at the parking lot. It’s basically right where the guy sitting in the middle of the road collecting payment for parking is located.

If you’re not aware, Paradise Park is an abandoned exotic bird zoo. It was once a major tourist attraction but was closed down in 1994.

Now, it is overrun with jungle terrain and it’s been featured in some movies like Jurassic World and shows like Lost.

Paradise park
Paradise park

Based on my research, I thought Paradise Park would be some area you could explore on your own but that was not the case. It was completely closed off to the public.

The only thing it offered was a little shop/restaurant where you could buy things like pineapples and other refreshments like Dole Whips and some types of food. (They did have some bathrooms, too.)

I’ve seen videos of people exploring Paradise Park so either things changed or they just decided to trespass.

You can still get a glimpse of it from one of the walkways but as far as exploring everything (legally), that’s not really an option as far as I can tell.

Final word

Manoa Falls is a great hike for people looking for a beautiful introduction into the jungle terrain of Hawaii. Given it’s easy access and close proximity to Waikiki, this is a great first hike to do in Hawaii to get your feet wet.

You’ll just need to start early to avoid the crowds and think about if you want to venture on any of the side trails that will be more of an adventure.

1 2 3 4