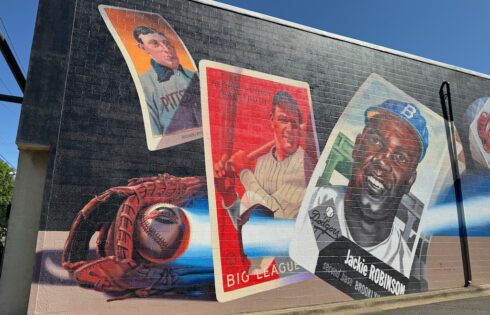
My Time in the Manly Shark Tank

The thought of being submerged in a confining water tank with sharks seemed like the ultimate adrenaline rush. So when I found at that I could enter a shark tank at Manly Sea Life Sanctuary near Sydney, Australia and do such a thing I knew I had to do it. Despite having what I’d call a “reasonable fear” of sharks, I felt like this would be something that I would remember for forever. So a few friends and I booked our day with the sharks and this is how it went.

Tip: Use WalletFlo for all your credit card needs. It’s free and will help you optimize your rewards and savings!

Day of the shark dive… annnnd I’m sick

The morning of the shark dive I woke up in sweats and with severe coughing and sneezing. This was the last thing I needed because the instructors actually stated that they would kick you out of the tank if you’re coughing and sneezing. (Those two things don’t mix well with SCUBA breathing devices). So to keep me from coughing during this half-hour “dive” I drugged myself with cough syrup (non-prescription I think) right before I entered the tank. And just in case you’re wondering, there’s no rain-check for the shark dive. I paid in advance and the only option other than me losing my money was to find someone else who would pay to dive in a tank with the sharks and that’s not generally something that happens everyday.

Man taking Cough Syrup

They instructed us to show up at the aquarium about an hour beforehand for training and instructional videos. The videos provided us with basic safety advice and also showed us how the instructors would be communicating to us via hand signs. These hand signs were usually just gestures asking you things like if you are okay but some literally meant “hey, there’s a shark behind you.” They are all pretty simple and self-explanatory so we didn’t have to learn anything extensive. Once the video was all done we were ready to head to the changing rooms and put on all of the gear.

Outside Manly Sea Life Sanctuary

That water temperature, though…

Because we did this during the Australian winter the water was freezing (at least 60ºF/15ºC) and they gave us additional wet suit gear like hoodies, gloves, and thick booties to keep us warm. In order to allow our bodies to warm up faster and reduce the shock of the cold water the wet suits they gave us were already wet (and cold). Each layer of SCUBA equipment just seemed to add to the coldness and I couldn’t wait to just get into the cold water to warm myself up. After strapping on extra layers of vests, weights, and the tank, we were finally ready to enter the “training pool.”

Scuba divers in water tank at Manly Sea Life Sanctuary
Going through safety procedures before entering the tank.

The training pool is basically a small swimming pool that happens to be connected to a tank with sharks in it. As we entered the water it was cold but not nearly as bad as it would have been without the wetsuits. The instructors had us go through a series of tests to ensure that we knew what we were doing and knew how to work the breathing apparatus. If you’ve ever done an introductory SCUBA course, you know what drills I’m talking about (blowing water out of your goggles, locating your respirator, etc.). Finally, once you’ve proven yourself to the instructors they go over all the hand signs one last time, take a lovely group photo of everyone, and then you are ready to enter the tank!

Scuba divers in water tank at Manly Sea Life Sanctuary

There’s an opening on the side of the pool where you swim through and then set yourself up on an underwater platform. Once everyone is out you then drop off the platform and you’re officially in the tank and ready to see some sharks, except there’s even more build-up. The area of the tank with the sharks is actually on the opposite side of this big tank so you have to hop like an astronaut over to that area. It’s a little difficult to walk with all the equipment but manageable. At one point,  we actually had to hurdle over the viewing tunnel beneath us to get to the other side. The staff assisted us through the whole process and it was actually pretty fun and will make you feel as if you’re undergoing NASA training.

Scuba divers in water tank at Manly Sea Life Sanctuary

Those couple of minutes heading to where the sharks reside are like the calm before the storm. All you can hear are the respirators and there’s tons of little fish darting around and even a few sea turtles passing by. One thing you won’t miss is the giant stingray lying on the floor. This thing looked as big as a Volkswagon and had multiple barbs sticking out with the largest looking to be at least a foot long. Still, it’s a rather peaceful experience as you make your way through the tank, waving at your friends along the way through the viewing tunnel.

Scuba divers in water tank at Manly Sea Life Sanctuary

Once you’ve hopped around the aquarium for a few minutes, you’re finally in the sharks’ lair. The instructors then line you up along the side of the viewing  tunnel. You’re basically standing on a small ledge with your hands on the glass in front of you. With all of the weighted equipment you must be careful and not lose your balance. The staff told us some pretty hilarious stories of people falling onto their backs only to be helplessly stuck. I wasn’t about to let that happen to me so I made sure to keep solid footing.

Scuba divers in water tank at Manly Sea Life Sanctuary

The first sights of the sharks

I had the privilege of being the one on the outside of the line, furthest into the shark area. For some reason the instructor assumed I was the mastermind behind our visit to the shark tank and decided that I’d enjoy the position closest to the sharks. After only about five seconds of standing up on the ledge I saw the first shadowy figure begin to drift towards us. It was one of the biggest, (perhaps the alpha?), Grey Nurse Shark in the tank and I could almost hear the Jaws theme song playing in my head. I’m not gong to lie to you, as soon as I saw it drawing near, s*** got real and I got a little anxious. My adrenaline was rushing and the whole thing just felt surreal. I couldn’t believe that an actual shark was slowly approaching me and there wasn’t a cage, wire, or anything between us — just water.

Scuba diver with nurse shark at Manly Sea Life Sanctuary

For some reason I felt the need to hold my breath as the shark coasted nearer and nearer. As many of you know, holding your breath during a SCUBA dive is a big no-no. I’m pretty sure it was just my natural reaction to the thought of the shark going rogue and biting my face off. After the shark was right in front of me I finally got the courage to look the shark in the eye. When I made eye contact with the shark, almost instantaneously the shark’s jaw popped open a few inches. “Nope,” I thought and looked away. But as I looked away the situation became more dynamic. As soon as that shark started to pass by me, I spotted another shark coasting in. And then another. And then another. Within minutes, sharks were roaming above, below, and everywhere in between me.

Tip: Use WalletFlo for all your credit card needs. It’s free and will help you optimize your rewards and savings!

Scuba diver with nurse sharks at Manly Sea Life Sanctuary

Some of the sharks were much smaller, with pointier snouts and a bit less menacing, but all of them had the infamous Nurse Shark jagged teeth that just scream “I can eat you if I wanted” (they really can’t but still). After seeing the third or fourth shark, it was clear that the swarm was officially on and these curious beasts were out to investigate us foreigners.

I kept reminding myself that these weren’t “man-eaters” to keep myself calm but there were a couple of problems with that: 1. it’s easier said than done when you’re surrounded by circling sharks of any type and 2. the googles cut off your peripheral vision so that the sharks constantly sneak up on you from the side. This is especially true if you are the one furtherest into the shark territory as I was. In the photos below you can see me looking right at the camera one second and then startled by a shark suddenly appearing in my line of vision. (This is one reason you definitely want to pay attention to the signals coming from the instructors.)

Scuba diver with nurse shark at Manly Sea Life Sanctuary

Brushing shoulders with a shark

One of the weirdest things about the entire experience was the few times that I think the shark fins scathed my head/shoulder. I’m still not 100% sure if it was a shark, fish, instructor playing some kind of sick joke, or perhaps me just being a bit paranoid but once or twice I felt a gentle brush on my shoulder/head area. It wouldn’t surprise me if it was a shark each time because of how close they got to me each time they cruised on by.

Scuba diver with nurse shark at Manly Sea Life Sanctuary

Needless to say, the first few minutes took quite the adjustment in order to settle my nerves and get comfortable. But after a few minutes, I began to relax and finally began to breathe a little easier. I realized that these sharks weren’t beasts out to collect their dinner, they were just curious creatures like just about every other aware and living thing on earth. And not only that, but the sharks were beautiful. Sure their teeth are pretty atrocious and their eyes are nothing short of terrifying but their fins and bodies are a brilliant silver color underwater it’s quite the sight to see.

Scuba divers with nurse shark at Manly Sea Life Sanctuary

Also, you don’t realize how graceful sharks are until you’re underwater right next to them. They just coast on by effortlessly with their giant bodies. By about the 15-minute marker, the sharks and I might as well have been best buds going for a dip. I didn’t seem to be bothering them at all and they weren’t bothering me at all. Now sure you could argue that these sharks have been conditioned to be peaceful when presented with humans and that’s perhaps a valid point but there’s still something to be said about having such a harmonizing experience with sharks, albeit in captivity.

Anyway, once we got acclimated to the sharks, my friends and I were waving happily at the spectators (and our friends) in the underwater viewing tunnel. The staff (which are awesome by the way) were also doing a great job of panning around with their underwater camera getting some awesome shots and video of us with the sharks. At that point, it was getting better by the second but before I broke out into my victory dance I started to shiver due to the cold.

Scuba divers with nurse shark at Manly Sea Life Sanctuary

And the cold returns…

Remember, I was battling a severe cold that day and about 20 minutes into the dive the temperature was starting to get to me. The shivering started with just my hands and then worked its up to all of my arms and legs. It was even a little difficult to breathe (though the gallon of cough syrup I had may have had something to do with that). I knew that getting into the cold water of the shark tank when I was so sick wasn’t exactly smart, but I wasn’t about to cut my time short with the sharks.

Finally the time was up. As we were ushered back to the other side of the aquarium and back into the changing area I was on what some would call a “natural high.” While high on life, I was pretty low on temperature. Luckily, they offer you a nice hot shower upon exiting. And let me tell you that hot water feels like heaven. That was probably the most enjoyable shower I’ve ever taken and trust me if you do this during the winter time you will love every second. After the shower we gave back our wetsuit gear, collected our CDs with video and tons of photos from our dive, received our shark dive certificates, and then were off on our way back to Sydney.

On the way back, I had some sort of hypothermic reaction and my temperature shot up extremely high. Incessant shaking was followed by a bad dose of the sweats and a temperature rising well over 100ºF. I didn’t get any sleep that night and certainly felt like crap the next day. However, there isn’t any part of me that feels that this experience wasn’t worth every penny and bit of healthiness it took from me. Being able to come into contact with the sharks and coming away with a new sense of appreciation for these animals was priceless. Sure, I’d prefer to have been out in the ocean with these creatures in their natural habitat, but at that time, it felt good enough just to say that I survived the “shark tank.”

Iceland: Quick Tips for a Great Experience

Brad and I recently took a week-long trip to Iceland in late August 2014. The trip didn’t go as expected to the say the least. We both came down with severe flu-like sicknesses and it pretty much kept us from being able to see everything we had listed on out itineraries. After looking forward to visiting Iceland for so long, it was a huge bummer to say the least. However, we were still able to see some of the attractions and  even though we weren’t able to make it out to every site we wanted to, we got a good feel of the layout of Iceland. So here are a few pointers for planning an amazing trip to Iceland.

Like snow? Want to see the northern lights and still have some daylight? Visit in March.

Maybe you’ve already decided on the time of year you will be heading to Iceland but if you haven’t then there are a few things to keep in mind. My personal recommendation is to go in the spring. Here’s why: if you go in March you can see the northern lights above beautiful glistening snow, still have enough daylight to explore some of the terrain during the day, and you’ll be able to see some of the ice caves (not available in the fall).

Other seasons do have their advantages, though. Summer has endless daylight and so there is plenty of time for you to explore and the weather is very mild, though it is also peak tourist season. Winter will likely give you the clear dark skies that are perfect for northern lights viewing but that comes at the the price of having almost no daylight and blistering cold winter temperatures. As you can see, there will obviously be pros and cons for each time of year, but if you’re interested in the northern lights and like the idea of being around snow then late February or March is probably best time of year for you to visit Iceland. (For the record, a March visit just didn’t fit into our schedule and that’s why we chose to visit in Aug/Sept.)

Northern lights from plane

Tip: Use WalletFlo for all your credit card needs. It’s free and will help you optimize your rewards and savings!

Golden Circle is an easy day trip

The Golden Circle can be easily seen in one day. If you’ve begun researching things to do in Iceland you’ve inevitably come across the “Golden Circle.” If you haven’t heard of it, the Golden Circle is an area just outside of Reykjavik that consists of Gulfoss, the Geysir hotsprings, and Þingvellir National Park.  There are a few other locations that sometimes make the list as well. These “big three” locations can easily be seen within a half day and if you get an early start out to the area, you should definitely have enough time to see them all, relax for lunch and still get back to Reykjavik or another nearby city in time for your evening meal or check-in.

Strokkur

My favorite attraction out of the three would have to the geysirs. Although this area is home to the “original Geysir,” the geysir that you’ll actually see erupt is “Strokkur.” It seems to go off about every five minutes. It was my first geysir to ever see in person and it was pretty impressive. Unlike many other geysir areas, you are allowed to get right up next to it and even get sprayed a bit so be careful if you don’t want to get wet. One of the coolest things to try is to get a photo of the bulge just as the geysir is erupting as seen below. You can really make your Geysir experience into your own as well, as there are some trails that will you take you up on a hillside for some great views of the surrounding area.

Strokkur Geysir erupting

Þingvellir National Park

Þingvellir National Park was an interesting place. Personally, it didn’t really blow me away but it did offer some fantastic photo opportunities and also offers you the opportunity to say that you’ve stood between the two continents. On that latter point I was somewhat disappointed to hear that you can’t actually stand in between the ridge and touch the Eurasian plates and the North American plates. From what I researched, the Mid-Atlantic Ridge is so deep and vast that you can’t actually pinpoint any specific points where you could actually touch each side. Still, even if that’ true, the experience of knowing that you’re standing (somewhere) between these two vast tectonic plates is something I won’t forget and makes Þingvellir National Park worth the visit.

Thinglvr

Gulfoss

Finally, there’s also Gulfoss. It’s one of the most famous waterfalls in the world and is worth a visit. Because the weather was so bad we pretty much just ran out from the car, took a look at it, and then scurried back in to the car. Hopefully, you’ll run into great weather there and will be able to linger there for some time.

The Jökulsárlón (The Glacier Lagoon) is a must-see attraction

Glacier Lagoon

I find Jökulsárlón a little difficult to pronounce and even read so I’ll just refer to it as “The Glacier Lagoon.” The Glacier Lagoon is one of the most awe-inspiring sights I’ve seen and is probably the main reason why I wanted to visit Iceland in the first place. It’s the deepest lake in Iceland and giant icebergs slowly bob around the lake as they break off from a giant glacier. Between guided boat rides and walking along the black sand beaches, one could easily spend an entire day admiring the lagoon. One of the cool things about the lagoon is that your experience of the icebergs can be completely different depending on whether or not the sun is shining on them or not.

Glacier Lagoon

At the Glacier Lagoon, there’s a couple of parking lots that you can pull into just after you pass the bridge. When we arrived in early September around noon, there were hardly any cars in sight. However, I’ve heard that during peak season the traffic can pick up here. If weather permits, many people enjoy walking along the black sand banks that lead to the parking lot. And one thing you absolutely cannot forget to do is to visit the black sand beach on the ocean-side of the bridge. All you have to do it park on the opposite side of the bridge from where you are parked to see the lagoon and you’ll walk up on the beach. Sometimes the tidal conditions aren’t quite right but if you catch it at the right time you’ll see tons of ice chunks (some the size of automobiles) washed up on the beach.

If you’re making the drive from Reykjavik to Jökulsárlón the ETA on driving is 4.5 hours. But keep in mind that there are several amazing things to stop by and see along the way. These include the cliffs overlooking the black sands at Dyrholaey and the waterfalls of Selijalandfoss and Skógafoss, among many other interesting viewpoints. With that in mind, you may want to plan on that trip to the glacier lagoon taking closer to 6 or 7 hours. I recommend starting that drive early in the morning to maximize your daylight.

In addition to planning enough to time to get there and see other sites, I suggest booking at least one night in a nearby hotel, such as those in Höfn (see my hotel reviews below). If you spend at least one night in that area, then you’ll have the opportunity to catch at least one sunrise and/or sunset at the glacier lagoon, which will make for remarkable photographs. If you can’t spend a full night there then don’t worry; you can still fully appreciate the Glacier Lagoon just by stopping by and checking it out.

The Blue Lagoon is the ultimate experience in relaxation

See my tips for visiting the Blue Lagoon for more information about the Blue Lagoon. Right now, I’ll just say that the Blue Lagoon was the most relaxing experience I ever had in my entire life! You don’t have to indulge in the premium package that comes with a robe and meal to the Lava Cafe either; just taking a dip in it is an almost hypnotic experience. The water is the perfect temperature and you can easily stay in there for hours.

Man in Blue Lagoon

As far as what to consider when planning, I think that visiting this at the end of your trip, after you’re exhausted, is perfect. Also, if you wait toward the end of your trip you’ll have a better sense of where you stand financially and you can decide if you want to splurge at the Blue Lagoon with some of the premium packages, massages, etc.

So those are a few quick notes on these destinations. Here are a few general words of advice that will hopefully make your trip a lot smoother.

Getting around Iceland: I recommend choosing a rental car

Iceland is the perfect place for jumping in a rental car and making your way around the island. There are plenty of rental car companies to choose from and some of them are pretty reasonably priced, though you will have to book them well in advance if you want to catch those rates for the cheaper vehicles. We went with RED Rentals and they had great service and provided us with a great running car. They even will pick you up from the airport (though we missed that memo and took a shuttle to their office downtown).

There’s always an option to get around the country by bus as well. However, this option can still get a little pricey and some of the busses don’t run very frequently so you will have to plenty of research to make sure that you don’t leave yourself stranded for a few days in a less-frequented part of Iceland.

One option for the traveller willing to deal with the risks is hitch-hiking. Iceland has some of the safest hitch-hiking around and there are a lot of travelers doing it in the south area of the country. Of course, this always comes with a risk, but if you are on a shoestring budget then perhaps you could look into this.

Tip: Use WalletFlo for all your credit card needs. It’s free and will help you optimize your rewards and savings!

Phone Service

Upon arriving, we bought a Vodafone SIM card for our unlocked iPhones. Overall, the service was okay when we were near urban areas. However, it gave me a lot of trouble when I tried to pull up my internet browser outside of the major cities. In fact, the lack of service rendered my iPhone GPS maps useless. If it weren’t for my GPS in the rental car we would have struggled to find our way around. My suggestion: get a Vodafone if you feel you will need to use data around cities but don’t rely on your cell phone service to get you around the country.

Lodging: When to book

I suggest for those people looking to pursue the northern lights to await making their bookings until they arrive. I’ll post more on the northern lights at a later point, but the reason is I state for making last-minute bookings is that the weather can be so fickle and one side of the island may be cloudless while the other side is completely overcast. Waiting until the day-of to book hotels can be nerve-racking, however and so if that is the sort of thing that you’re not comfortable then perhaps just go ahead and play the odds and book ahead. But if you’re visiting in late August as we did, you’ll find there is no difficulty in finding available hotels on the day of or day before your planned booking (this would be less doable in the summer but the northern lights won’t be out so that’s not an issue).

Where to stay in Iceland?

If you’re not like us and you don’t mind sharing bathroom facilities then you will have a much easier time finding more affordable lodging across the country. However, if you are like us and you prefer to have private bathroom facilities in a hotel with decent reviews you should expect to pay around €125-150 per night and expect the options to be somewhat limited. We stayed at four different hotels and I am going to recommend two of them. Here are the two that I recommend:

  • Thoristun Apartments (Selfoss) (€126 per night) — The town of Selfoss is a good place if you are wanting to stay somewhere outside of Reykjavik after seeing the Golden Circle and perhaps want to get a jump start on your next day trip to the Glacier Lagoon or any other destination on the eastern side of the country. There are plenty of restaurants and I really loved that their traffic lights had smiley faces on the green lights. : ) As for our hotel, we really enjoyed our night at Thoristun Apartments. The customer service was exceptional and they will even let you check in early if you contact them ahead of time.
  • Seljavellir Guesthouse (Glacier Lagoon) (€168 per night) – Finding an affordable place near the Glacier Lagoon with private bathrooms is difficult. There are limited number of places to choose from but this place was pretty great. It’s a small hotel with probably only eight or ten rooms but it is very new and very clean. Because tidiness is a big thing for me I give this hotel an A+. The hotel is also close enough to Hofn that you’ll have no trouble heading into town for lunch and/or dinner. (Though breakfast is available at the hotel we didn’t try it so I can’t comment on that.)
Outside of Seljavellir Guesthouse
A view from outside of Seljavellir Guesthouse

The food is pricey and not exactly overwhelmingly delicious

I’ve got to be honest, overall, I wasn’t too impressed with the food in Iceland. A lot of that probably has to do with the fact that I was so sick but I think some of it is just the way it is. I’ll say this, there are plenty of restaurants where you can find some quality lamb dishes and seafood like lobster. You can’t really go wrong with those dishes. I also tried some other American foods that I heard good things about in Iceland like hotdogs and pizza. I wasn’t too impressed with either of those but I did have a couple of great burgers during my stay in Iceland. Finally, there are some of the local dishes like cured shark and Puffin… I was a little too sick during my stay to even contemplate trying to stomach those so my take on those foods will have to wait until next time.

One last thing about the food, if you plan on eating out at a decent restaurant you should plan on paying $40 to $50 USD for a meal for two. The one drawback to Iceland is that eating out is so expensive and you don’t always feel like you’re getting your money’s worth. For that reason, try to load up on sandwiches or some other cheaper food during the day or save them for dinner to keep the costs from getting too high. One thing that you can do is rent an apartment that comes equipped with a kitchen and cook your own meals. That will cut down on your costs a lot.

This is only the tip of the iceberg

Remember that I’ve only covered the tip of the iceberg when it comes to things to do in Iceland. I almost didn’t want to make this post because I felt like my Iceland experience was so cheated from being so sick. Just remember that there are a million more things to see and do in Iceland and that it is a unique landscape that you will never forget upon your visit.

The British Museum: Experiencing the “Museum Effect”

The British Museum is often considered one of the top things to do in London. That should come to no surprise as the museum is free to enter and holds a vast collection of at least 8 million objects. One of the most fascinating facts about the museum is that only 1% of those objects can be on display at once, mostly due to light sensitivity. Even with only a small fraction of the objects on display, however, there is plenty to keep you occupied for hours.

Entrance of the British Museum
Outside the entrance of the British Museum

This article is by no means a comprehensive look at the exhibits of the British Museum but rather a highlight of some of the key exhibits and attractions that we looked at, such as the Greek Parthenon Exhibit and a few other key sites like the Rosetta Stone and the Easter Island Statue.

Tip: Use WalletFlo for all your credit card needs. It’s free and will help you optimize your rewards and savings!

Cameras and Backpacks welcomed!

I always have my DSLR camera on me and really enjoy bringing it to museums so I was happy to find out that the British Museum allows cameras (just no tripods without a permit). Another good thing about the museum is that they allow backpacks in as well. In fact, I was a little astonished as to the ease of access into the museum. No ticket line. No security line. You just walk through the entryway and then you’re looking up at the beautiful, bright interior of the British Museum and on your way to explore.

British Museum Lobby
The entrance to the British Museum

The Rosetta Stone

The first thing to see for us was the Rosetta Stone. I’ve been wanting to see that for a long time and was really excited to finally be able to see it in person. Predictably, on a Friday afternoon, the museum was pretty packed and the Rosetta Stone exhibit was no exception. It was difficult to get any decent photographs due to some tourists who allowed their LED screens from their audio guides to reflect off the glass right in the middle of the stone. I was tempted to ask some to simply flip it around but there appeared to be language barriers and I figured I’d just wait it out. After a couple of minutes I was able to get close enough to try and get some shots. Luckily, the stone is huge so it’s not hard to get a view of it, just be ready for crowds.

Rosetta Stone British Museum
The Rosetta Stone

What is the Rosetta Stone?

For those who don’t know the Rosetta Stone is a stone with engravings in two scripts of Greek and one script of Egyptian (that is, two languages, three scripts). It was carved around 196 BCE and went undiscovered until 1799 when it was discovered by French soldiers. After a couple of decades of intense study, scholars were able to decipher the meaning of the hieroglyphics contained on the stone and thus the Rosetta Stone paved the way for our modern understanding of Egyptian hieroglyphics. Considering how vital this giant stone was to our understanding of the Egyptian culture, I had to see it in person.

Rosetta Stone British Museum

After viewing the Rosetta Stone, we wandered throughout the Egyptian collection on the first floor. There were plenty of other beautiful sculptures and relics to see. Some of the pieces that stood out to me were the remains of different tombs and temples. And of course, there were several pharaoh sculptures to admire as well.

Colossal bust of Ramesses II the Younger Memnon
Colossal bust of Ramesses II, the ‘Younger Memnon’ about 1250 BC
Red granite sarcophagus British Museum
Red granite sarcophagus

The rest of the Egyptian collection is on the third floor. The emphasis on that gallery is on life and death and it’s where you will find all of the coffins, mummies, and masks associated with Egyptian burials as well as a lot of the ancient scrolls and other items like jewelry. That’s also where you will find a lot of the crowds. The Egyptian exhibits upstairs were by far the most crowded of all that we visited so perhaps you’d like to put that first on your agenda.

Easter Island Statue

The next big thing we wanted to see was the Easter Island statue. Easter Island, known as “Rapa Nui” to local inhabitants, is an island far off the west coast of South America. It’s famous for its stones like this one that are known as “moai.” The British Museum claims that these figures were probably carved from 1000 AD until the second half of the seventeenth century.

Easter Island Statue British Museum
Easter Island Statue

The statue pictured here is known as “Hoa Hakananai’a,” which means “stolen or hidden friend” and dates back to around 1000 AD. The statue is made up of basalt, a hard volcanic rock that is very difficult to carve into. Though eyeballs are missing now they were once present and likely made of stone. It’s a very imposing statue and I enjoyed seeing it as it’s very possible that I may not ever be fortunate enough to make my way to Easter Island. Unfortunately, it’s pretty much a stand-alone piece so there’s no Easter Island exhibit to and you’ll be on to other galleries pretty quickly.

The Greek Parthenon Sculptures

After the Egyptian and a few other galleries, we made our way over to the Greek exhibits, which as a whole, were my favorite. Specifically, I think that the Parthenon marbles had the biggest “museum effect” on me.

Greek Sculptures British Museum

If you didn’t’ know, the Parthenon is considered one of the world’s most marvelous monuments and considered to be one of, if not the one, best example of Greek architecture. Dedicated to the goddess Athena, it was finished at about 433 BCE and served as one of the grandest Greek temples ever known. Although damaged by war, it remained at least partially intact through centuries up until today.  Not only does the Parthenon serve as the perhaps the most enduring symbol of Greek culture and democracy, but the sculptures of the Parthenon are considered to be some of the pinnacles of Classical Greek art. Many of these sculptures depict battles while others reflect mythological scenes.

Tip: Use WalletFlo for all your credit card needs. It’s free and will help you optimize your rewards and savings!

Parthenon British Museum

For me personally, this was an opportunity to see up close and in person, the timeless art of one of the most influential civilizations that ever walked the planet (I know there are heated disputes over whether these sculptures should be returned to Greece but I’ll just put that debate on the side for now). After spending time admiring these sculptures, I realized that these must have been created by some of the most well-respected artists alive at the time. Artists whom I knew nothing about.

British Museum

As I looked closely at the details of these fine sculptures, it was apparent to me that there were stories behind them all. Stories, again, that I really only possessed a superficial understanding about. It was just that realization — that I lacked a real understanding of these cultural expressions — that provided me with a sense of inspiration to gain understanding. I’m not sure what it was about the Greek sculptures that did it but after only a few minutes in the Greek exhibit, I found myself feeling what I call the “museum effect,” where I find myself inspired to further my understanding of a subject after experiencing it at a museum.

Greek Parthenon British Museum
Figure of Iris from the west pediment of the Parthenon

This is one of the major reasons why I visit museums even when I don’t necessarily always enjoy them. The problem with museums for me is that I mostly enjoy being active (e.g., climbing things) and museums don’t exactly offer me much in terms of that. However, every once in a while I enjoy the slow pace of a museum experience and walk away from it a bit inspired to take on an understanding of something else. It’s usually nothing obsessive like I’m going to dedicate my life to learning about that particular thing. It’s just that I usually feel some sort of obligation to further my understanding of the subject. In this case, it’s Greek culture and it starts with the art.

It’s funny how quickly you begin uncovering facts about things that otherwise would seem insignificant if it wasn’t for the “museum effect.” For example, just yesterday, I found out that the sculptures at the Parthenon were actually painted with color originally and were not the pure white we see today. Apparently, when these sculptures were discovered during the Renaissance excavations they were without their color and from that point artists thought they were “continuing” the tradition of sculpting marble in its natural white state.

Central scene of the east frieze of the Parthenon British Museum
Central scene of the east frieze of the Parthenon

And sure, the fact that these sculptures likely used to beam with color doesn’t necessarily fundamentally change my understanding of Greek civilization (though for some art historians it probably could). At best, this might be a random fact I mention to someone else IRL once or twice when the opportunity arises. The point is that I’m on my way to adding another layer of understanding to yet another culture. And that’s really one of my biggest goals for travel in general: to just keep laying those bricks down and building upon my knowledge while discovering (and of course experiencing) more and more about different civilizations and the places where they exist.

I should also mention that we made our way through some of the other exhibitions, such as the Americas and Asian exhibitions and thoroughly enjoyed those. By that time we were running a little short on time and I’d made the decision to do less photo-taking and to just try to enjoy the museum. We happily left some galleries untouched as we planned on leaving some exhibitions unseen and wait for the next time that we could venture to the museum.

Sculpture South Asian gallery British Museum
Sculpture from the South Asian gallery

Overall, I think the exhibitions in the museum are extremely well presented. My only real complaint with the museum was the “shopping-mall” feel that it had to it at some places. That’s mostly the product of it being free and inundated with so many tourists but there seems to be somewhat of an issue of enforcements as well.

I understand there’s probably nothing the museum can do about the noise factor in such a busy museum but certainly personnel could be in place to keep others from putting their hands all over the exhibits and blasting objects with their flash photography. We were only there for about an hour and a half to two hours and yet I couldn’t believe how many people I saw touching some of the objects and paying no mind to their camera flashes. Because of those reasons and mostly the crowd factor, it can be difficult to have a true intimate museum experience here.

Still, not every exhibit was full of the type people described above and the enjoyment I experienced far outweighed the annoyances during my visit. Like I said, I walked away from the British Museum inspired by the beautiful Greek art on display and eager to investigate further; I saw one of he most renowned pieces of history, the Rosetta Stone; and I had a look at hundreds of other pieces of history that span centuries of different civilizations and still left plenty more to see for next time. In short, it was a fantastic museum experience.

So well done, British Museum. Well done.

Visiting The Tower of London: A Rich Historical and Cultural Experience

If you’re coming to London for a short period of time and you’re looking for a must-see London attraction, then I recommend the Tower of London. I had the privilege of visiting the Tower of London with over 800,000 poppies on display for the 100 year commemoration of lost British soldiers in WWI. The poppies will be on display until November 11, 2014 and if there’s any way you can get there before that date I highly recommend it. While some of my photos will showcase that amazing display, the focus of this article is on visiting the Tower of London at any time of the year.

Panoramic of the Tower of London during the 100 year commemoration of WWI
Panoramic shot of the Tower of London during the 100 year commemoration of WWI.

People first hearing of the Tower of London usually have two questions: what is the tower and what was/is it used for? The name Tower of London is a little misleading because today the entire castle is referred to as the Tower of London. The “Castle of London” would perhaps be a more apt name. It’s also a little bit confusing because within the Tower of London, is the White Tower, which is the heart of the castle and the original building constructed on the premises. Just know that when people talk about the Tower of London they’re referring to the entire castle as pictured above.

As for the purpose of the Tower of London…. The Tower was ordered to be built by William the Conqueror sometime in the 11th century to serve as a fortress. Since then, it’s served as a power base in times of peace, a refuge in times of war, a prison for the most dangerous criminals, an armoury, treasury, and general conserver of records for king’s court of justice among many other purposes. On the outside, it’s underwent several additions over the centuries as walls and moats have been installed by different monarchies. Through all this time and through all these changes, the Tower of London has stood as a testament to the perseverance of the monarchy and today still captivates the imagination of visitors from all around the world.

Here are some things to know about the Tower of London before visiting.

Tip: Use WalletFlo for all your credit card needs. It’s free and will help you optimize your rewards and savings!

Prices and booking

  • £20.90 per adult with online booking
  • £22 per adult at the gate
  • Student and other discounts available

I recommend booking online so that you can save a little bit. One thing that is a little confusing is that if you buy online, you still have to go to the “Group ticket booth” and get them to issue you your admission tickets. The ticket booth is located next to the visitor center on the east side of the tower. Be sure to get those tickets because you can’t just bring an electronic version of your ticket confirmation and expect to get in.

The Yeoman Warders, or “Beef Eaters,” are highly entertaining and worth your time

A Yeoman Warder

One thing you must do is participate in a tour given by the Yeoman Warders. The tours go on for about an hour and they start about every 30 minutes from the entrance of the tower. They provide you with more information than you’ll likely be able to digest but they all have a great sense of humor and superb presentation skills so it makes for a really enjoyable experience. They’ll tell you all about the famous prisoners, murders, and tons of other random facts about special people who have spent time in the Tower of London. During the tour, you’ll basically be walking around to different locations, such as Traiter’s Gate, and then stopping for about 10-15 minutes to listen to all of the stories and see some of the exact locations of certain events, such as where prisoners were executed. You can hang around the tour for the entire time or wander off from the crowd at some point if the tour just isn’t for you or you are in a time-crunch.

Traitors Gate Tower of London
Traitor’s Gate

Don’t let the nickname “Beef Eater” fool you, either. One thing I was a bit surprised to find out is how accomplished these individuals must be in order to be granted such a prestigious position. The Yeoman Warders have to have at least 22 years of military service and have been awarded a number of accolades from the military to even be eligible for such a position. Not only that, but they also have to undergo a strenuous application process, including doing their own independent research to come up with presentations that are good enough to impress their superiors and allow them to become official Yeoman Warders. For those reasons, I have a lot of respect for them and think that they do a brilliant job of showcasing the highlights of the Tower of London. Definitely do one of these tours when visiting.

You’ll have great up-close views of the British guards

Maybe you’re not able to view the changing of the guard at Buckingham Palace but you are still interested in seeing some of these famous stoic British guards up close. The Tower of London is the perfect place to do so. Every two hours there is a changing of the guards and while it doesn’t involve the same level of presentation as Buckingham, it’s still pretty cool to be able to see that up close, which can be a very difficult thing to do when you are attending the changing of the guards at Buckingham Palace with hundreds of other tourists. Also, there are always a couple of the guards outside of the Jewel’s House and the Queen’s House and you can get up close to one of them and get some great photos.

Guard at Tower of London
Guard at the Tower of London
Changing of the guards at Tower of London
Changing of the guards at the Tower of London

The Crown Jewels will blow you away with some serious bling

The crown jewels exhibit contains tons of royal regalia from modern and historical times. You will be dazzled by the brilliant display of shiny silver and gold ornaments. You’ll find everything from sceptres, orbs, swords, robes, spoons, and of course, plenty of crowns. Most of the items are objects that have been used in coronations of English Kings and Queens throughout the centuries, with at least one piece dating back to the 12th century. It’s a pretty brilliant presentation and is by far the most impressive collection of jewels and regalia I’ve ever seen in person.

The Tower doesn’t allow any photography in the room so I didn’t take any photos but it’s an absolute must-see if you are to visit the Tower. Also, you can move through the exhibition at your own pace and get through it as slow or as fast as you would like. As a side note, the Crown Jewels exhibit is where I discovered that “My Country, ‘Tis of Thee” was written to the same melody as “God Save the Queen.” If you weren’t aware of this fact then just listen for it when you get to a certain area of the exhibit and it will be pretty clear that the melodies are the same. I was a little disappointed to find out that one of my favorite American tunes (second to “God Bless America,” of course) wasn’t as original as I once thought. However, as I’ve spent more time in England, I’ve found it fascinating to discover links to America’s British heritage that I never knew existed. 

Tip: Use WalletFlo for all your credit card needs. It’s free and will help you optimize your rewards and savings!

Don’t forget to visit the heart of the castle: The White Tower

The White Tower is really the heart of the castle. At the time it was completed near the beginning of the 12th century, it was an imposing tower that was meant to serve as a reminder of the king’s authority and vast ruling power. It was the first of its kind in England and still today is one of the best preserved 11th century structures of Europe. Inside the tower you’ll discover many  noteworthy attractions. When you first walk in there’s an amazing display of medieval armour, including Henry VIII’s famous armour dating back to 1515. Other major attractions in the White Tower include St. John’s Chapel and the “block and axe.” The Tower of London notes that St. John’s Chapel is one of the most “complete examples of early Anglo-Norman ecclesiastical architecture.” The “block” is believed to have been used in the last public beheading in 1747 on Tower Hill (where most executions took place).

The White Tower looming over castle walls
The White Tower looming over the castle walls.

The “torture room” is a little underwhelming, though that’s probably a good thing…

A lot of torture occurred in the Tower’s walls and some of the mechanisms used for that torture were pretty gruesome. There’s one room designated as the torture exhibit in the tower. It’s a small exhibit with only a few displays and it was a little underwhelming. There were limited things to see and the small room got very crowded. Still, after taking a look at some of the model torture devices I got a little sick to my stomach thinking about the poor souls who were forced to endure that horrendous treatment. For those reasons, you’ll probably only spend a few minutes stopping by this room and be ready to step out and get some fresh air.

Be sure to take the “wall walk” around the castle walls

The “wall walk” is a neat experience that allows you to walk along with inner curtain walls and admire the different views of the Tower of London and also pass through many different exhibitions in the different towers. These walls were the place where archers and other soldiers stood willing to defend the castle at all cost. Several steel sculptures are placed along the walkways posing in different war-ready positions taking you back through the centuries. Along the way, you’ll also have some nice sights of Tower Bridge and other prominent buildings of the London skyline.

Tower Bridge view from the wall walk
Tower Bridge view from the wall walk.
A view of the Tower walls

As you walk along the wall be sure to take your time and enjoy the different exhibitions in the different towers. Some of them, such as the Salt Tower and Broad Arrow Tower, give you a close look at the graffiti left by prisoners who were kept in isolation in those rooms. Be sure to be mindful of some of the signs as you make your way through the towers because some of the exhibits prohibit photography while others allow it.

Prisoners graffiti inside Tower of London
A prisoner’s graffiti inside one of the towers.

Gift Shops and Cafes

There are multiple gift shops and cafes throughout the Tower. If you’re looking for royal souvenirs there are several crowns on sale in the gift shop that I thought would make for a great souvenir.

Visiting the Tower is a fulfilling English and historical experience

I recommend the Tower of London for visitors because once you leave you feel as if you’ve experienced a thin slice of centuries of English history. You’ve roamed where kings and queens have roamed, seen where some of the most famous prisoners and greatest minds have spent years of their lives (and last moments), and you’ve wandered over the walls where peasants revolted and archers stood to defend the crown. Simply put, this is a must-see attraction for London.

The only drawback to this experience is that it is usually going to be overrun with tourists. However, we visited on a Wednesday in September and it wasn’t too bad, especially when we wandered out to the wall walk and other spots further away from the main attractions. My advice would be to try to avoid the weekend crowd if you can.

Finally, as a last recommendation you should try to be around for the key ceremony, which is the ceremonial locking of the castle. It’s gone on for about 700 years without missing a night! You arrive at about 9:30 pm but if you’d like to witness this spectacle you’ll have to book your (free) tickets in advance. You can book those tickets here.

That’s it for the Tower of London. I hope you make it out to see this amazing site and enjoy your time in London!

Love Lock Bridges in Paris: The Tradition that Never Was?

There are actually many “love lock” bridges in Paris, though two of them stand out amongst the rest. The “Pont de l’Archeveche,” is located just next door to the Notre Dame Cathedral while the “Pont des Arts” is located just outside the Louvre. Tourists often engrave or write their names on locks and then attach these locks to the bridges in an effort to symbolize their love for eachother. Some even go so far as to throwing their key into the Seine River to put a stamp on their eternal desire to be together. Lately, there’s been talk about banning this practice, as the weight from the locks has actually collapsed portions of the bridge and the cumulative effect of the discarded keys has been detrimental to the river’s environment.

For now, placing locks along these bridges is still an on-going tourist attraction. Here’s a look at some things to consider if you are planning on taking part in this “tradition” upon your visit to Paris.

Tip: Use WalletFlo for all your credit card needs. It’s free and will help you optimize your rewards and savings!

There’s nothing historical or “Parisian” about this practice

There’s nothing enduring about this “tradition.” Local reports state this practice began around the mid-2000s. That’s right, not 2,000 years ago, but something closer to about eight years ago. Also, the majority of Parisians seem to attribute this new practice to tourists and not anything distinctly rooted in any tradition or ritual of Paris. Thus, placing these locks on these bridges is pretty much a modern tourist invention (with roots dating back to a WWI Serbian tale). So while the idea is cool in theory, just know that you’re not engaging in some sort of renowned Parisian act of romance as many visitors think they are.

Love Lock Bridge Paris

The locks are getting out of control and damaging the bridges

These locks are now starting to exceed the holding capacity of the bridge due to their weight. When you see the bridge, you’ll see locks locked onto locks locked onto locks. Some of these locks are completely obnoxious and about as big as laptops. One look at the insane amount of locks on the bridges now and it’s easy to see how these locks are starting to get out of control. In fact, in June of 2014 a portion of the bridge’s fencing (where the locks are attached) actually collapsed. Just before we arrived in October 2014, some officials from the city actually placed boards over some areas to protect the bridge. To be honest, the boards look like crap and all of the writing on the boards don’t help the eyesore that they have become.

Love Lock Bridge Paris

It’s too bad that this kind of thing doesn’t work out because unlike some who oppose this practice, I actually think that the locks on the bridge look pretty cool and some are pretty creative. Unfortunately, I’m not sure that there’s an option where you can allow tourists to attach padlocks onto a bridge without it getting out of control pretty quickly. It’s just not sustainable. Perhaps this kind of thing could work somewhere where it would be difficult to access the location where the locks are to be attached… like the top of a mountain peak. But with millions of visitors pouring in each year over these bridges, it simply will never workout in the long-term without damaging the local landscape.

Love Lock Bridge Paris

To alleviate this issue, Paris recently initiated an effort, dubbed #lovewithoutlocks, to encourage visitors to take selfies in front of the locks now. I don’t see that doing much considering that websites still encourage tourists to bring their custom-engraved locks to the bridge. Moreover, there are even local vendors on the bridges selling locks to tourists. Obviously, there is still a ways to go if city officials want tourists to receive a consistent message that this is no longer welcomed. And because of the mixed-messages out there, I can’t really blame a lot of visitors for not realizing that so many others seriously object to the practice and find the locks a nuisance.

Tip: Use WalletFlo for all your credit card needs. It’s free and will help you optimize your rewards and savings!

Our personal decision not to place a lock on the bridge

After researching more into the issues facing the bridge, Brad and I decided not to place a lock on the bridge. While there was still quite a bit of open room on some of the outer areas of the bridge, I didn’t feel like the bridge needed another lock from us. My reasons were both idealogical and environmental. I just don’t see romantic love properly manifested in a padlock attached to a bridge with the key thrown away. To me, what makes love so great is the risk involved. The risk that you’re partaking in something in which you ultimately have no control over the final outcome. It’s just that risk that brings in such a great reward. I understand that not everyone feels that way about romantic love and that’s fine, of course. But for me, the idea of something akin to a shackle symbolizing romance just didn’t jive with me. Add in the fact that it’s harming the environment and landmarks and you can see why I didn’t partake.

I understand that many are probably more interested in doing this for the nostalgia than for an actual symbolic statement of their never-ending love and I totally get it. You come to Paris, the city of romance, and you and your partner leave a small piece of yourselves there and five or ten years you come back and see that same enduring marker of your visit and feel all warm and fuzzy on the inside. However, my suggestion is to just stick with photographs. Take some selfies of you and your lover at the bridge and be satisfied with that memory. Remember, it’s pretty selfish to add to the destruction of a landmark for your own want of nostalgia.

Love Lock Bridge Paris

However, if you are absolutely determined to put a lock on the bridge then please just don’t throw your key into the river. They estimate that over 700,000 locks are on these bridges and you can just imagine the environmental impact of so many thousands of keys rusting away in the riverbed. And it’s not like this is the River Thames. No offense, London, I really love you, and the Thames is pretty in it’s own way. But rivers like the Thames already look like they’ve dealt with their fare share of rust issues over the decades (though the Thames is said to be one of the cleanest rivers running through a major city). On the other hand, a beautiful green river like the Seine should be preserved as much as possible and it’s not hard to see how after a few years its beauty could be compromised from hundreds of thousands of deteriorating keys.=I hope this post doesn’t rain too much on your parade if you were looking forward to placing your own lock on the bridge. I try to focus on more positive aspects of travel and I know that this post is more on the negative side. I just wanted to help get the word out there that this practice is doing some harm to these areas and that we should think about the cumulative, long-term effects of doing even the most simple things like attaching a small lock to a bridge and tossing a key into a river.

Visiting the Towers of Notre-Dame

One of the most famous cathedrals on the planet, the Notre Dame is situated on a small island in the middle of the Seine River. The construction of the Notre Dame originally began in the 12th century and through the centuries it’s gone through several additions on its way to becoming the masterpiece it is today. I have to be honest, typically cathedrals don’t do much for me. However, the Notre Dame was certainly an exception. There are some stunning details to the cathedral that upon close examination really allow you to appreciate this marvel. That said, this post is only about visiting the towers of the Notre Dame and not the interior. So if you’re looking for some good info on making your way up to the top of Notre Dame cathedral, you’re in the right spot.

Tip: Use WalletFlo for all your credit card needs. It’s free and will help you optimize your rewards and savings!

The towers of Notre Dame offer what is in my opinion, one of the best views and photographic opportunities in the entire city of Paris. After wearing out your legs a bit going up close to 400 stairs, you’re rewarded with panoramic views of the River Seine, the Eiffel Tower, and the marvelous French architecture all around spanning all the way to downtown Paris. Here’s a quick look at what you need to know if you’d like to venture up to the top of the towers.

View of the Eiffel Tower from the Notre Dame cathedral
View of the Eiffel Tower from the Notre Dame cathedral.

1. Price

At €8.50 per adult, I’d say the price admission is somewhat reasonable. Like just about every other destination they offer discounts for certain people, such as students. There’s a sign by the entrance that states that you need exact change for your ticket but don’t worry about that because once you get in, there are cashiers that will offer you your change in the event you don’t tender exact change.

2. The towers have a separate entrance from the cathedral

The towers are managed by the National Monuments Centre and are basically an entirely separate experience from seeing the inside of the cathedral. You’ll enter into a separate line and will not be given access to the interior of the cathedral as part of your visit. Thus, if you’re planning on seeing the inside be sure to allocate enough time to wait through that line as well.

3. The line gets pretty long

The line for the towers begins at the base of the north tower (if you’re facing the front entrance of the cathedral it will be on your left). The line goes down the side of the cathedral towards the back and it can get pretty long. When the line moves it will only move in blocks. So at times it feels like you’re not making any kind of progress. The good news is that there are several cafes across the street where you can by some drinks or something to eat to help with the wait.

My advice is try to arrive at the towers a little before opening. If you wait until later you are pretty much guaranteed to have to wait in a pretty long line. One option you can look into is after hour tours that will allow you to jump the lines after the towers are closed off to the public. I’ve heard many of these tours offer great talks on the history of the towers and can be a great way to go up in the towers without dealing with the crowds.

4. The stairs… aren’t exactly easy

Once you are given access to the entrance you’ll begin your walk up the spiral stairs. But this will only be a taste of what’s to come. You shortly arrive at the gift shop/admissions desk where you will actually buy your ticket. After getting your ticket, there will be a worker at the door where you entered that will give you the green light to proceed ascending the stairs. That’s when the real fun begins.

To get to the top of the Notre Dame you’ll have to work your way up over 380 spiraling steps. I consider myself to be in average health. I’m not going to win any bodybuilding competitions any time soon but I can knock out a few miles without losing my breakfast. I found the walk up to the top to be what I’d call a calve burning experience. There were a few people in front of us who ended up taking breaks on the way up because it was so difficult. The hardest part for me was keeping my claustrophobia at bay and dealing with the dizziness that came from going up the tight spiraling stairs that seemed to get smaller and smaller as you approached the top. If you find yourself getting worn out feel free to take a breather or two and you will be up to the viewing deck in no time.

Stairs at the top of the Notre Dame tower
The tight spiraling stairs of the Notre Dame tower.
Man on Stairs

5. Capture the best photo opportunities with the chimeras

Once your legs are close to giving out you’ll be relieved to see the sunlight lighting up the stairway — you’ve made it! You’ll make your way through a small door opening (pictured above) and out onto the platforms where the chimeras are. This area is covered by a steel cable-fencing for protection as seen below. Yes, the cables detract somewhat from the view, but as far as photos go it’s extremely easy to fit your camera past the cables to get them out of your way. Plus, it’s completely understandable that they’d need some form of protection up there. Some of the walkways get a little tight as you make your way around, so be prepared for some pretty tight spaces.

Man at top of Notre Dame tower

Being up on that deck was my favorite part of the Notre Dame Towers because I thought taking photos with the gargoyles and chimeras in the foreground and the Eiffel Tower in the background was pretty amazing. They make for very striking photographs and really capture the mystique of the cathedral in very picturesque way.

Notre Dame Gargoyles

When we visited, the south tower was closed off (apparently this happens from time to time). The south tower is the tower that is home to the huge “Emmanuel” bell that is over 300 years old and weighs 13 tons! The Emmanuel is hardly ever rung, however. I’m guessing that in an effort to preserve the bell they’ve decided to only ring it a few times a year, such as on special holidays like Christmas and Easter. In the north tower there are four bells that ring daily for the time. Be prepared for the loud clamoring of the bells when you are up there; it can be quite jarring when you’re not expecting it.

After you’ve wandered around the first deck you then have the option to go up to the top or go back down. The staff at the tower strictly regulates the amount of visitors that are at the top. This means that you may be standing in line for some time while you wait for the top of the tower to clear. Once they give you the okay to head up you’ll have to deal with even tighter spiraling stairs to make it up to the top of the towers, so if you were struggling with the first batch of stairs just prepare yourself for a little bit more agony (it’s really not that bad). The view from the top of the towers is pretty much the same view you get from the bottom — you aren’t that much higher. The good thing about the top is that you can wander all around the top of the tower for a full panoramic view of the area, which is pretty cool.

Notre Dame top deck
View from the top deck of the north Notre Dame tower.

After you’ve circled around the top of the tower, the staff will make you wait for the stairs in the tower and then send you back down. If you didn’t get a chance to check out the gift shop you can stop by it on your way down.Otherwise, you’ll descend all the way to the bottom floor exit. They way back down is much easier on your legs. The only difficult part of it for me was, once again, dealing with the dizziness that comes from heading down spiraling stairs. Once you finally arrive at the bottom a door will automatically slide open for you to exit and just like that you are back outside of the cathedral.

6. Don’t forget to go in the cathedral if you have time

Like I mentioned, you will have to enter into a separate line to go into the cathedral. On Sunday at about noon the line going into the front was pretty substantial, although it appeared to be moving at a pretty steady pace. Unfortunately, we were a little short on time and weren’t able to see the inside but if you have the time then I recommend you hanging around to see the inside.

That’s the skinny on visiting the towers at Notre Dame. I hope that these tips help you better understand what to expect and that you have a great time visiting this beautiful place!

The Eiffel Tower: Save Time and Money

Once the tallest structure in the world, now the Eiffel Tower stands out as probably the most recognizable tower in the world. You can see the tower from just about anywhere in central Paris and for travelers it serves as a constant reminder that “you’ve made it” (to Paris at least). Admiring the tower from afar or even up close is good enough for many. But for others, going inside the tower is an irresistible experience. Visiting the Eiffel Tower itself is a relatively straightforward process. You wait in line, buy your tickets, and then go up and down the elevator or stairs. However, there are a couple of things you may want to take into consideration when planning your visit to the Tower. Here are five bits of information for making your visit to the tower a good one.

Tip: Use WalletFlo for all your credit card needs. It’s free and will help you optimize your rewards and savings!

1. Prices (as of October 2014)

A ticket to get to the top of the tower via the elevator is €15 per adult (less for students and children).

To get to the second deck via the elevator it’s only €9.

To get to the second deck via the stairs it’s only €5.

Under Eiffel Tower

2. How to beat (or deal) with the lines

You can beat the lines by reserving your visit online. The only problem is that you usually have to make this booking about one to two months in advance! That means you’ll have no idea what the weather will be like on the day you choose to visit. Still, it may be better to play the odds with the weather and not have to worry about standing in line.

Another way to beat the line, or at least mitigate the damage of time standing in line would be to get in line about 30-40 minutes before opening or to go at night (at a risk). If you arrive before opening, the line will start picking up about 30 to 40 minutes before opening so make sure that you are there extra early. You can always buy some coffee and crepes from a nearby cafe to appease your appetite while you wait. Be careful about going at night, however. The reason is that sometimes they will close the elevators due to a high capacity of visitors or even worse they may close off admissions entirely if too many visitors are coming in. So while the night time may offer great views and potentially shorter crowds, that comes at the risk of not being able to enter the tower at all.

The photos below show the difference in the crowd from a 5pm on a Saturday and about 45 minutes before opening on a Monday.

Crowd Under Eiffel Tower
The line at the Eiffel Tower at about 5pm on a Saturday.
Eiffel Tower no crowd
The line at the Eiffel Tower approximately 45 minutes before opening.

Finally, in addition to going at the tight time, a way to beat the lines is just to take a hike up the steps. Many feel this is the most rewarding way to view the tower. Not only do you save money (and likely waiting time), you get a more intimate experience as you make your way up the tower step by step.

Remember though, while you’ll be entering into a shorter line you’re going to have to climb a good enough amount of stairs (about 600) to get to that second level. If you’re in decent shape this shouldn’t be a big problem but if mobility is somewhat of an issue for you then I recommend you looking into the elevator route. Also, not to be ignored is that those with extreme fear of heights may struggle a bit due to the exposed sights below. While you are barricaded in by steel and fencing, you can see right through the stairs and surrounding structures on your way up and that may induce a little bit of vertigo in some, so just be mindful of that.

Eiffel Tower elevator view
View from the elevator.

If you decide to go the elevator route you may be a bit surprised by the smoothness of these machines. They seem to almost float up to their next floor. While they can get a little stuffed with visitors, I think the employees do a good job of not squishing a ridiculous amount of people in the elevator at once. After you switch elevators on the second deck to get to the top, the speed picks up as you ascend hundreds of feet and before you know it you are at the top. If I had to grade the elevator experience I would give it an A+, and coming from a claustrophobic guy that’s saying a lot.

3. Is the view from the top worth the extra money?

I hear a lot of people ask this question. I have to say that personally I do think that it’s worth it but it’s really a matter of personal preference. Paris is such a beautiful city and a lot of that comes from the amazing symmetry of the architecture and the layout of the parks, monuments, and streets. You can definitely appreciate this at the second level. However, seeing the city from the top of the city just adds “emphasis” to this fact. Check out the photos below to see the difference in the view in terms of being able to appreciate the full-scale of the city’s symmetry. For some, the difference may be negligible but for me, I appreciated the enhanced perspective.

Trocadéro Gardens from Eiffel Tower
View from the top of the tower.
Trocadéro Gardens from Eiffel Tower
View from the second level.

The other reason for wanting to go to the top is just to say that you were at the top. For me this was the primary reason. Much like going to the top of the Empire State Building, traveling to the top of the tallest structure in Paris is just a cool experience and offers a bit more “bragging rights,” especially if you are willing to add the extra cherry on top with a €10 “glass” of champagne. (Note: the “bar” at the top is really just a walk-up bar where you grab your glass and go so don’t expect an elaborate set-up.)

Top of Eiffel tower

I realize that bragging rights and pricey champagne may not be important to everyone and if it’s not then you will not feel cheated one bit from just visiting the second level of the tower. The views are still sweeping and for some arguably better. Remember, this area of Paris isn’t full of high-rises. Thus, a higher vantage point won’t necessarily improve your sights of many of the four and five story buildings. So while you can appreciate the full scale of the city’s symmetry better from above, that may come at the expense of missing some of the fine detail of the buildings from the second deck. For that reason, the second deck has it’s own advantages and you should stop and check out that view even if you are primarily interested in the view from the summit.

Another shot from the top of the tower.
Top of Eiffel tower

So I guess the answer to which view is better or more worth the money is that you truly can’t go wrong with either choice. And just in case you were wondering, no you cannot walk up the stairs to the very top of the Tower. While such a workout would be unforgettable, they only allow you to access up to the second level via the stairs.

4. Scammers and souvenirs – $ave your money!

Avoid the scams in and around the Eiffel Tower area! There are basically two ways you may get scammed. One are these Romanian Gypsies who wander around asking you to donate to some deaf and blind “charity.” They will approach you asking if you speak English and if you answer in the affirmative then you will become fresh meat in their eyes and they will try to pressure you to “just sign your name” and then donate. They usually have about four or five names on their little sign-up sheets already marked to try to entice you to donate, but don’t fall for it.

After I caught on to their game, I purposely answered one that I spoke English just to take another look at their sign-up sheet. My suspicion was that all of the previous donators were written in the same handwriting. After getting one of the scammers back over to me, I quickly saw that I was right. All four individuals had their names written down in the same exact handwriting! I didn’t really need confirmation on these scammers, but it was interesting to see how little effort apparently goes into their game on that end.

The other potential scams are the folks selling Eiffel Tower models out on the sidewalks. They are mostly African and usually have a big bunch of metal tower models in three or four different sizes attached on a ring. They aren’t scammers per se, but they will try to get you for your money. They sell Eiffel Tower models for about €10 that easily sell for €2-3 in the nearby souvenir shops. So my advice is not to buy from these people unless you bargain them down to about 25% of their offering price or unless you are just feeling particularly generous with your money.

Eiffel Tower gift shop
Eiffel Tower souvenirs at a local shop, sold for a fraction of the price offered by some of the street vendors.

On that same note, I recommend you spend as little as possible at the souvenir shops inside the Tower. I have to admit, I bought the “official” Eiffel Tower model from one of the shops inside the Tower just because I couldn’t resist, but I don’t recommend you buying a bunch of little items like magnets because you can pay about half the price for those at nearby souvenir shops and little kiosks around the streets.

5. Eiffel Tower Restaurants

I did not have the privilege to dine at any of the restaurants located inside the tower so I can’t say much about them. My advice would to be to read up on Tripadvisor about these places before making plans. Here’s a list of the restaurants found inside the tower.

Overall, the visit to the Eiffel Tower is pretty straight forward and shouldn’t pose any problems for you. I think the main thing is to catch the tower before it opens because the lines underneath get out-of-control and that is your only sure way of being guarantied admission without pre-booking months in advance. Also, be careful when purchasing souvenirs from the street vendors and the souvenir shops because you can easily save 50% by just being patient and buying from nearby shops.

That’s it for now. Enjoy your time in Paris!

Northern Lights… from a plane!?

My recent trip to Iceland to see the northern lights did not go as planned in many more ways than one. One of those failures was not being able to see the northern lights because of crazy overcast clouds. However, on my way flying into Iceland, I was able to capture the northern lights from our plane and thus at least partially fulfilled my wish of seeing the northern lights! Here’s how I did it.

Iceland Air Map

I first noticed the flight path as we were on the ground getting ready to take off. I knew that we would be in the “zone” for seeing the northern lights and that we would be above the clouds so that if the northern lights were actually showing I would be in good shape to see them. When I checked the kp Index I saw that they were predicting a “3” which is a relatively strong indicator that the lights would be out. With that information, I decided that I would stay up all night on the flight.

Tip: Use WalletFlo for all your credit card needs. It’s free and will help you optimize your rewards and savings!

About three hours into the flight, everyone on the plane just about was asleep. That’s when I started to focus intensely outside my plane window. After squinting pretty hard for hours, I noticed that there was something outside the window in the distance. It resembled a cloud but seemed to have a different texture and also extended far beyond where I remembered the clouds being. It was difficult to see because of the light pollution coming from the cabin and the light on the wing. I then grabbed a blanket and a jacket and essentially suction-cupped myself to the window, blocking out all stray light. That’s when I was sure I was looking at the northern lights!

I got pretty excited and knew I had to grab my camera. I positioned it on top of my camera bag in an attempt to make myself a make-shift tripod. I then turned up the ISO and put the shutter speed on about 10 seconds. After a couple of trial and error shots, I got the below shot.

Northern Lights from plane

Amazingly, the picture turned out much better than I had imagined. You can see the sky full of stars and can barely see the clouds near the bottom. The color of the lights were not that green in real-life but the camera sensor certainly did its job in picking up the light. I took about 20 or 30 shots of this until the light began to fade as dusk approached. It really was a somewhat magical experience and what was interesting was that everyone on the plane seemed to be asleep and missing out on this awesome sight. I wondered to myself how many other passengers would have gladly stayed up to see the sights and how many other people may have seen the same thing on this flight or another flight. Overall, I still hope to see the northern lights one day from the ground but for now I will treasure this experience — truly unforgettable.

1 13 14 15