Soak in One of Oregon’s Most Beautiful Riverfront Hot Springs
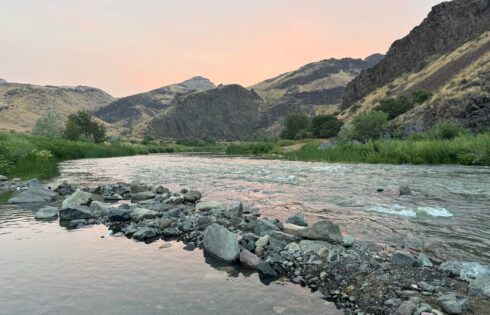
It’s hard to beat soaking in a natural hot spring, especially when you have such magnificent views to enjoy. Snively Hot Spring, located in eastern Oregon near the border with
It’s hard to beat soaking in a natural hot spring, especially when you have such magnificent views to enjoy. Snively Hot Spring, located in eastern Oregon near the border with
In this article, we’re going to take a look at different distances required to travel from one end of the United States to another. We will dissect the country into
Located in the Upper Peninsula of Michigan, the Keweenaw Peninsula offers a range of exciting experiences, from discovering enchanting waterfalls to hunting for Yooperlites. You can dive into history by
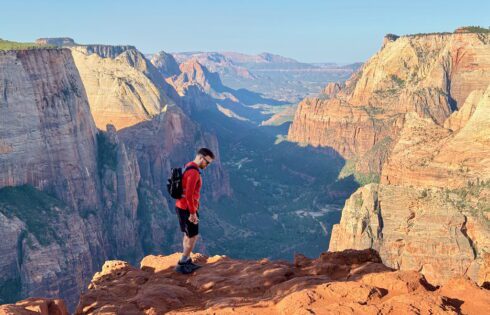
Zion National Park is known for its extraordinary hikes—Angels Landing, The Subway, The Narrows—and the list goes on. Most people hit the trails chasing those jaw-dropping views. But honestly, some
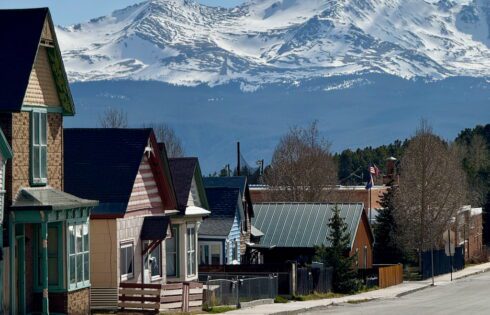
Our latest adventures took us to Leadville, Colorado, where we spent about two months soaking up life at serious altitude. Leadville’s big claim to fame? It’s the highest incorporated city

Tucked high in the Colorado Rockies at over 10,000 feet, Leadville is a historic mining town known for its rugged charm, scenic mountain views, and rich Wild West past. Once
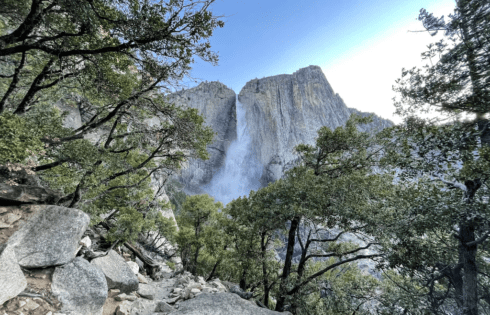
If you’re looking for a hike that delivers jaw-dropping views, serious elevation gain, and the chance to stand beside North America’s tallest waterfall, the Upper Yosemite Falls Trail is calling
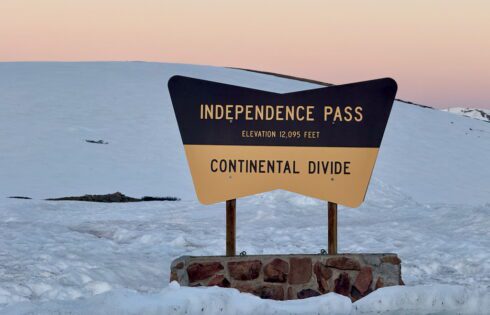
If you’ve spent any time exploring Colorado, chances are you’ve heard people talk about the “Continental Divide“—but what exactly is it, and why do people make such a big deal
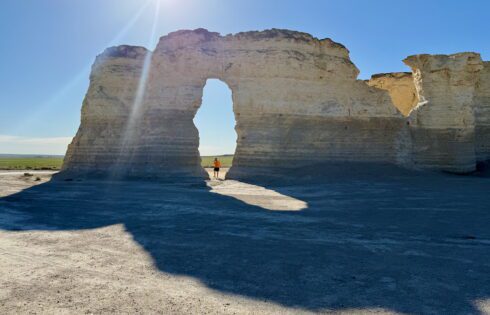
Constantly named as one of the natural wonders of Kansas, Monument Rocks is a destination that often surprises people when they find out that it’s located in the mostly flat
I’ve traveled all around the world and have seen a lot of bucket-list worthy places. And while it’s impossible to rank all of these places, in my opinion, the National
