
Possum Pie: A Mouth-Watering Delicacy in Arkansas?
You hear the words “Possum Pie,” and your mind instantly conjures images of a concoction featuring the notorious marsupial. Yes, for those curious possums are North America’s only marsupial. But
You hear the words “Possum Pie,” and your mind instantly conjures images of a concoction featuring the notorious marsupial. Yes, for those curious possums are North America’s only marsupial. But
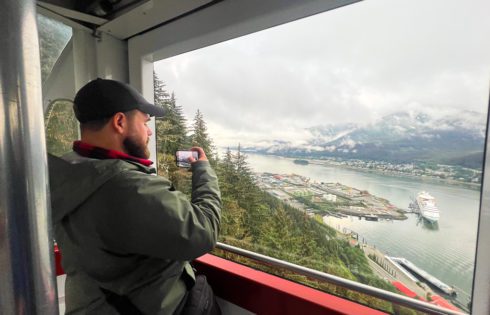
Towering above Juneau and surrounded by stunning alpine views, Mount Roberts offers one of the most breathtaking vantage points in Southeast Alaska. The Mount Roberts Tramway — now commonly branded
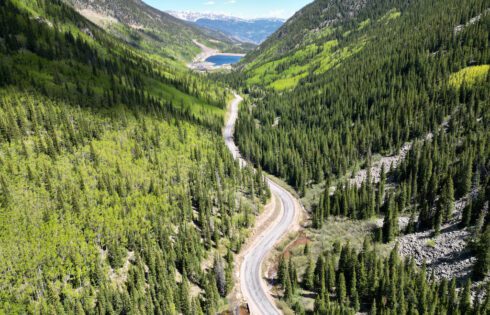
Colorado is renowned for its picturesque scenic byways that wind through magnificent mountain landscapes. Among these, the Guanella Pass Scenic Byway stands out as one of the most breathtaking routes
Traveling to Arizona soon? You might want to get a little familiar with the time zones in Arizona because they can be a bit confusing, especially for tourists trying to

Mount Rushmore is easily one of the top three most iconic American landmarks—perhaps only rivaled by the Statue of Liberty, the Empire State Building, or the Golden Gate Bridge. It’s
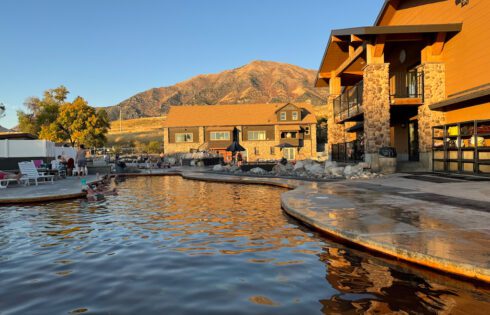
It feels like I’ve been on a hot springs quest ever since leaving Hot Springs, Arkansas. I’ve soaked in springs across Oregon, Idaho, and now I had the chance to

If you’re planning a trip to the Upper Peninsula of Michigan or anywhere in the northern Great Lakes region, Yooperlite hunting is a highly recommended form of unique night life.
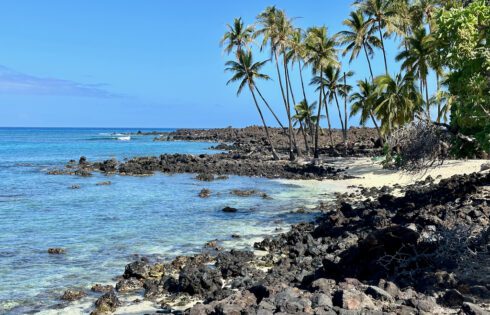
Hawaii is often thought of as the ultimate vacation destination that everyone instantly falls in love with. And how couldn’t you with all of the breathtaking scenery, warm weather, clear
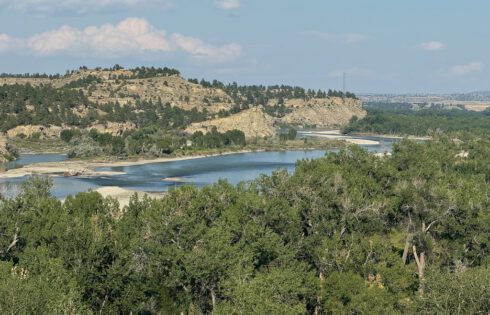
Pompeys Pillar National Monument is a true hidden gem. It stands out as being the place where you will find the only verified on-site physical evidence remaining from the Lewis
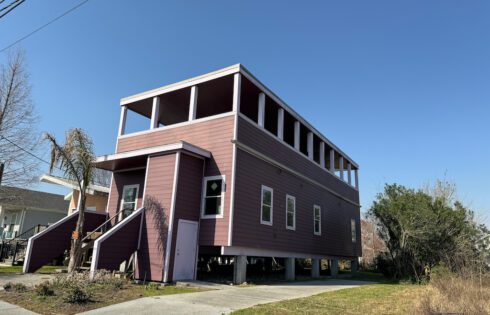
On August 29, 2005, Hurricane Katrina made landfall just east of New Orleans and became one of the deadliest hurricanes to ever hit the U.S. and the costliest natural disaster
