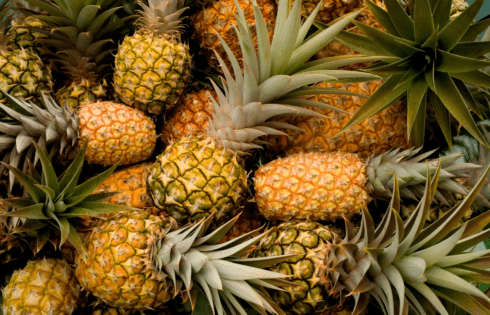
How to (Legally) Bring Pineapples From Hawaii to the Mainland [2022]
Undoubtedly when you get back from Hawaii and arrive on the mainland you’ll have cravings for some of those juicy golden pineapples from Hawaii. But can you bring pineapples from
Undoubtedly when you get back from Hawaii and arrive on the mainland you’ll have cravings for some of those juicy golden pineapples from Hawaii. But can you bring pineapples from
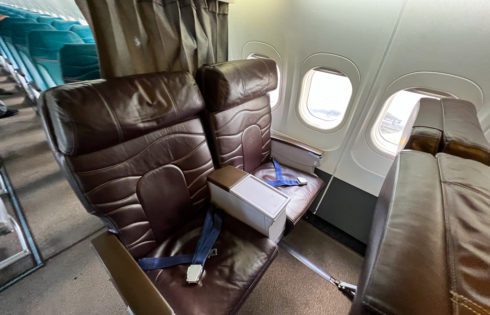
If you’re flying between Hawaiian islands you might be tempted by the Hawaiian Airlines first class experience. Could it actually be worth it to fly first class on such a

In this article, I’ll go over both the Premier Club and Plumeria Lounge found at HNL and show you what each lounge has to offer when flying Hawaiian Airlines. You
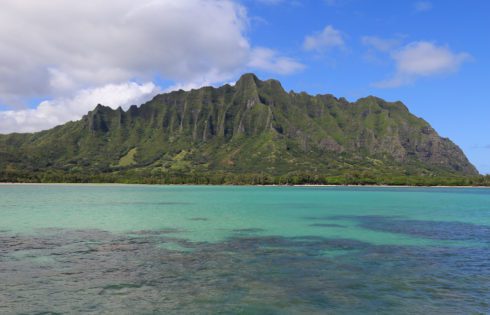
It’s always nice when you can combine stunning scenic views with enriching experiences where you learn about the history and culture of a location. The Kualoa Ranch Fishpond Ocean Voyage
Are you thinking about flying first class from Phoenix to Hawaii? You’ve got a few options to choose from but if you end up going with the American Airlines A321
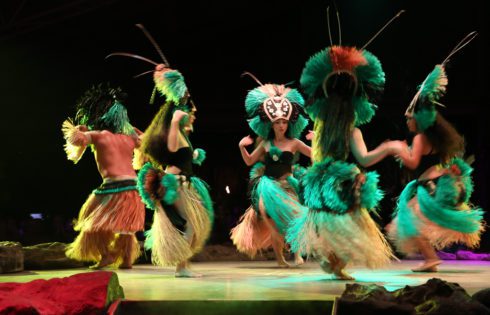
If you’re visiting the Hawaiian island of Kauai and looking for one of the best luaus then make sure you consider Luau Kalamaku. Attending this luau was one of the

I was really looking forward to our stay at the Marriott’s Kaua’i Beach Club, located on the south part of the island of Kauai. It had everything I thought you
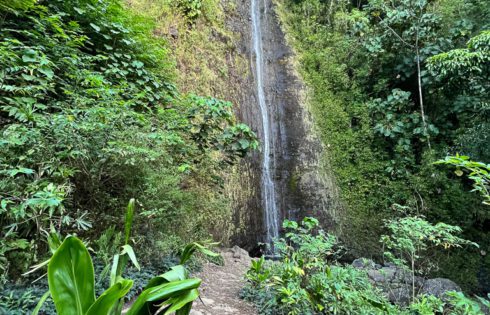
Manoa Falls Trail is one of the most popular and beautiful trails in Oahu, Hawaii. But is the trail worth it and what can you expect? Below, I’ll give you
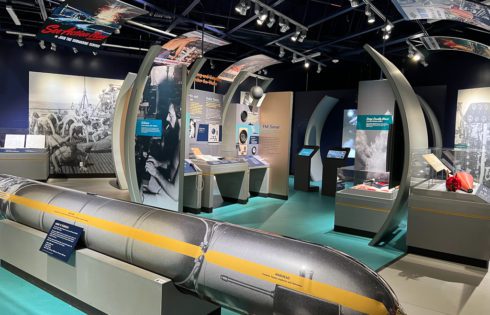
The Pacific Fleet Submarine Museum is one of the main attractions at Pearl Harbor in Hawaii that will give you insight into the role that the “silent service” of submarines
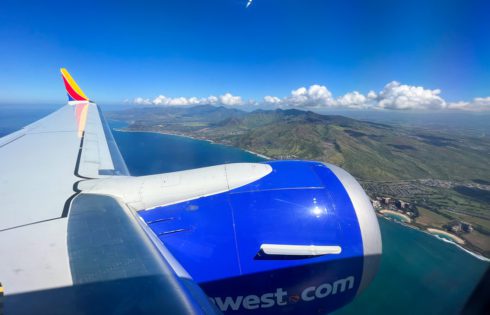
Are you thinking about flying Southwest between Hawaiian islands (inter-island)? Do you know what to expect when it comes to the flying experience, boarding, carry-on rules, and ticket prices? In
