
Getting a tourist visa for Brazil from the Houston Consulate was one of the easiest things I’ve ever done in my life. We probably got a little bit lucky, but we were able to get our tourists visas for Brazil in less than 24 hours without doing any kind of expedited effort. Here’s a review of how we got our visas and some tips to help you along the way.
Disclaimer: This article does not constitute legal and/or immigration advice of any kind. If you have any questions please contact a professional immigration attorney or other other professional. Also, if you are applying for a tourist visa in another city many of these steps may not be applicable to you as different jurisdictions have different requirements.
Filling out the application
First, if you are looking for information on getting a visa from Brazil then check this out. That link will tell you almost everything you need to know and is a great starting point for wrapping your head around the requirements you’ll need to fulfill.
The application must be filled out online at this link. For English click on the Union Jack (UK flag) and then select “VISA SELECT.”
From that point, you’re in the application and just need to fill everything out. Remember, leave a space blank if it doesn’t apply (e.g., “previous name”). There’s not a whole lot to fill out for the application and the hardest part will probably be the contact information in Brazil. For most tourists, you’ll just put your hotel but you’ll need to go dig-up the address, phone number, and email. (The state is RJ if you’re staying in Rio De Janeiro, in case you couldn’t guess that.)
After you fill out your application hit submit and it should give you your application ID. If you don’t get that application ID you may have to just re-apply (that’s what Brad had to do).
Uploading documents
After you hit submit, you’ll be prompted to upload documents. (If you hit cancel, you can always upload the documents later or just not upload any documents and bring them into your appointment.)

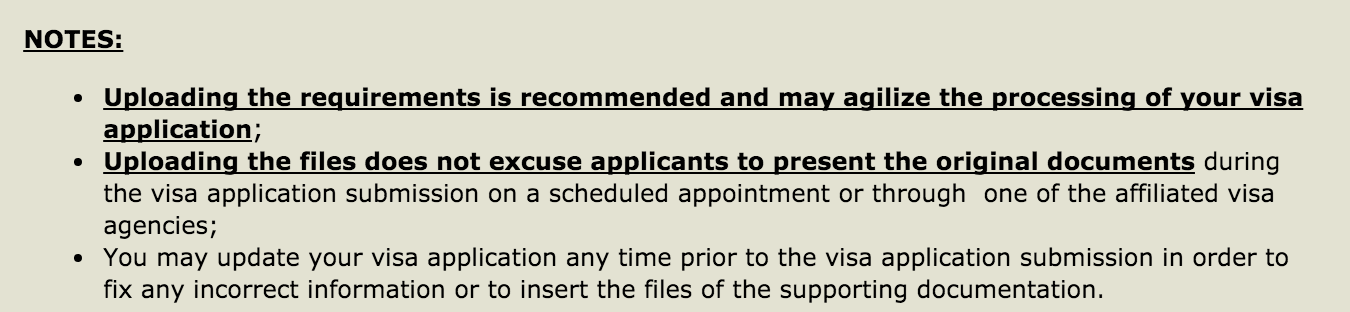
The documents you’ll probably be uploading are itinerary, signature, passport, and photo. There are some special requirements for uploading the documents so pay close attention to those requirement. To upload a photo I would have had to cut my passport photo and since I only had one photo on me I decided not to upload any documents. Remember, even if you upload your documents you still must bring all of them in with you to the appointment.
Note: The website states that it will “agilize” your application by uploading the documents. I didn’t know what that meant, but it’s apparently Portuguese for “streamline.” Still, I got my visa within 45 minutes of my scheduled appointment so I doubt it could have been streamlined that much, anyway.
Anyway, if you just hit cancel then your next step is to print out your visa form delivery receipt. This is one of the documents that you have to bring with you to your appointment, so don’t forget about it!

Schedule an appointment
Your next step is to schedule an appointment. This is easy to do and just requires you to follow basic directions and go to the appointment booking website. We found morning availability for the next day when we searched and there were plenty of open slots for the coming week so you should have a pretty easy time booking an appointment if you’re even just a little bit flexible.
You can schedule up to two appointments for one slot and the other applicant doesn’t need to be there (just bring a copy of their ID). You can schedule appointments for more than one additional person but those additional appointments will have to be booked separately and in groups of two. If you need to book appointments for seven or more people then you have to meet special group application requirements.
The appointment

The building for the consulate is located directly off of 610 if you’re going north on the westside of Houston. It’s pretty hard to miss and you can actually pull into their little driveway and go right into the visiting center parking (it’s free, thankfully).

Once you park, go inside and sign in with the front desk. You then need to go up to the 11th floor and you’ll head directly to your right where the visa signs to go. There’s like fifteen chairs and you just take a seat. You don’t sign in up there and the workers will just call your name when they are ready.
Tip: They only called names one time and didn’t shout the names too loudly when I was there and a few people seemed to miss their name being called. Thus, I’d sit as close to the front as possible.
For a tourist visa you will likely need at least the following documents.
- Passport
- Print out of delivery receipt form
- Print out Itinerary (plane tickets)
- Copy of ID for additional applicants
- USPS (United States Postal Service) Money Order (Make sure this is a money order from the USPS, as this is one requirement they seemed very strict about!)
They called my name about 20 minutes after my scheduled appointment. This appointment lasted just a few seconds and the only issue for me was that I didn’t have a print out of my itinerary or a copy of Brad’s ID. Luckily, she accepted the itinerary that showed up on my Aadvantage App on my iPhone and let me get by with a photo Brad sent of his ID from his phone. It was kind of funny how easy it was satisfy the requirements but I was very thankful that it didn’t become too difficult.
There’s a cafe on floor 7 of the building and the workers encourage you to go down there for about 30 minutes while you wait for your visa to be processed. I didn’t check out the cafe so I’m not sure what all was down there but a lot of people seemed to be interested in it.
Anyway, about 45 minutes after my appointment, they called me to the front to verify the details on the visas and just like that I had two tourist visas for Brazil in under 24 hours! It’s awesome how quickly you can get them and I even met a guy on the elevator who was leaving for Brazil the next day and just getting his visa!
I’ve applied for a few visas but so far the tourist visa for Brazil has been of the easiest for me to apply for. Just follow the directions online and you should have no problems getting approved for your visa, potentially in as quickly as 24 hours as we did!
Daniel Gillaspia is the Founder of UponArriving.com and the credit card app, WalletFlo. He is a former attorney turned travel expert covering destinations along with TSA, airline, and hotel policies. Since 2014, his content has been featured in publications such as National Geographic, Smithsonian Magazine, and CNBC. Read my bio.
