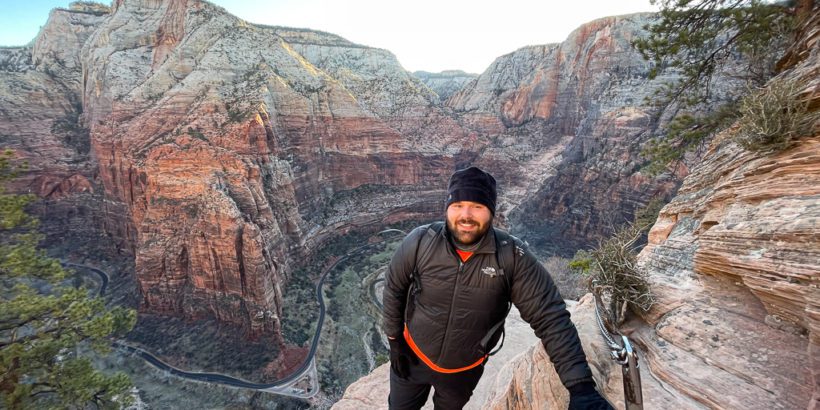
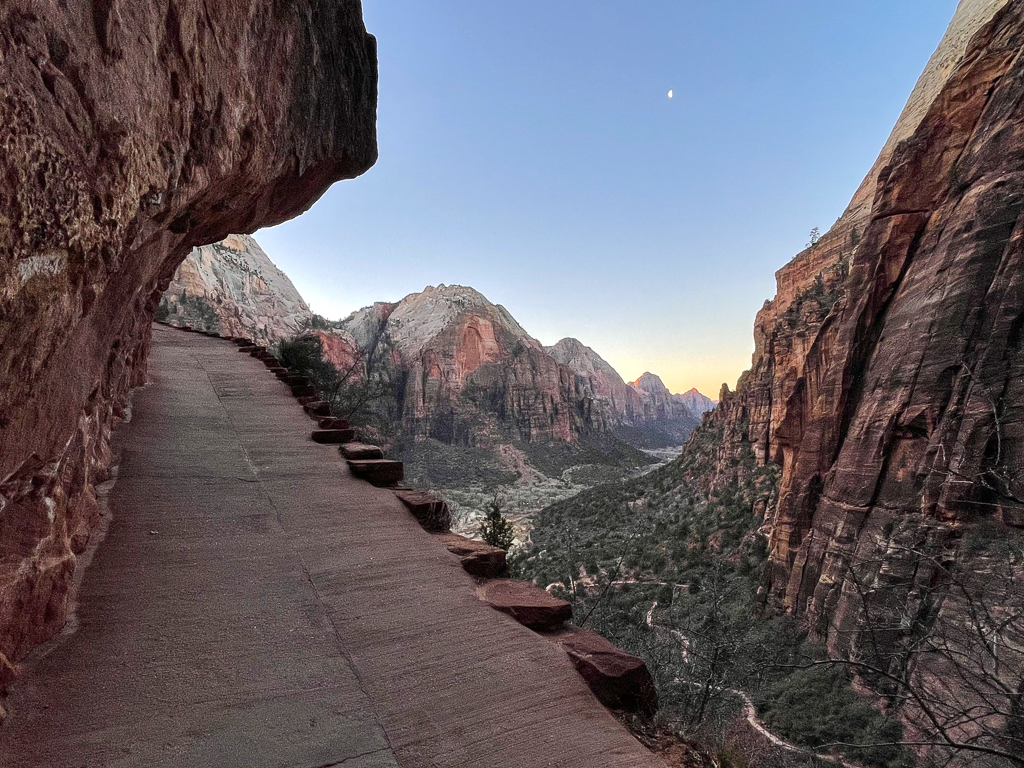
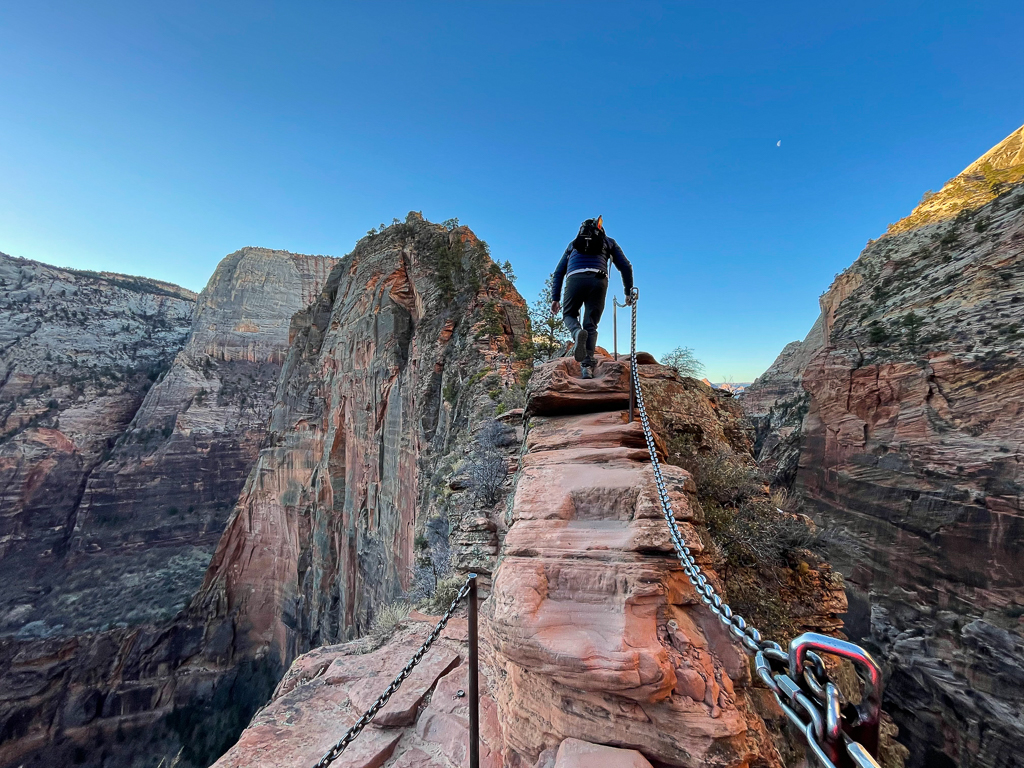
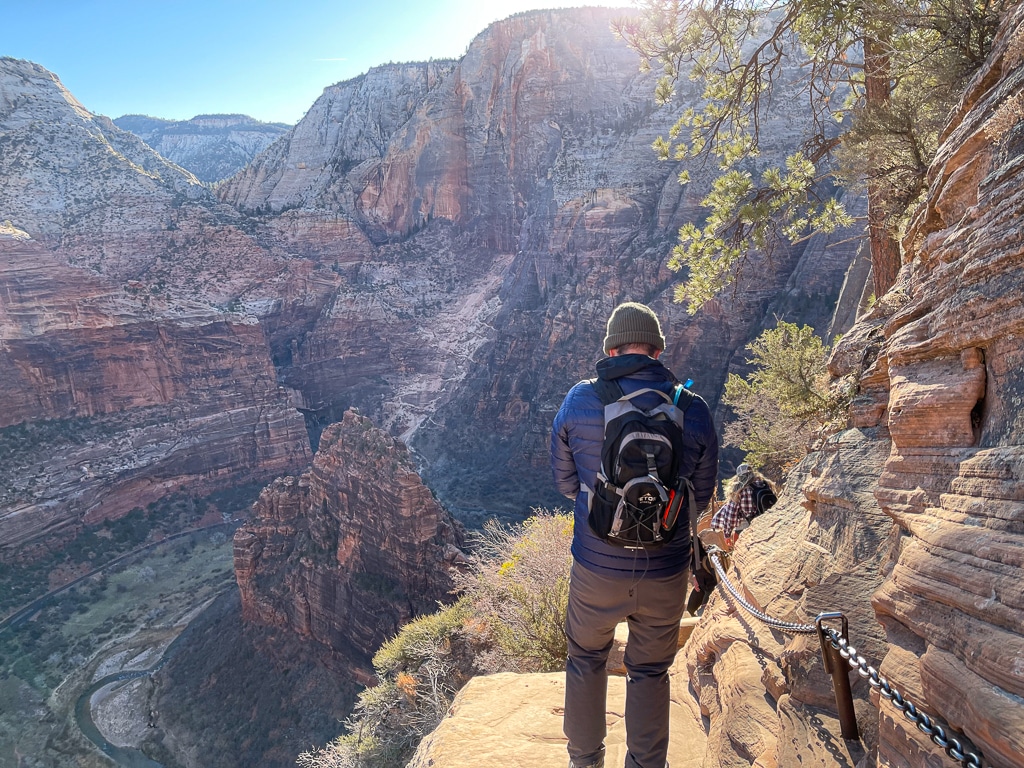
Angels Landing at Zion National Park in Utah is one of the most popular hiking trails in the world. People come from all over the globe to experience the thrill of hiking along the narrow spine of a mountain 1,500 feet above the stunning valley floor.
But Angels Landing is not a hike that you should take lightly, especially if you are not an experienced hiker. I recently completed the hike and wanted to share a lot of my tips that I believe will make your trip a lot easier and safer.
Table of Contents
Train
To successfully complete and enjoy (keyword enjoy) Angels Landing, the number one thing you need is confidence.
Your confidence can be gained in many ways but one of the best ways to improve it is to do a little bit of training so that you are physically prepared for this hike.
Consider this: it’s one thing to be a little bit nervous about heights and quite another to be a little bit nervous about heights and physically exhausted with shaky knees and arms while atop a cliff with 1,500 foot drop offs on either side, the wind swirling, your heart pounding, etc.
So it’s a good idea to work on your strength before you attempt this hike. No, you don’t have to train like you are preparing for the Olympic Games but you should have some baseline level of strength and endurance.
I would recommend beginning the exercises below at least six weeks prior to your visit but it is even better if you can start them earlier. If you only have a couple of weeks, hey, that’s still better than nothing.
Lunges
Lunges are a terrific exercise for hikers as they help build strength and control in your legs (quads, glutes, and hamstrings). They also help you stabilize as you head downhill on steep terrain which you will be doing on this hike on the way down.
Stairs or step ups
You also want to work your legs so that they don’t get exhausted from the hike up to the chains. You are going to have to deal with a relatively steep trail and a good deal of switchbacks so working your legs with stairs, a stairmaster, or step ups will really help. Maybe throw in some calve raises as well.
Rows
At several points along the chains, you will need to pull yourself up using the chains or rocks/vegetation. I would suggest that you work on your upper body by doing rows so that your back and arms build up some strength and endurance. You can buy a cheap package of cables off Amazon and do rows at home to hit your back and arms.
Balance
The next thing you want to work on is your balance.
Once you are looking down at a 1,500 foot drop inches away from your feet, your mind can play funny tricks on your balance. But if you have been actively working on strengthening your balance, you can resist this better.
There are a lot of different things that you can do. I would look into doing core exercises because the strength of your core dictates your balance to a large degree. You can also buy something like a balance disc and do balancing exercises on one of those a couple of times a week.
Stretching/yoga
Some parts of the route will require you to take some large strides or steps and if you have been stretching your legs and upper body, these sections will be much easier.
Tip: Use the free app WalletFlo to help you travel the world for free by finding the best travel credit cards and promotions!
Plan
The first thing to think about is what time of year do you want to visit?
If you are visiting March through October, chances are the road that leads to the trailhead will be shut down to passenger traffic and you will have to take a shuttle. This means that you may not be able to start the hike as early as you want and will have to depend on the shuttle buses.
That’s not a horrible thing but it does mean that you will be getting a later start which will typically mean more crowds to deal with. The good news is that the lighting is much better in the canyon later on in the morning so if you want great photographs, that is one of the best times to go.
Doing Angels Landing in the late fall or early spring can be ideal because you don’t have to worry about the shuttle buses and the weather will be more mild with less of a chance of ice or snow.
If you are visiting at a time when you can access the road with your own vehicle, you will need to arrive very early if you plan on getting a parking spot. (We arrived about 40 minutes prior to sunset and almost every spot was already taken.)
Zion can have some pretty beautiful days in the winter and you won’t necessarily run into ice or snow throughout the winter months. However, the odds of having to deal with those elements do increase and those can present some major obstacles and dangers to the hike.
I would not attempt Angels Landing when ice or snow is present unless you have experience hiking in those conditions and the proper equipment.
Related: SpringHill Suites Springdale/Zion National Park Review
Get some experience
This won’t be practical for everybody but I would highly recommend to get some level of experience with hiking on exposed ledges or cliffs before doing this hike.
If you are going to be in the park for a day or two before your planned Angels Landing hike, you can do an easy hike like the Zion overlook trail and just focus on gaining confidence as you hike near the drop offs.
Get the right gear
You don’t need a lot of gear for this hike but you do need some essentials.
Good hiking boots
You will feel so much better if you have a good pair of hiking boots with nice tread on the bottom.
Most of Angels Landing consists of hiking on slick rock which is not ideal for tennis shoes or other worn shoes/boots.
But if you have a solid pair of hiking boots with good tread, you can stick to the rock with no issue in most cases. And trust me, you will be very thankful for that grip when you are hiking along the exposed sides. Keen hiking boots are known for having great grip. We also really like Salomon boots for their great traction.

Gloves
In my opinion, gloves are absolutely essential if you are doing this hike in cold weather.
Between the temperature, the wind chill, and the ice cold chains you will be grabbing, you may find your hands becoming useless and even numb pretty quick. Try to get a pair of snug fitting gloves that will allow you to grip the chains well.
You might also bring some handwarmers with you and stuff those in your jacket pockets well.
If you are doing the hike in warmer weather, you can look into climbing gloves, perhaps some that have open fingers for better ventilation.
(Gloves are also a good idea because you can scrape your knuckles up easily on some sections.)
Weather protection
If the sun is going to be out then you will also want some level of some protection which would include some type of hat, sunglasses, and sunscreen.
If it is cold outside then a beanie and possibly gaitor or facemask will be helpful to keep your head and face warm. I also really enjoyed having my Patagonia puffer jacket which helped break up the wind that was gusting pretty bad during our climb.

Small backpack
Because of the narrow passages, you don’t want to carry a huge backpack around with you on the hike. For one, it will make it more difficult to pass other hikers. And if you have a big heavy backpack, it can mess with your balance which is something you absolutely do not want on this hike.
You will be much better off with a smaller Camelback or similar pack. Camelbacks are great on this hike because you can sip your water hands-free while your hands remain on the chains. I really love my TETON Sports backpack and it worked out great on Angels Landing.
Water
If you are attempting Angels Landing in the summer and especially during the middle of the day, you’ll want to have plenty of water. Once again this is why a Camelback backpack would be ideal.
If you are doing this when temperatures are cooler, you don’t need a ton of water. This is basically a 5 mile round trip hike with about 1,600 feet in elevation gain so your water supply does not have to be crazy.
Trekking poles?
Some people bring trekking poles on Angels Landing but I don’t think they are necessary. They might be of some use when hiking up the switchbacks to Scout Overlook but once you are on the chain section they are pretty much useless.
Depending on the type of poles that you have, they could also get in the way if you need to stuff them in your backpack so I did not bring mine. (The exception would be if you are hiking when there is ice or snow present.)
Move strategically
Pacing and patience
You should begin pacing yourself from the very beginning of the hike.
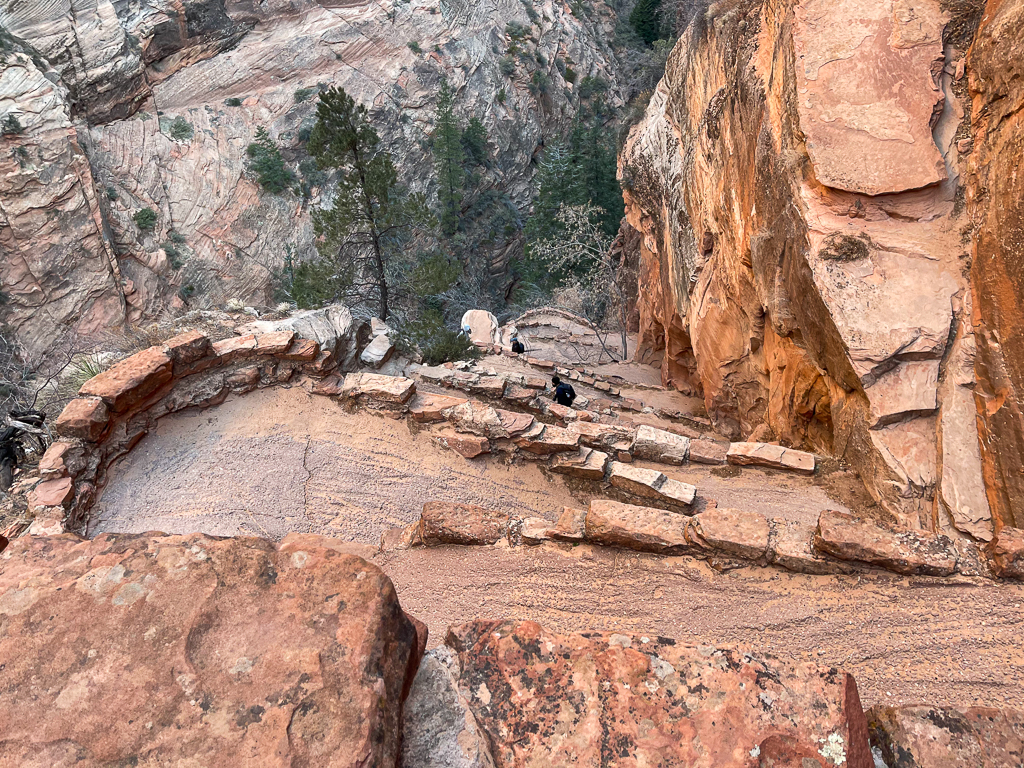
If you try to push through all of the switchbacks too quickly, you might be a bit gassed by the time you arrive to the chains. You could always hang out at the Scout Overlook and regain some energy but it would be much better if you just paced yourself from the beginning and enjoyed the views as you gain in elevation.
And once you are on the chain section, pacing and patience is even more important. If there are a lot of crowds then you will have to move at a slower pace than you would like. This could be incredibly frustrating but just try to enjoy the views while you wait because this is not the place to rush.
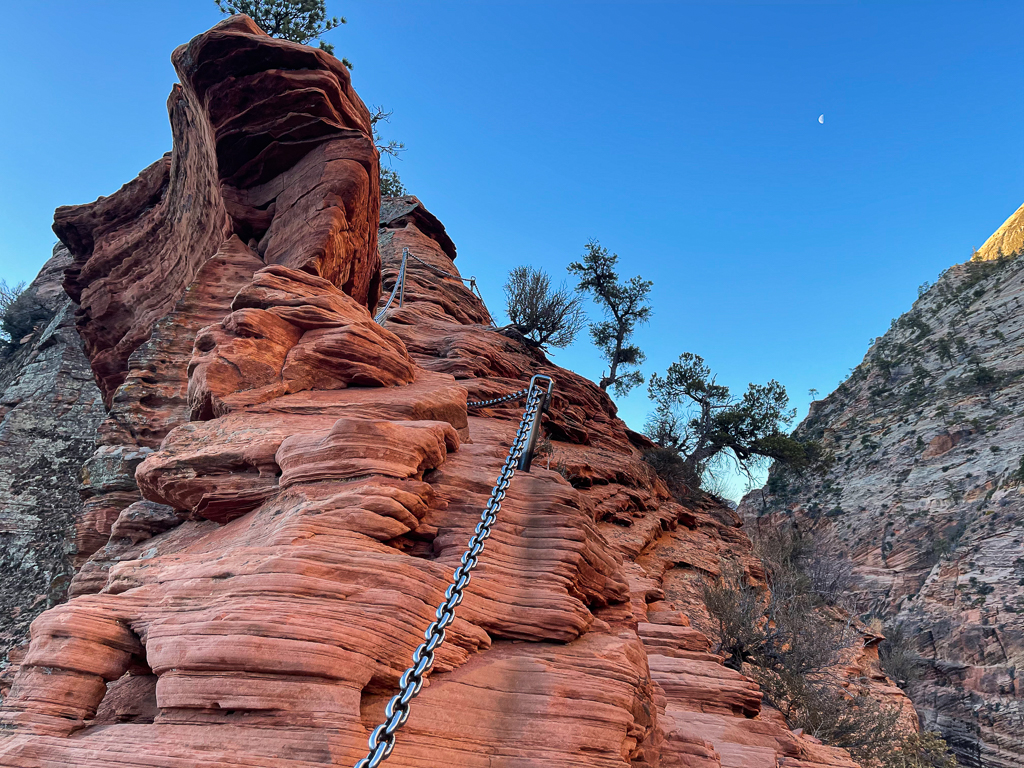
Don’t shake the chains
The chains are hoisted up by posts that are securely inserted into the rock. As a courtesy to other hikers, you should wait until the hiker in front of you is past the chain section in front of you before you grab hold of those chains.
If you grab the same section that they are gripping, you could shake them which can make the hike a lot more dangerous.
Follow other hikers/groups
With the above tip in mind, one great way to do this hike is to simply follow right behind another group. Have you ever seen those little fish that suction onto larger sharks for a free ride? That’s basically what you want to do on Angels Landing.
Most of the time if a group is moving through the chains at Angels Landing, others will stop and allow the entire group to go through.
So what you can do is tagalong to the end of the group and essentially blend in as if you were a part of the group. Unless every member of that group is wearing matching attire this should be very easy to do. This will save you a lot of time and remove the mental effort required for determining whether you need to stop or go.
Allow others to pass
At the same time, if you are moving a bit slower than others then you want to make it easier for them to pass you. You will find a number of different areas that you can step aside on and allow others to pass through.
Anytime you are taking a break, be sure to glance behind or in front of you to see who is coming so that you can decide if you would like to wait for them to pass first before jumping back on the trail.
Focus on your feet
When you hit the chain section, your biggest focus should be on where your feet are going and where your hands are. I would try to keep one hand on the chains at all times and then just focus on each step that you take.
This is the type of hike where you really want to be present in the moment (not just for your enjoyment but also for your safety). Try not to get caught up looking ahead at the path to come because it typically looks a lot worse than it is.
Get on your butt
On the way back down, things are going to be a little bit trickier. I found it easy on a few occasions to just get down on my butt and sort of scramble down a few portions. Others were taking this approach as well.
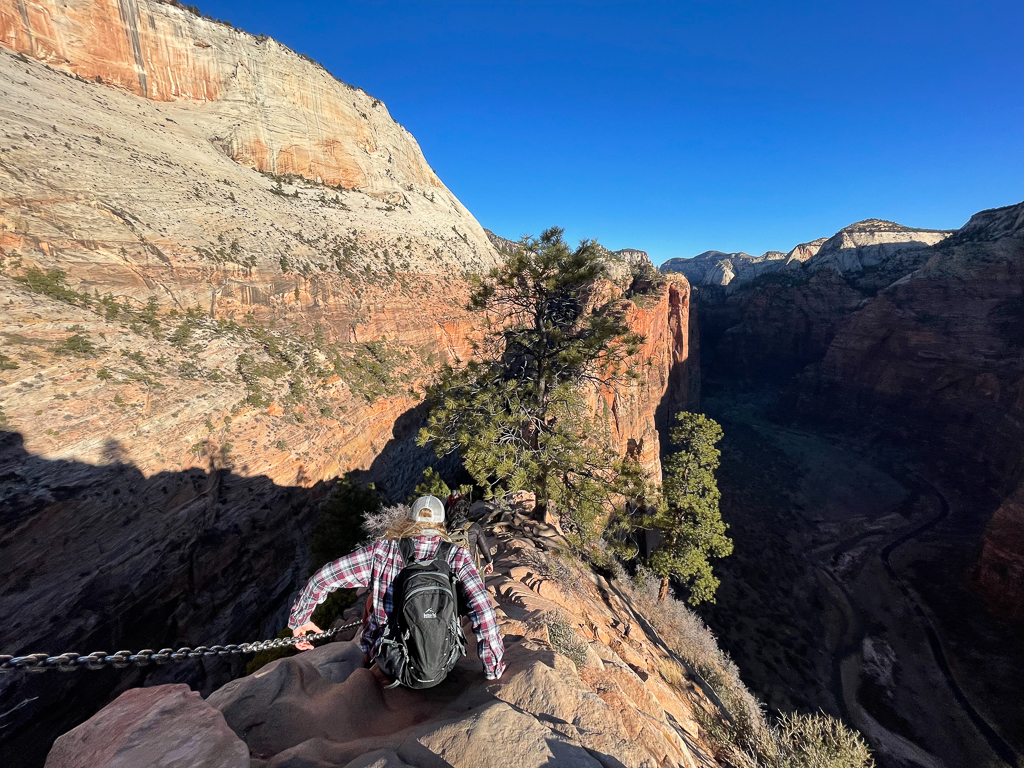
My rule for safe photos
I blog for a living on UponArriving and also run a national parks blog where I do a lot of hiking reviews. After doing tons of hikes and facing a lot of exposure along cliffs in places like the Grand Canyon I developed a rule for photographs.
I plant my feet in a safe spot and then give myself permission to take the photos or video I want to but my feet are not allowed to move until I put the camera back down and focus on them.
This is the ultimate way to ensure that you don’t ever forget where you are and accidentally step off a cliff.
An even safer step to take is to simply just sit down before taking photos or video.
Be okay with turning around
It is always 100% okay to turn around if you are not feeling a hike but at Angels Landing, it is even more true.
Heights can be a tricky thing because some people can push through it while others can get hit with paralyzing fear. It’s not always apparent how you will react and you do not want to be stuck up on a ledge having a panic attack.
Here is my advice when deciding on what to do:
If you know that you have a crippling fear of heights then the chains portion of the hike is just not for you. Consider just going to the Scout Overlook and enjoying the views up there because even making it to that point is an accomplishment and the views are spectacular.
If you are sort of on the fence about your capabilities of doing this hike, I would recommend venturing out on the chains through the first couple of sections and just seeing how you feel.
- If you can feel the fear of heights going away as you make progress than you are probably going to really enjoy the rest of the hike and will settle in to your comfort zone at some point. This is what happened to me once I arrived at the summit.
- If you can feel your fear of heights stabilizing but not going away you probably will still be good to complete the hike to the summit but you will just need to focus a little bit more on your feet, hands, etc. Focus on taking the hike one step at a time and don’t worry about what lies ahead.
- If you feel the fear building up as you progress, you need to be very cautious. This is a sign that this hike may not be for you and you may want to turn around before it gets too real for you.
If you fall into one of the two last groups then one huge tip I have is to do the hike with someone that you trust. If you are hiking along with someone who can give you some assurance and encouragement along the way it may be able to help you push through the fear.
And also practically speaking, you can literally follow in their footsteps and know where to put your feet and hands as you make your way to the top.
Watch YouTube videos
The final tip I have is to watch YouTube videos. There are now tons of them available and they can give you an idea of what to expect. Just know that people love to film their hikes with wide-angle lenses which can make the hike look a lot worse than it is. It is still pretty intimidating and dangerous at times but it is not quite as crazy as it might look on these videos.
Final word
Hiking Angels Landing is not something to take lightly. But if you start preparing for the hike, get yourself into reasonable shape, and come prepared with the gear you need, the hike is very doable.
Daniel Gillaspia is the Founder of UponArriving.com and the credit card app, WalletFlo. He is a former attorney turned travel expert covering destinations along with TSA, airline, and hotel policies. Since 2014, his content has been featured in publications such as National Geographic, Smithsonian Magazine, and CNBC. Read my bio.
