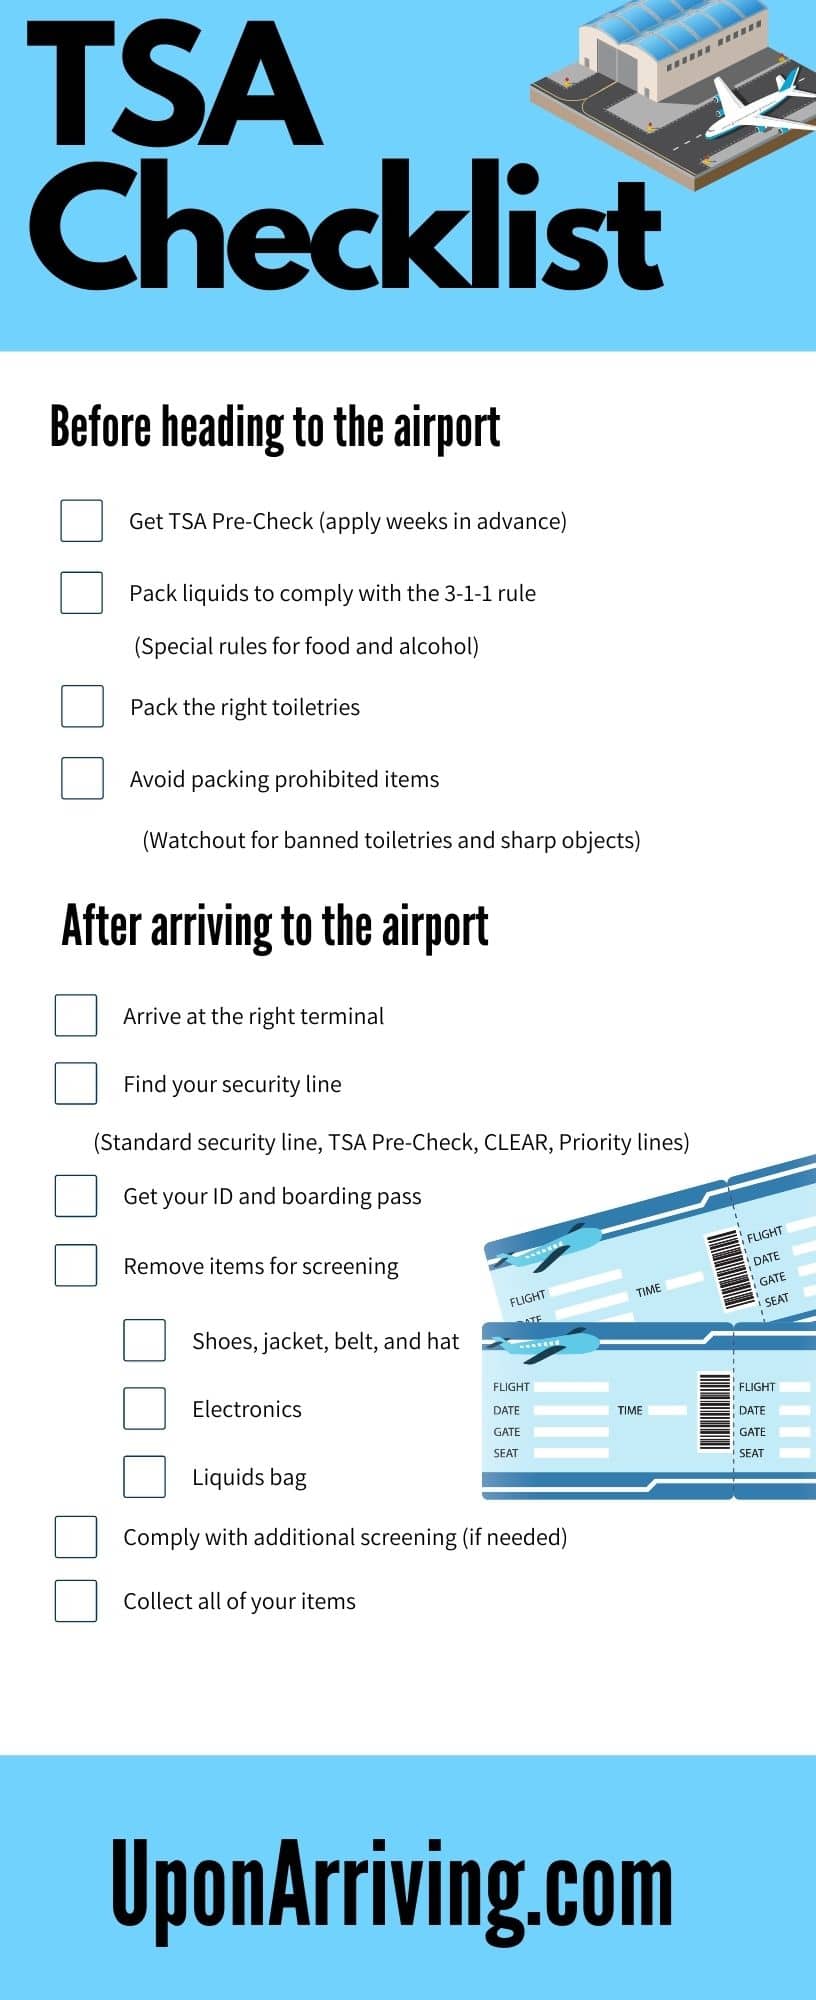
If you’re getting ready to head to the airport make sure that you know exactly what to expect when it comes to TSA.
There are quite a few tips that I have to make your experience less stressful and a lot smoother so be sure to check out the tips below and the helpful PDF checklist at the bottom of the article.
Table of Contents
Before you head to the airport
Before you ever head to the airport, there are a few tips that you should consider.
Tip: Use the free app WalletFlo to help you travel the world for free by finding the best travel credit cards and promotions!
TSA Pre-Check
TSA Pre-Check is one of my favorite travel benefits that I’ve ever used and at this point I’ve probably used it a couple of hundred times.
It allows you to bypass the main security line which speeds up the airport security process a great deal in many cases.
In addition, you can often avoid the invasive full body scanners and you get the following benefits:
- Shoes can stay on
- Belt can stay on
- Light jackets can stay on
- Laptops allowed to stay in bag
- Liquids (3-1-1 Rule) can stay in bag
The membership will cost you $85 for four years but you can often get it for free by choosing the right credit card.
You want to sign up at least a few weeks/months before your trip because you will have to attend an in-person appointment in order to register your biometrics.
Also, after you are approved you will need to add your Known Traveler Number (KTN) to your travel itineraries in order to receive the TSA Pre-Check benefits.
The best way to do this is to add your KTN to your frequent flyer profile. That will allow your KTN to be added to your itineraries automatically although sometimes you might have to verify that.
Packing your liquids
How to bring liquids through airport security is one of the most commonly asked TSA questions.
If you were planning on bringing liquids on a plane, you will be subject to the 3-1-1 rule. This rule means that your liquids must be contained within a container no larger than 3.4 fluid ounces (or 100 mL). You can fit as many containers as can comfortably fit within a quart size Ziploc bag.
The rule is straightforward but there are a few things that trip people up.
The rule goes by the size of the container and not how much fluid is inside the container.
For example, if you have a 5 ounce container with only 2 ounces of liquid, that container is still not allowed because the size of the container is larger than 3.4 ounces.
An exception to this is that TSA is currently allowing one oversized liquid hand sanitizer container, up to 12 ounces per passenger, in carry-on bags.
Another thing that trips people up is what is considered a liquid?
Some liquids are obvious like water but TSA also considers other substances to be liquids such as gels, creams, pastes, etc. You can read more about these here.
Another issue is with food.
Certain foods will be considered liquids while many other foods are allowed to be brought through airport security. To find out more about bringing food through airport security click here.
If you are planning on bringing alcohol there are also very special rules that you should be aware of. Contrary to what many people think, you actually are allowed to bring your own alcohol on a plane even in liquid bottles.
You just need to be aware of the alcohol content of the beverage and pay special attention to the restrictions for the different types of alcohol.
Pack the right toiletries
If you are taking your toiletries through airport security then you need to be extra careful that all of your toiletries are TSA compliant.
Some of the most commonly asked about toiletries include the following:
The biggest issue is typically that some toiletries violate the liquids rule so as long as you focus on complying with the liquids rule, you’ll usually be good for all of your toiletries.
Prohibited items
You always want to make sure that you are not bringing prohibited items through airport security. And that is not just because you will have to throw them out but some prohibited items can get you into some serious legal trouble.
Sharp items
One of the biggest mistakes some people make is bringing prohibited sharp items which include things like knives, certain types of scissors, and other items.
Some items are allowed like tweezers, small scissors, certain razors, etc. So it’s really important to understand the rules regarding sharp objects.
Explosives
Explosives are obviously banned from getting through airport security but some people forget this when it comes to items like small fireworks or other explosive type devices such as flares.
Firearms
If you’re traveling with a firearm then you need to keep these in your checked baggage and you also need to comply with the rules for transporting a firearm which include transporting it in a hard sided case that can be secured.
You can read more about traveling with a firearm here.
Medication
If you need to pack medication, the good news is that TSA is actually pretty lenient when it comes to allowing medication.
They allow exceptions to the liquids rule so that you can bring in liquid medications larger than 3.4 ounces and they don’t even require you to have a prescription (although state laws may require that).
Read more about the TSA medication guidelines here.
Coronavirus update
If you are traveling while pandemic conditions are occurring, you’ll want to make sure that you have the following items accounted for:
Masks
Most airlines will require you to wear a mask when flying and even when in the boarding area. Some airports might even require you to wear a mask when in the airport so be sure to have one handy.
Social distancing
While waiting in line, you will likely have to social distance so be sure to keep several feet between you and other travelers.
Read more about other TSA coronavirus measures here.
Once you’re at the airport
After you have knowledgeably packed your carry-on item, you are through with the hardest part of complying with TSA rules. But you still need to be mindful about a few things.
Arrive at the right terminal
You need to make sure you arrive at the right terminal so that you go through the proper security line.
In some cases, some airports will not allow you to go through security if you are attempting to go through a terminal that is not the terminal you are flying out of.
If you are trying to visit a particular lounge, such as a Centurion Lounge, you might want to enter a terminal that is not the terminal you will be flying out of.
TSA agents may allow you to do this but be prepared just in case you are not allowed to do this.
Also, you might be forced to re-enter through security when leaving the lounge terminal which is something I would only recommend to attempt if you are knowledgeable about the airport layout and waiting times.
Find your security line
Typically, when you arrive at the airport there will be up to four different options for you to go through security.
Standard security line
There is the standard security line which is open to all of the public. This will typically be the longest line and will sometimes be a very long and winding place that you will have to wait in.
Related: Does TSA Check For Arrest Warrants?
Tip: Sometimes a terminal may have multiple security lines such as a north and south line. So always look around to see if there is a shorter alternative if you are faced with a very long line.
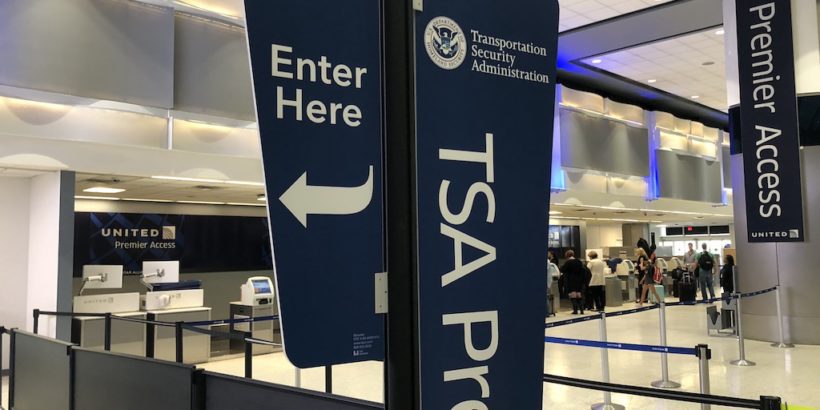
TSA Pre-Check
If you have TSA Pre-Check then you need to look for the TSA Pre-Check line.
Sometimes the line can be a little bit hidden or pushed away to the side so look for the signs and if you don’t find one, simply ask an airport agent.
Just remember that some terminals do not have a TSA Pre-Check line and in other cases it may not be open during certain hours.
CLEAR
If you have CLEAR, look for the CLEAR line and enter that line based on whether or not you have TSA Pre-Check.
Airline priority lines
If you have elite status or if you are flying in a premium cabin such as business class, you may have access to the airline priority screening line. Even when I have this access I usually just choose to go through the TSA Pre-Check line.
Get your ID and boarding pass
In order to access a security line, you will likely need to show a government-issued ID and your boarding pass.
Make sure that you have an ID that is accepted (keep in mind the upcoming changes to the REAL ID Act).
Keep in mind that due to the coronavirus:
- TSA will accept expired driver’s licenses or state-issued ID a year after expiration.
- DHS has extended the REAL ID enforcement deadline to October 1, 2021.
You can pull up your boarding pass with your phone using a mobile app for the airline you are flying on but you can also hold a printed boarding pass.
Try to have those already in your hand as you enter the line so that you do not hold it up and can smoothly get through. If you forgot your ID or realized you just lost it read up on what to do here.
Remove items for screening
When you arrive at the security screening checkpoint, you will need to do the following in many cases:
- Remove your shoes, jacket, belt, and hat
- Remove your electronics such as laptops and bulky cameras
- Remove your liquids bag
The main exception here is if you have TSA Pre-Check.
In that case, your clothing items can stay on and you can also keep your electronics and liquid bag within your carry-on bag.
Depending on the size of your carry-on bag, you may or may not have to place it in a bin.
Comply with additional screening (if needed)
In some cases, you might have to deal with additional screening.
If you have brought certain items such as powders or special items related to disabilities, your objects might need to be screened by a TSA agent. This is typically a pretty painless process that only last a few seconds to a couple of minutes.
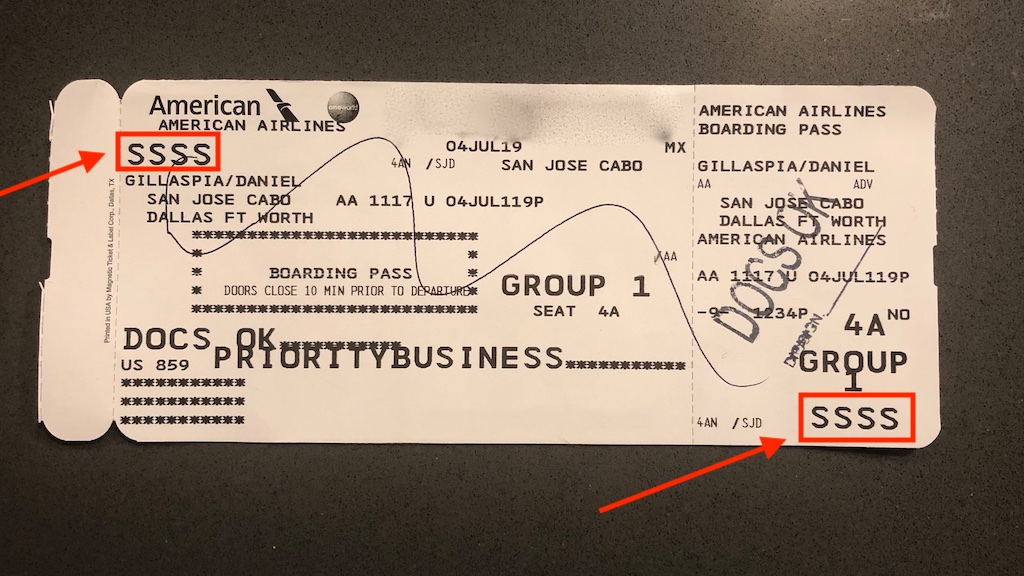
In rare cases, you might be subject to SSSS which is a secondary screening process. You will know that you are subject to the screening because you will see the letters on your boarding pass.
In some cases, this can require a lot of time so this is why you do not want to arrive late because it could take you 20 minutes to get through this process depending on how the agents go about your screening process.
If you are consistently subjected to additional screening and don’t believe it is justified, considered applying for a redress number which can take you off certain lists that require more screening.
Collect all of your items
Your final step is to make sure that you don’t forget to collect all of your items after you go through airport security.
After you have dropped all of your items in your bins and walked through the metal detectors, and perhaps received additional screening, it can be a little bit disorienting and you might forget to collect your items.
The easiest way to not forget certain items is to make sure that you placed them inside your carry-on before you push them through the x-ray scanner.
I always make sure to stuff my wallet, ID, boarding pass, watch, keys, and any other every day item into one of the compartments in my backpack so that I always know where to find them.
This is especially true if you are traveling during a hectic time with a lot of people because that is typically when items are lost or stolen. If you do end up losing an item, here are tips for dealing with the TSA lost and found.
Final word
Getting through airport security can be a bit stressful and even intimidating for some people. But if you follow the steps on this checklist, you will know exactly what to expect and be prepared for just about any situation that could arise.
Daniel Gillaspia is the Founder of UponArriving.com and the credit card app, WalletFlo. He is a former attorney turned travel expert covering destinations along with TSA, airline, and hotel policies. Since 2014, his content has been featured in publications such as National Geographic, Smithsonian Magazine, and CNBC. Read my bio.
